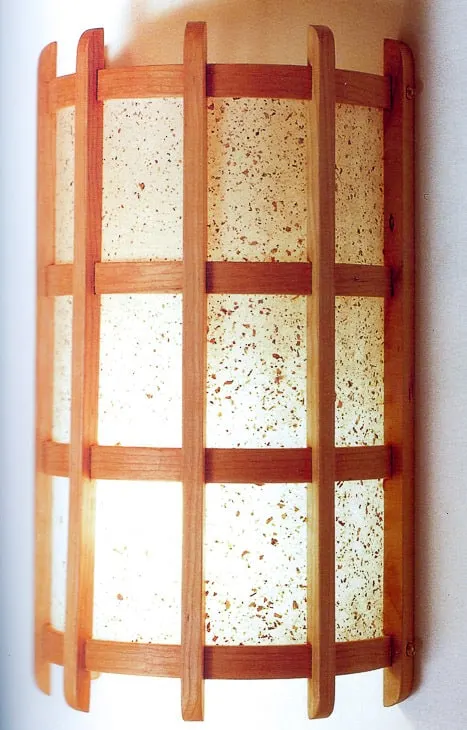
Get the look of a Japanese lantern without the hefty price tag! This DIY wooden wall sconce is a modern take that you can make yourself.


Whenever I visit my dad, I ask him to teach me more about woodworking. This Japanese-style DIY wall sconce was the perfect project to learn how to bend wood, cut notches on the table saw, and create sharp inside corners with chisels.
This post contains affiliate links for your convenience. Purchases made through these links may earn me a small commission at no additional cost to you. Please visit my disclosures page for more information.
The inspiration for this lighting fixture came from this beautiful book of Japanese-style lamps and lanterns. We changed up the design with less vertical slats and sharper corners.

Bend the wood slats
My dad created the curved pieces before I arrived. The process involved submerging thin pieces of cherry wood in water in the oven just below boiling for about 20 minutes.
Then the wood was placed in a bending jig he created out of pipe hanging strap bolted to steel bars.

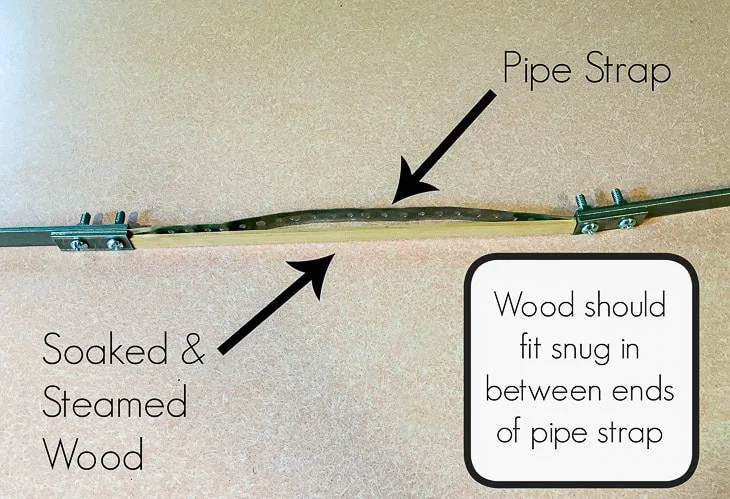
With the wood still soft and pliable, he was able to wrap it around the form (a large diameter PVC pipe). It was clamped into place and left overnight. The strap keeps the wood from splintering under pressure and the holes allow moisture to evaporate out of the wood.

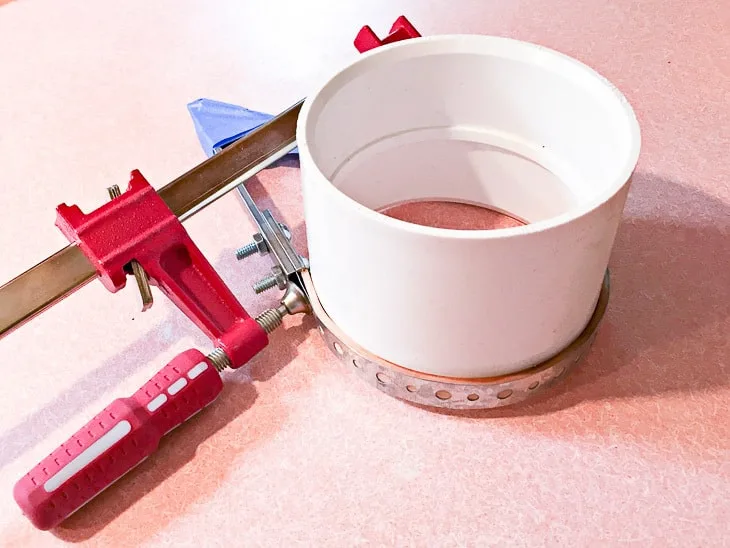
In the final version, the wood was left on the form for a full week to create perfectly identical curves that kept their shape. Parchment paper was sandwiched between the wood and the metal strap to avoid discoloration.
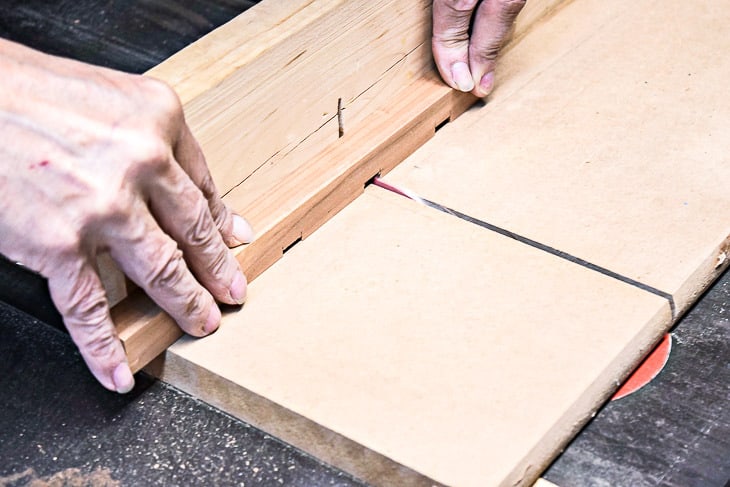
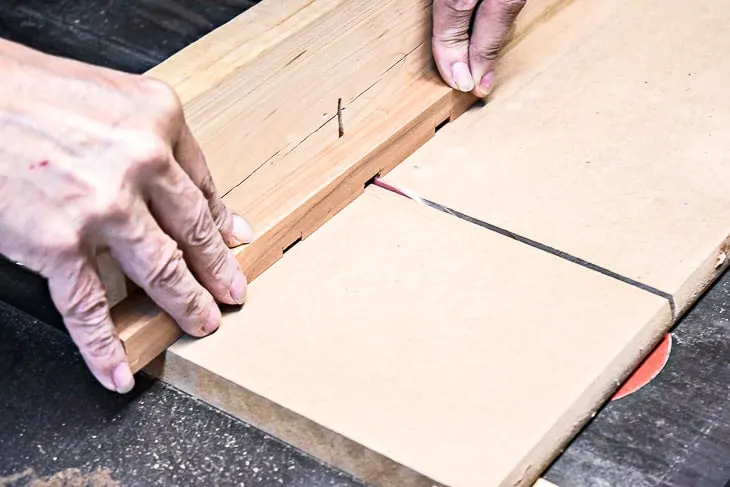
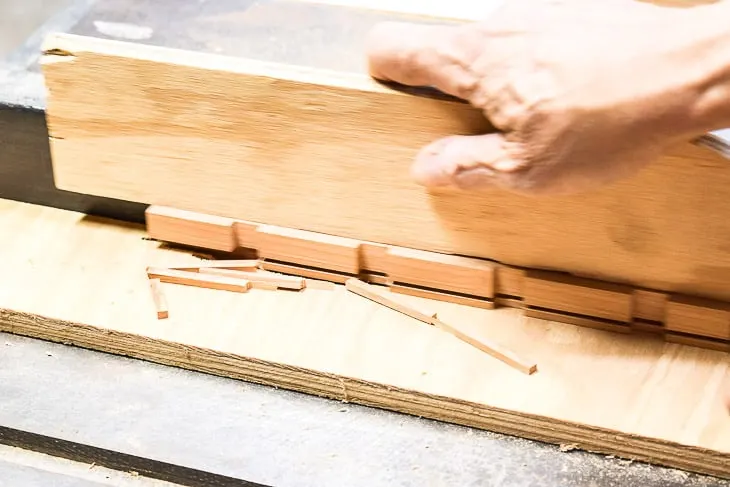
Cut the notches
With the curved pieces created, the next step was to notch out the vertical pieces that hold the curves in place.
He lined up all four pieces on his table saw sled, checking to make sure the ends were square. Cutting them all together ensures they are identical, using the markings on the first one as a guide.
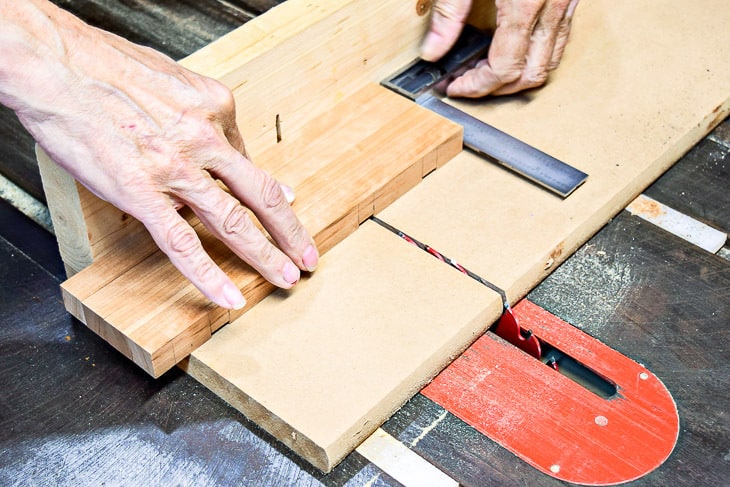

He finished cutting out the notches individually. By running the wood back and forth perpendicular to the table saw blade, over progressively higher points on the blade, he was able to get exactly the depth he needed.
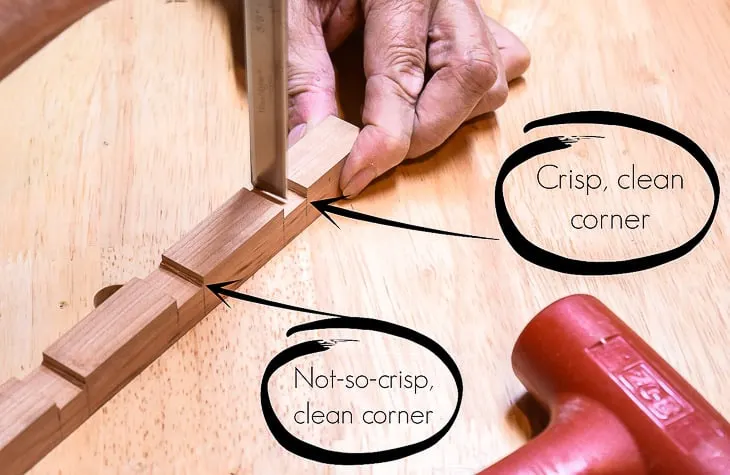
Next, he showed me how to get a crisp, clean corner in those grooves with his super-sharp chisels. Just a few whacks with a mallet dislodged the excess wood.

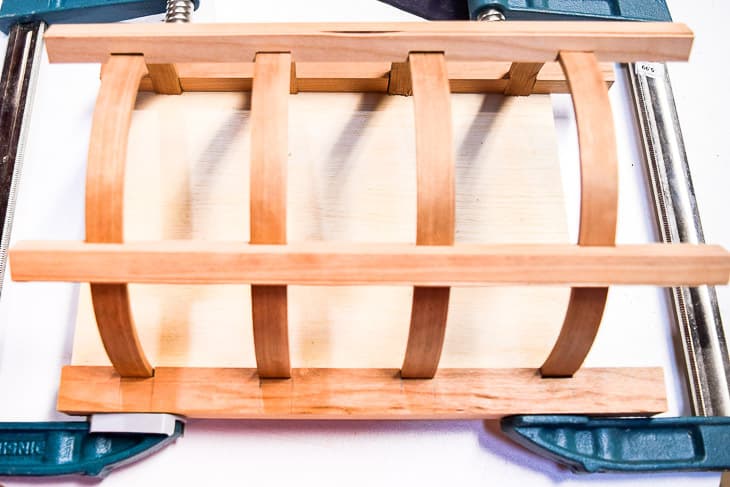
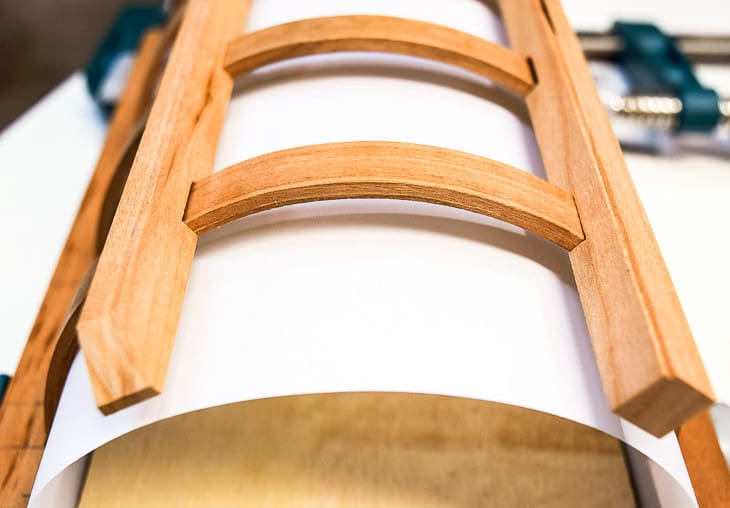
Fit the curved wood pieces into the grooves
Now the curved pieces lie flush inside the grooves. This is just a prototype, so they're not all a perfect fit. But you can see the wall sconce start to take shape.

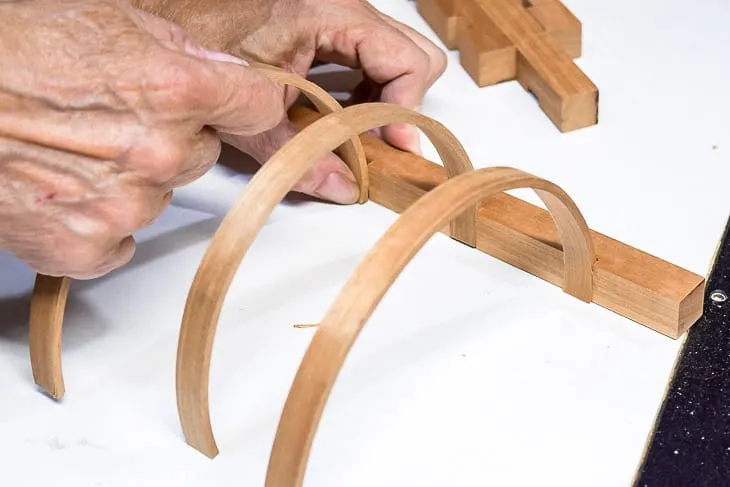
Because the curved pieces for the prototype only stayed on the form overnight, they sprung back a bit when they were released. It was my job was to trim them to the size of the smallest one to make them uniform.
My dad fired up the band saw, and I cut off the excess at his markings. There are no pictures of this step, because I wanted to keep all my fingers intact!
Cut the plywood backing
The wooden wall sconce has a plywood backing to hold the light socket and wooden pieces together. We cut a groove in two of the notched pieces to accommodate the plywood panel with the table saw.

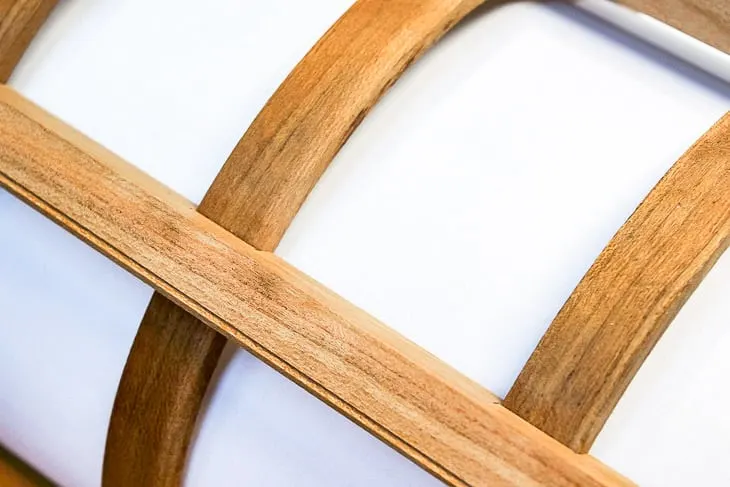
Here you can see how the wall sconce will all fit together when it's finished. Not too shabby for a prototype!

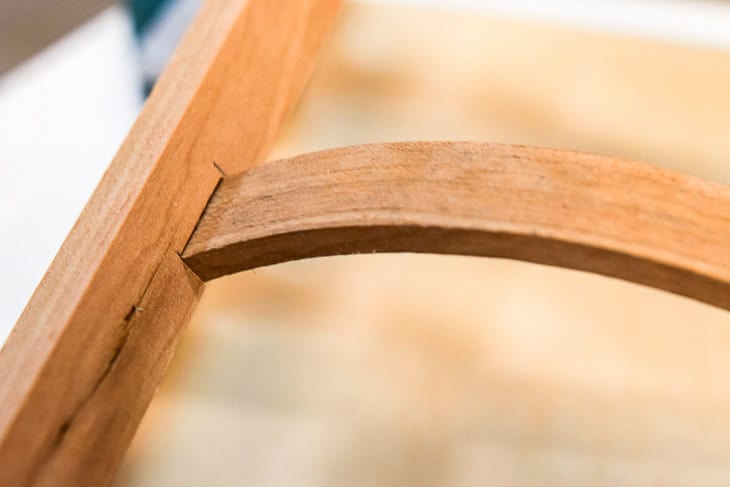
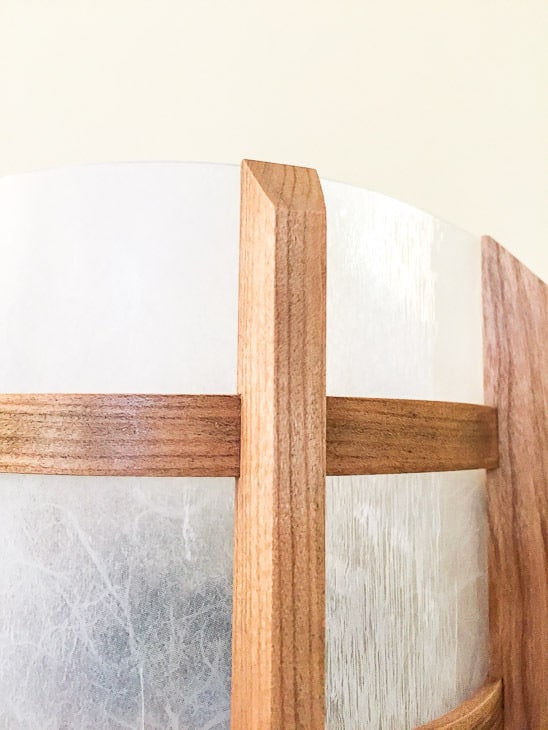
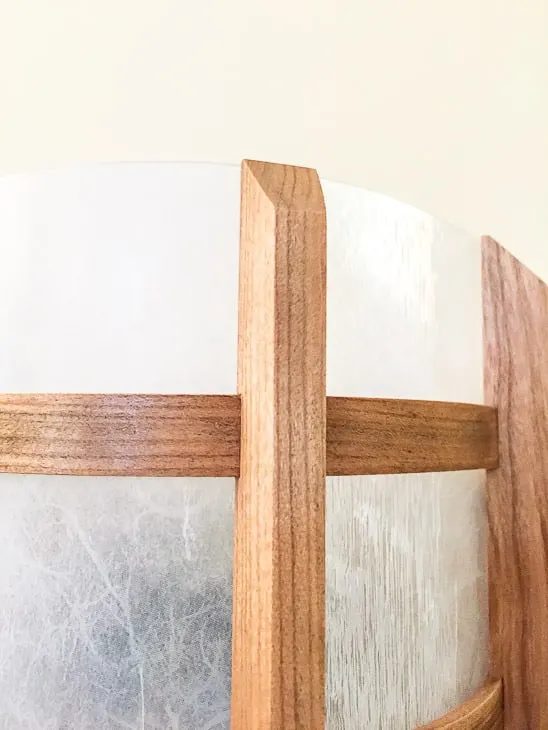
A close up of a joint shows how neatly the arch fits into the notch.

Add the shade
We added some vellum paper to the inside to mimic the shade that will be used in the final version. He created the shade with clear, flexible plastic sheets and adhesive window film that resembles rice paper.

One reason for putting in the effort to create a prototype is to test out different details without messing up the final project. You can see that the inspiration photo has more vertical slats, but my dad wanted a smaller sconce with fewer pieces.
We also tested out a couple different styles for the ends of the slats. We both agreed that the beveled cut was the clear winner!

After our visit, my father began working on the final version that will be installed in their house. This weekend, he sent me photos of the finished project. I'm just in awe of his woodworking skills, and hope I can be just like him when I grow up! 😉

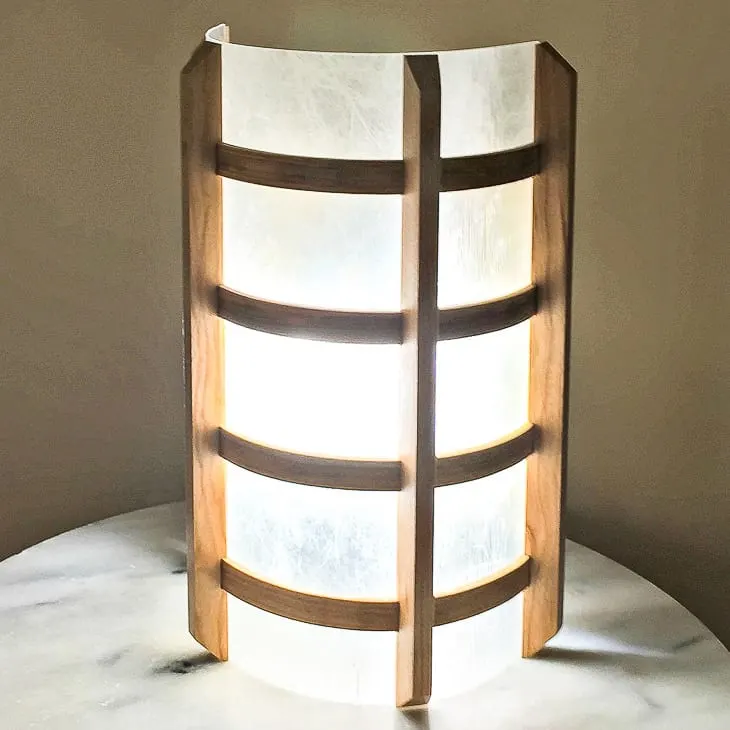
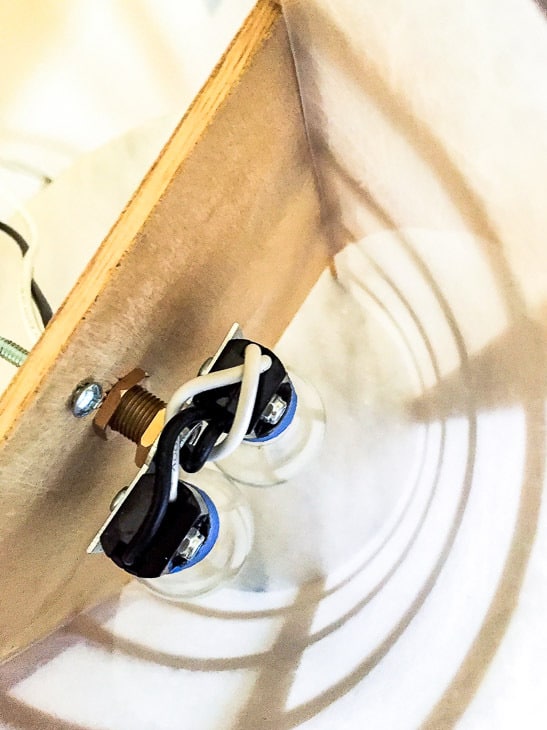
Here you can see how he wired up the inside.

Want more ideas for brightening up your home? Check out all the DIY lighting ideas I found!


Jann Olson
Tuesday 3rd of April 2018
Another great project! Thanks for sharing with SYC. I'm sure it's not intentional, but I'm not seeing a link back to the party in any of your posts. hugs, Jann
Vineta
Tuesday 3rd of April 2018
Jann, you can find the page with all the party link backs here. There are way too many to list in each post!
Sheri
Monday 2nd of April 2018
Love this light. Thanks for sharing at the To Grandma's House We Go DIY, Crafts, Recipes and More Link Party! Hope to see you again this week!
Janet Trieschman
Wednesday 14th of September 2016
I am amazed! Bent wood - so difficult. Thanks for sharing with us at #CCBG
debbie
Monday 12th of September 2016
This is a work of art by an artisan. It is definitely over my head but for the many diy ers out there I know you have given them the inspiration and instruction to make it easily.
The Handyman's Daughter
Monday 12th of September 2016
I know my dad will be touched to hear that! Thanks, Debbie!
Shirley Wood
Sunday 11th of September 2016
That is gorgeous. I love this project. Pinning. Thanks for partying with us at Merry Monday.