Traditional screen printing is complicated and time consuming, but DIY screen printing with a laser can be done in minutes! Here's how!

I've always wanted to make my own t-shirts. I can cut iron-on vinyl with my xTool M1, but I don't like the look or feel of vinyl on fabric. Nothing screams "homemade" like a peeling decal!
Traditional screen printing involves burning an image onto a screen covered with a light sensitive emulsion. The process is messy, and requires a dark room and special equipment to work properly.
But xTool recently came out with an amazing accessory for their laser lineup...a screen printer! The screens are covered with a laser-safe emulsion that is engraved away to reveal your design. The kit comes with everything you need!

Most of the reviews for the screen printer use one of xTool's diode lasers. I'll be using my xTool P2, which is a CO2 laser.
The process is basically the same, but multicolor prints may be a little tricky to line up perfectly without positioning pieces specifically made for this machine. I'll be sticking with single color prints for these projects.
Let's get started!
This post is sponsored by xTool and contains affiliate links for your convenience. Purchases made through these links may earn me a small commission at no additional cost to you. Please visit my disclosures page for more information.
Materials Required
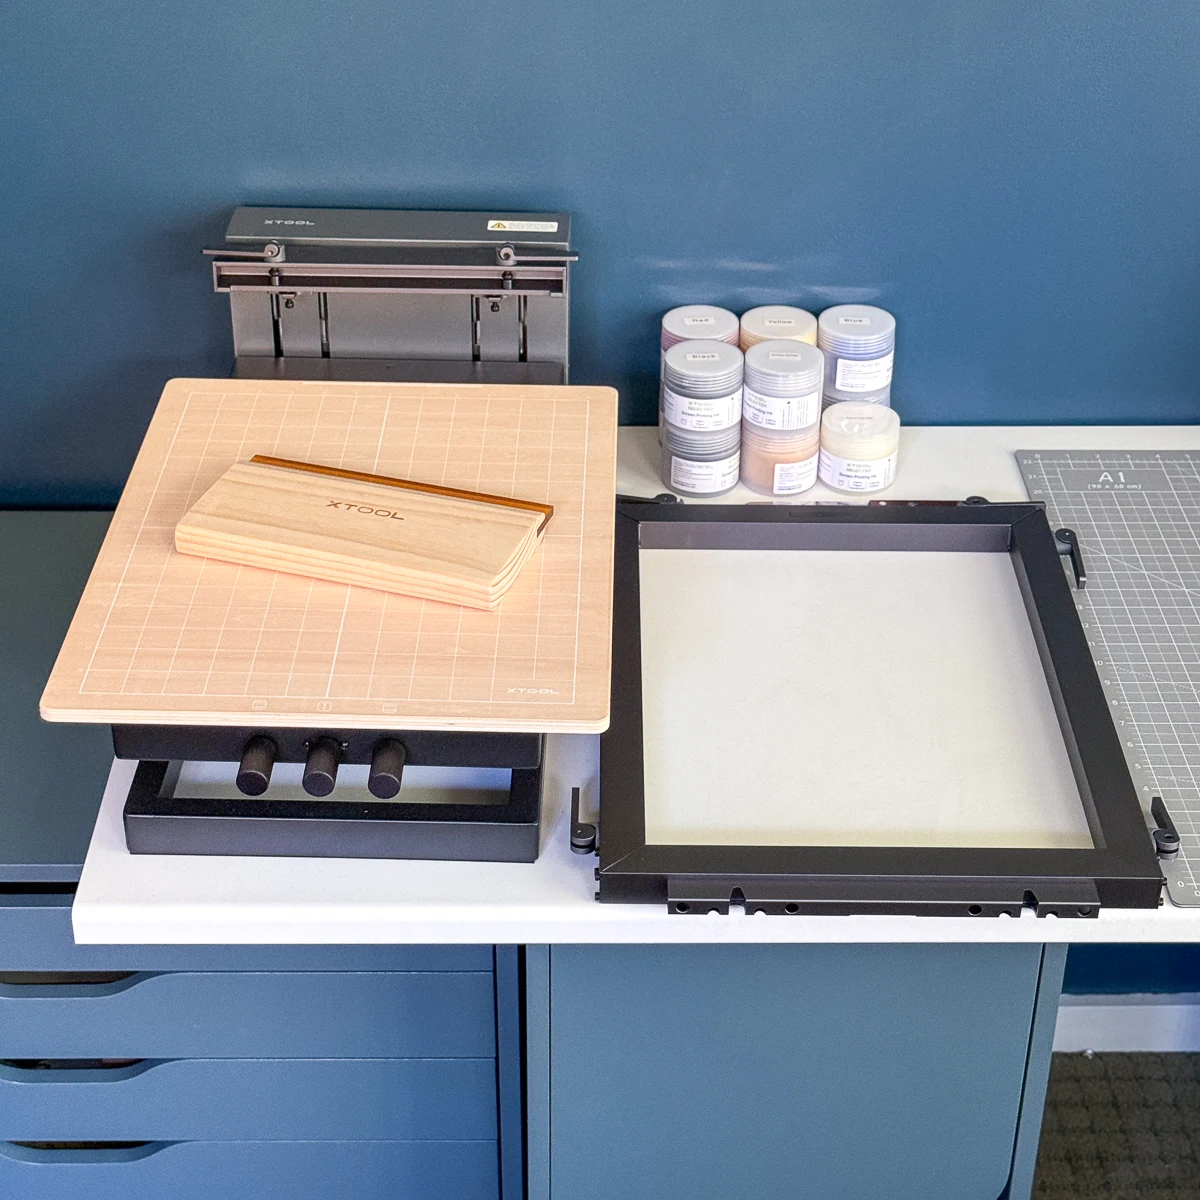
- xTool screen printing kit
- The basic kit comes with one frame, three screens and four ink colors. The multi-color kit has four frames, 12 screens and 10 ink colors.
- xTool laser
- I'm using the xTool P2 with the riser base. Multi-color printing currently works best with the xTool D1 and S1.
- Blanks to print on
- I'm making a black t-shirt, tote bag and pillow cover.
Don't have a laser, or looking to upgrade? Use the code VINETA100 for $100 off an xTool laser! Click here to check them out!
Setting up the screen
The metal frame makes it really easy to stretch the screen tight. Just open up all the latches and place the screen on top.
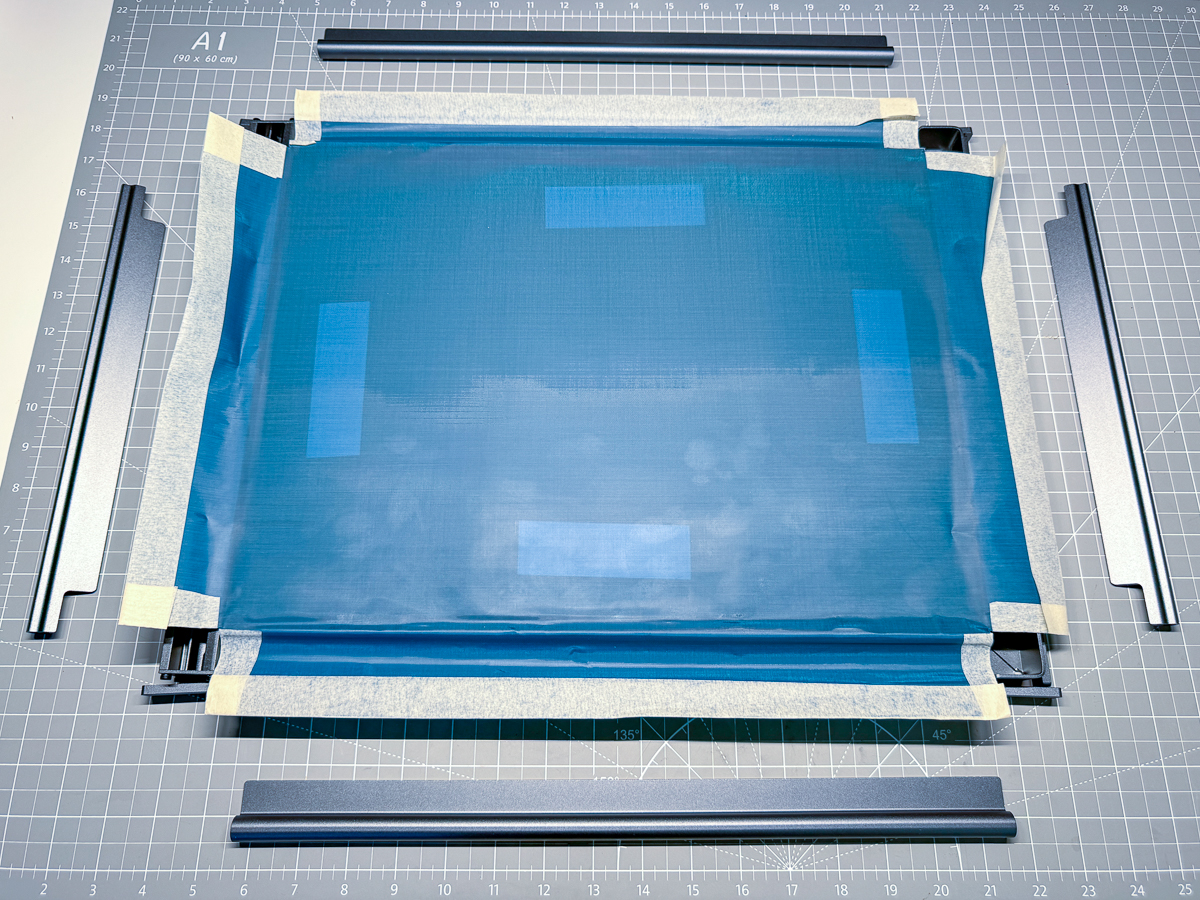

Make sure the cardboard backer is inside the frame.
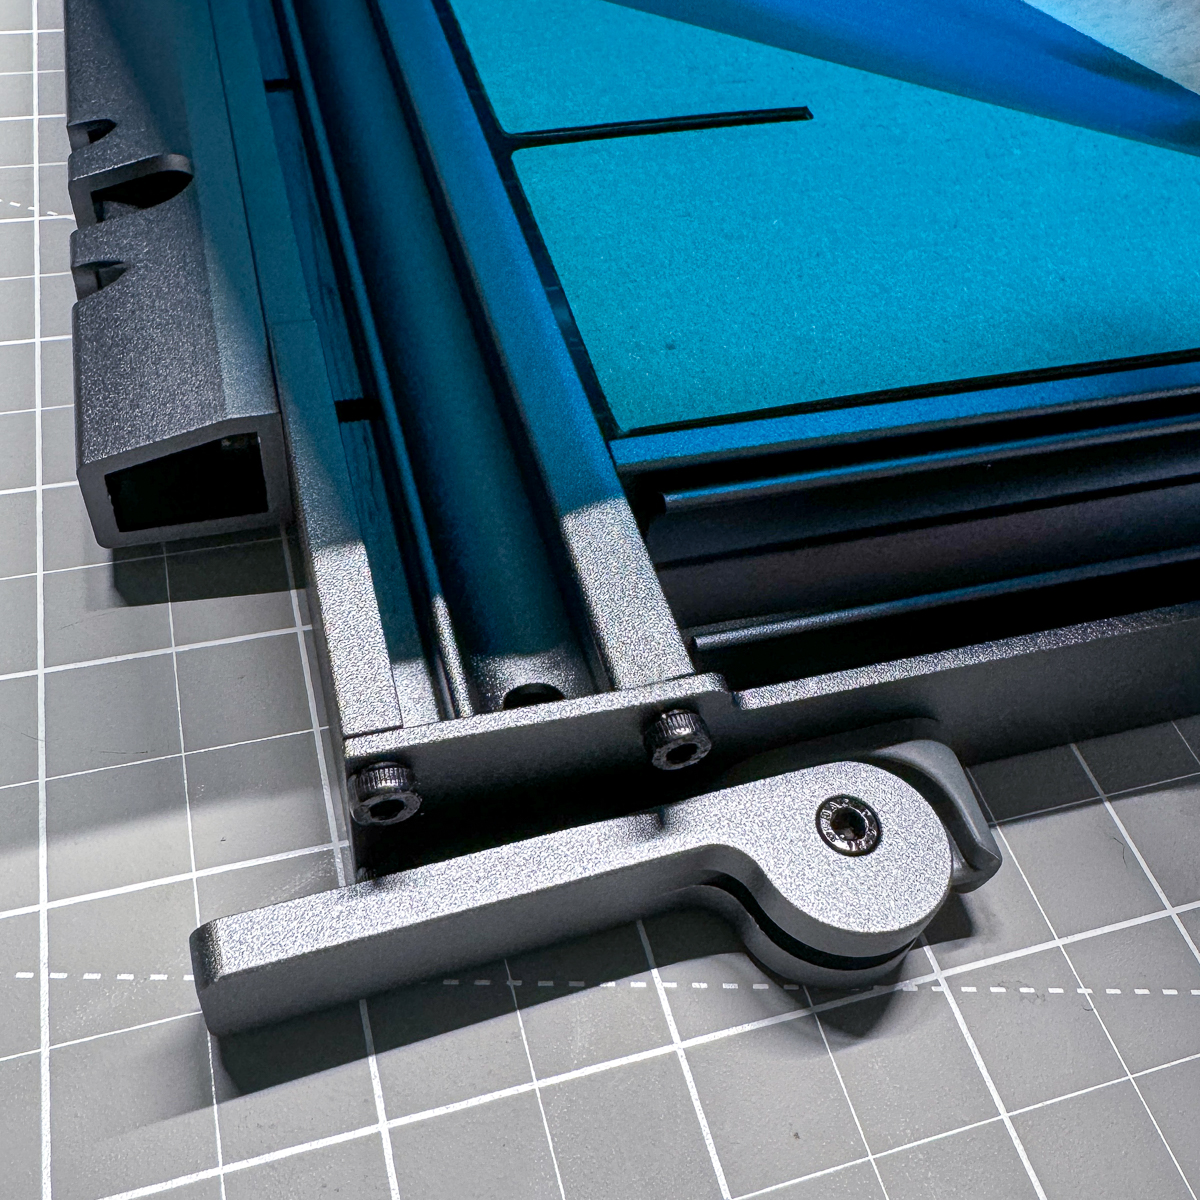
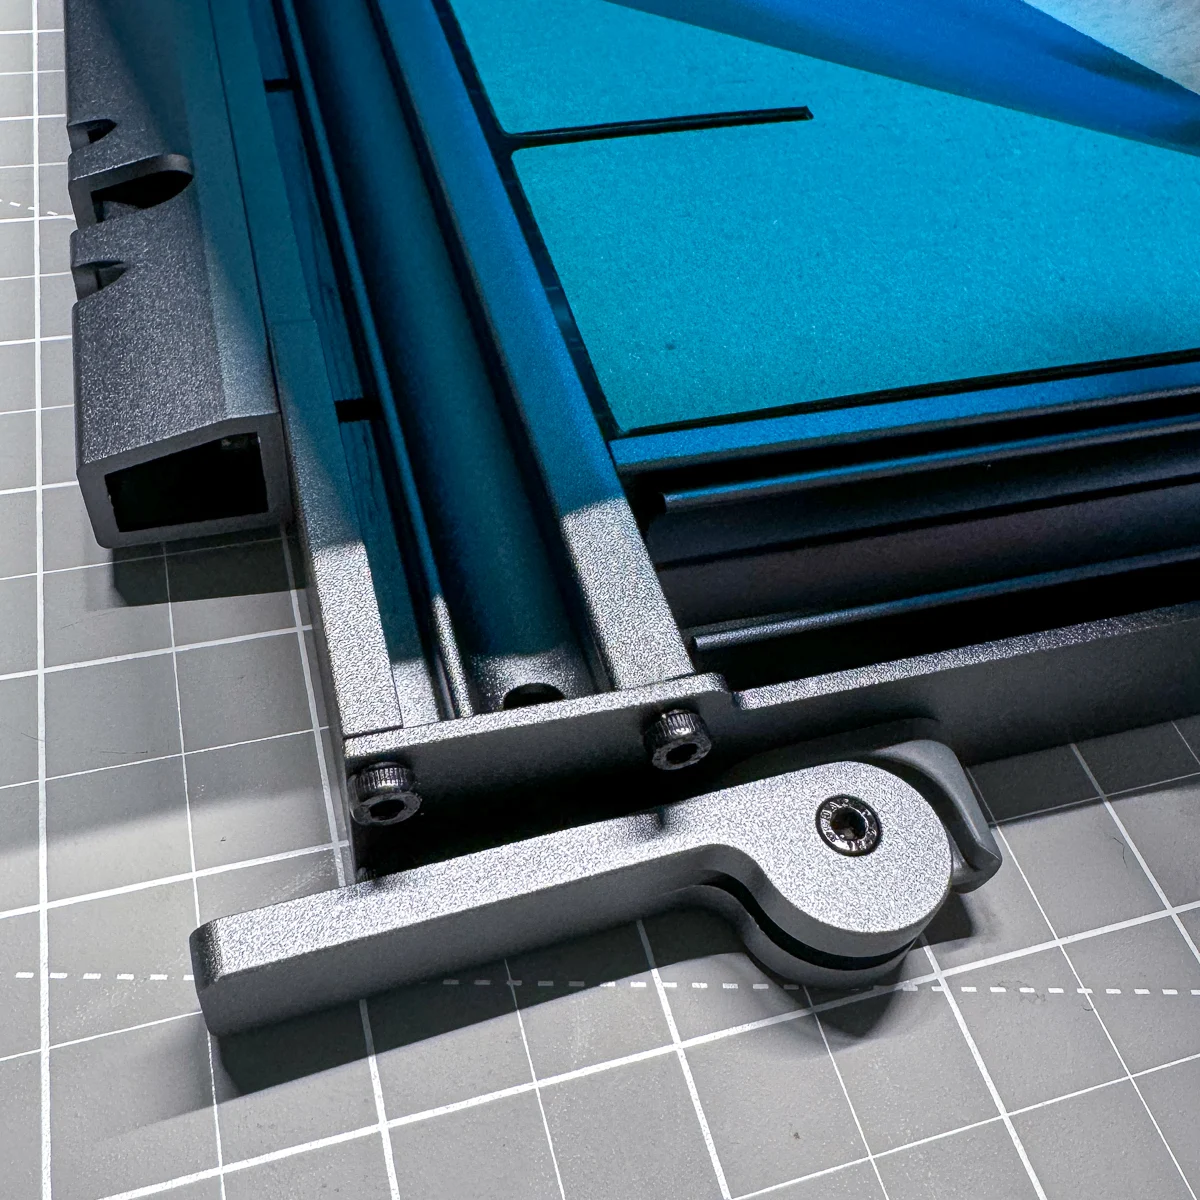
Press one of the long fixing pins into the groove of the frame at a 45 degree angle with the flat part facing outward.


Make sure to position the bar so that it will sit in the groove on the side of the frame, not on the corner. Then push the flat part down until it meets the frame.
Repeat on the other long side, then install the shorter ends.
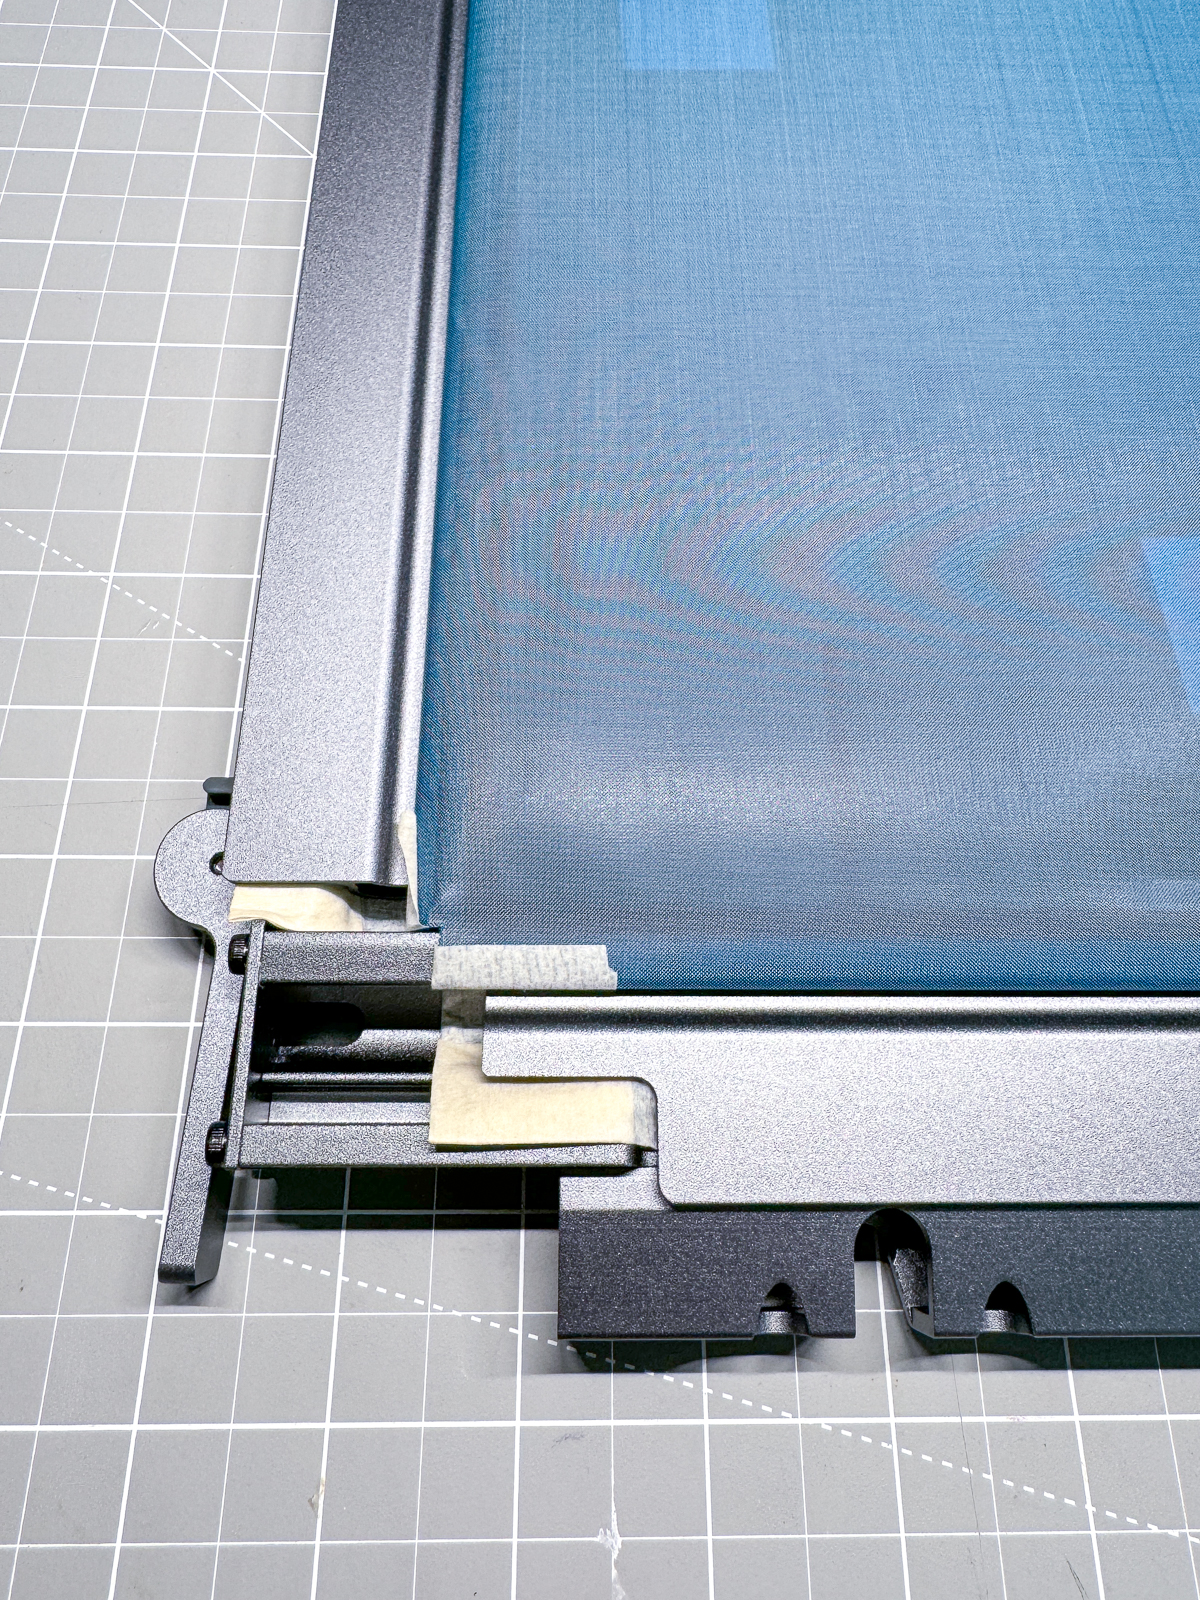
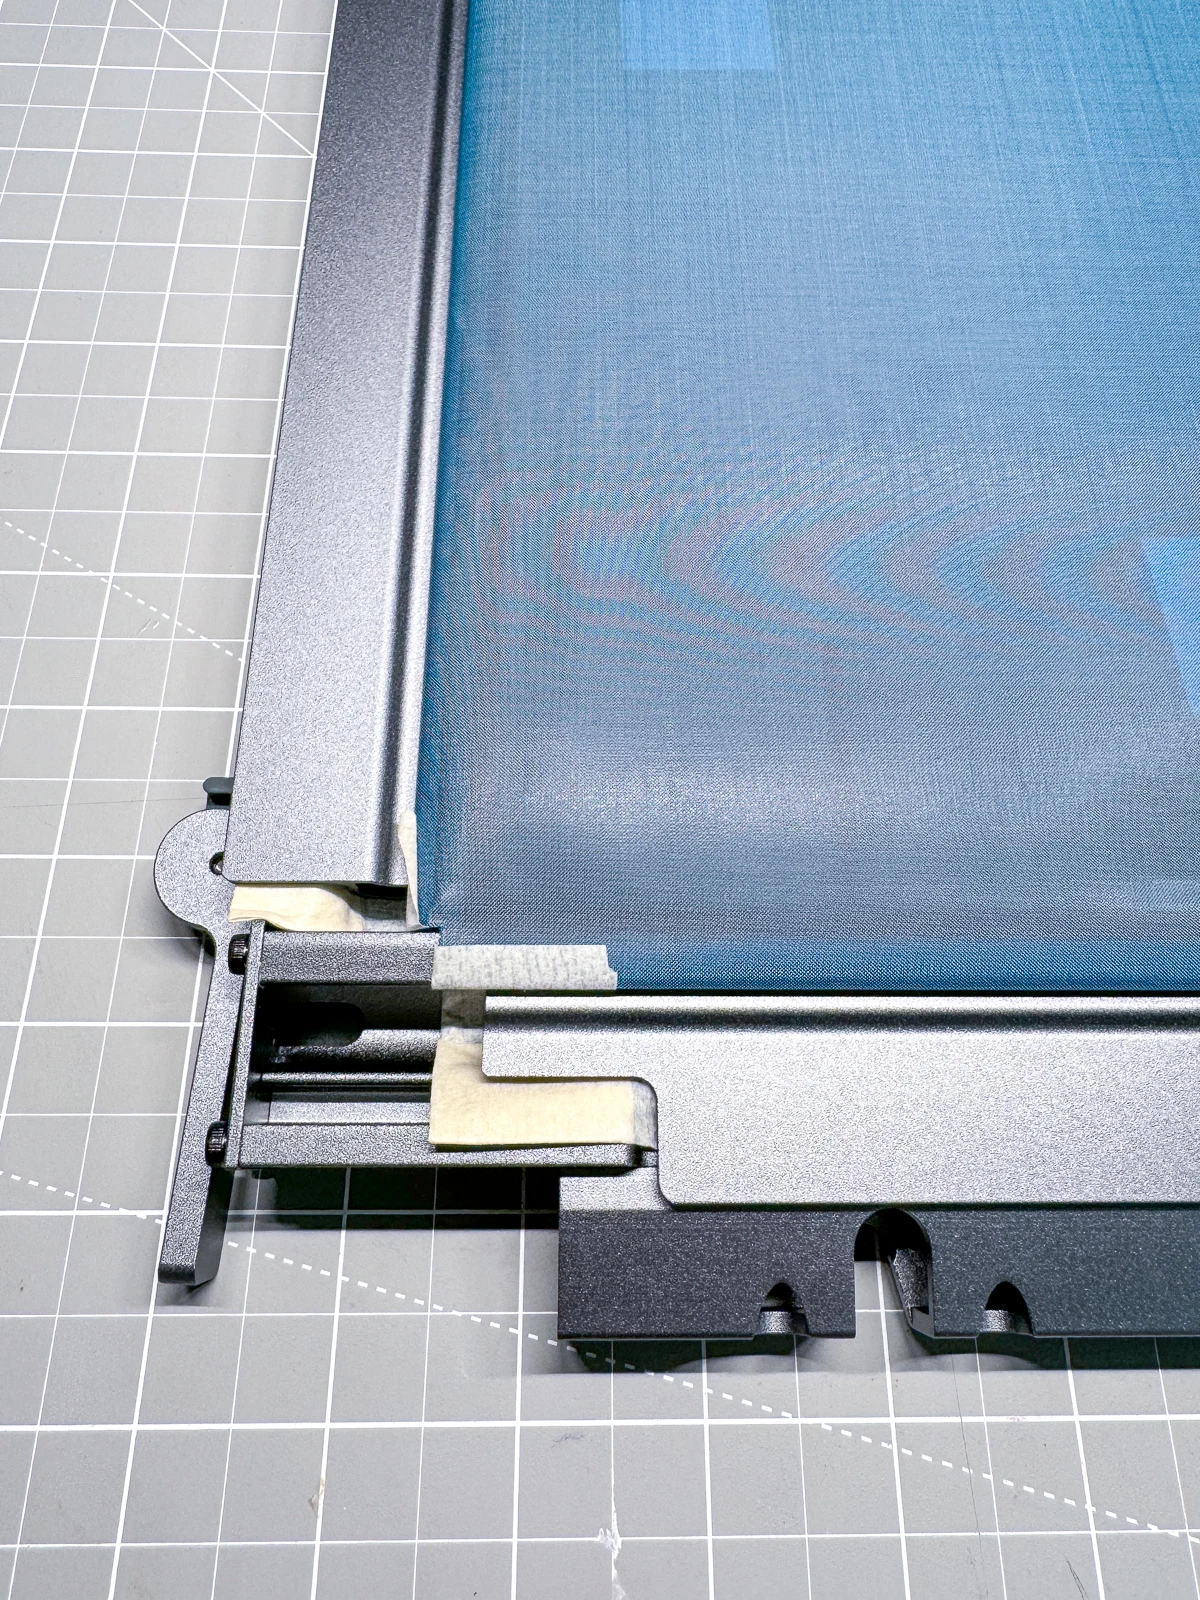
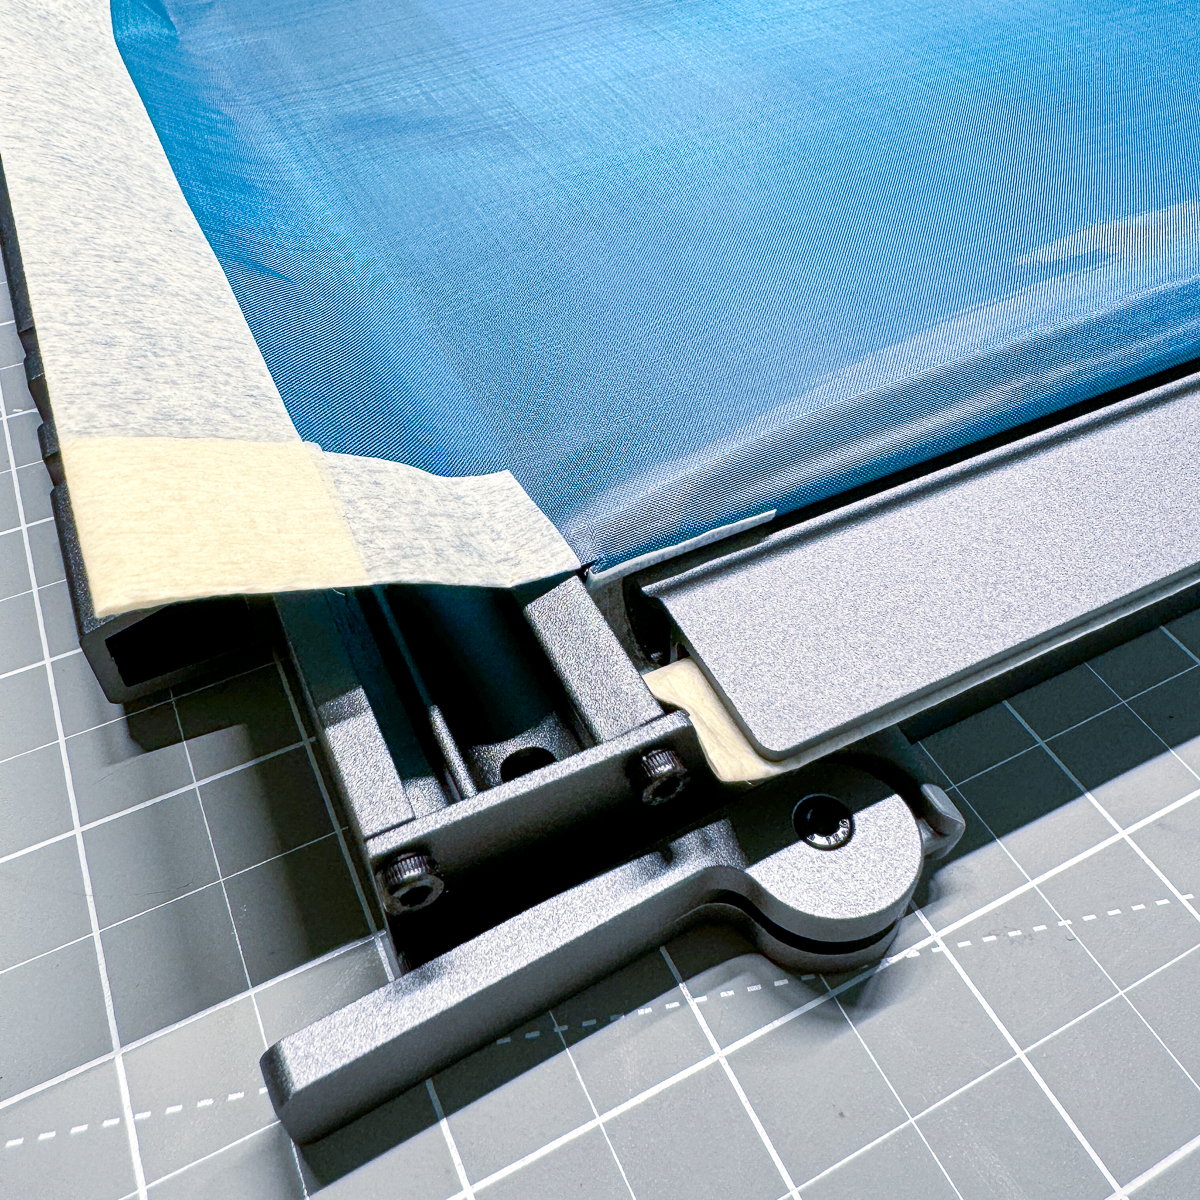
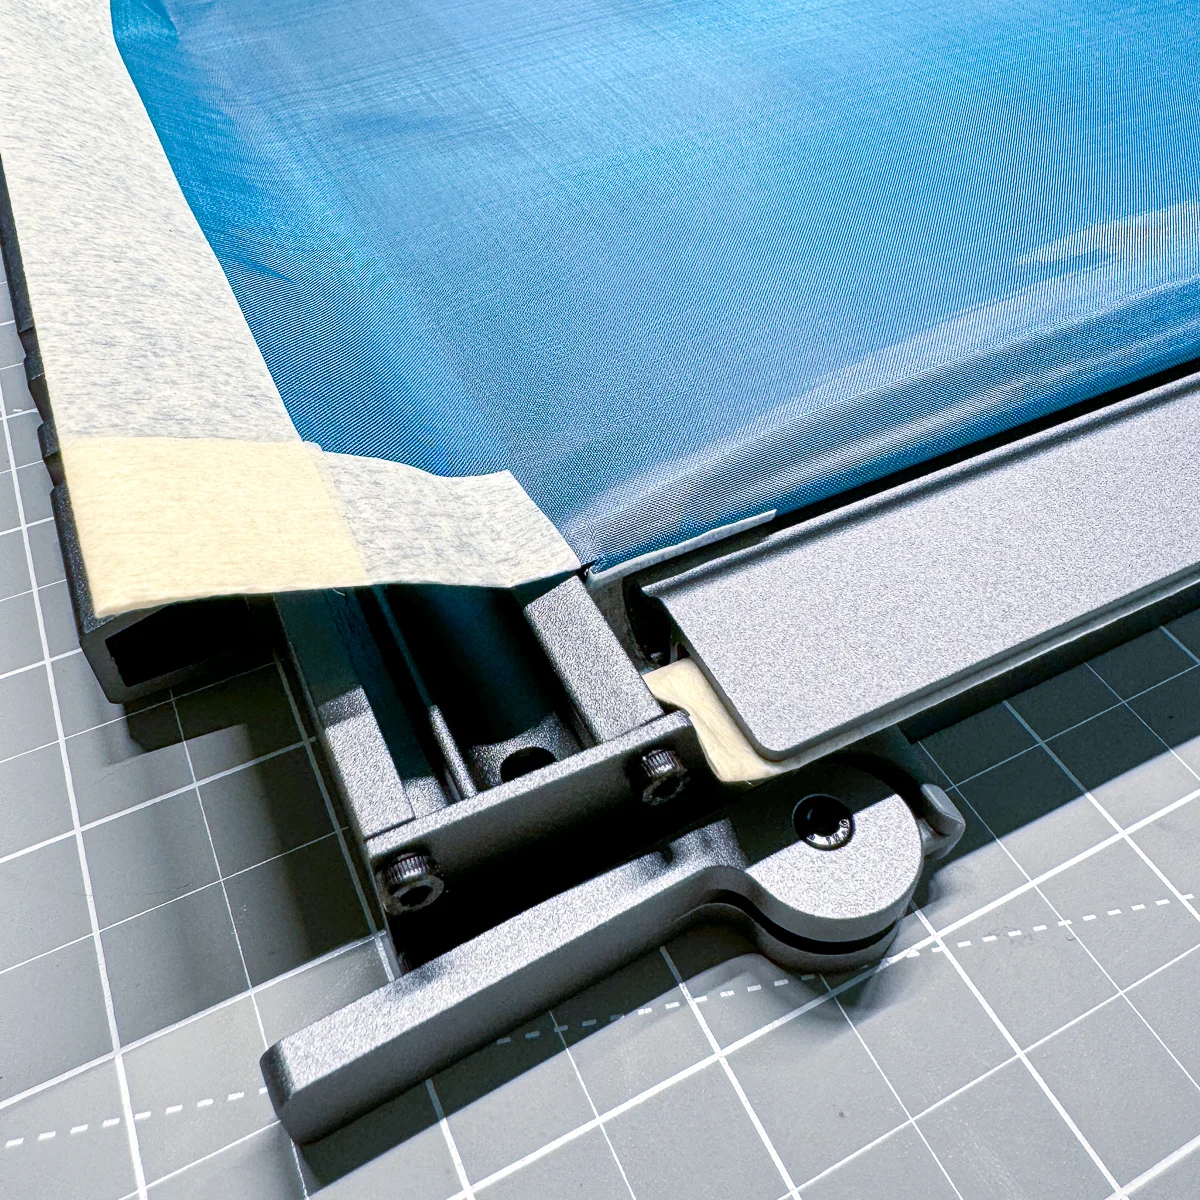
To tighten the screen, just flip the latches inward on all four corners.
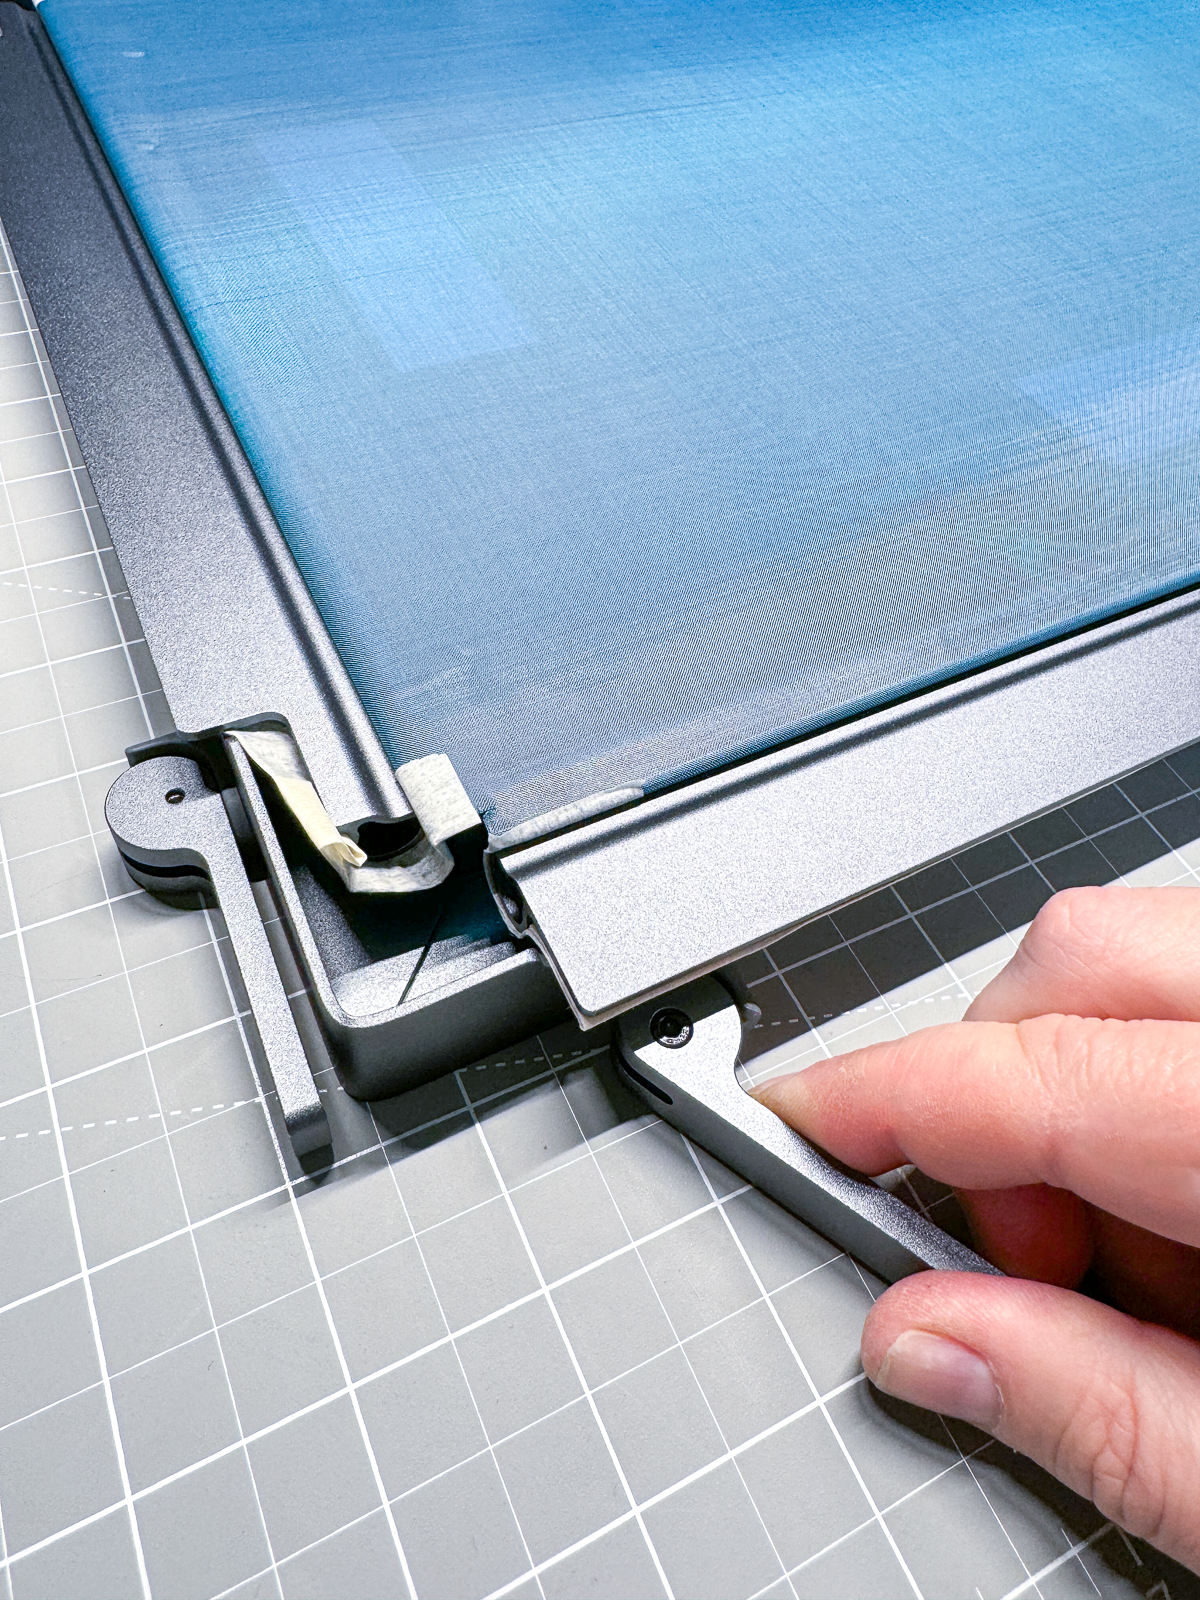

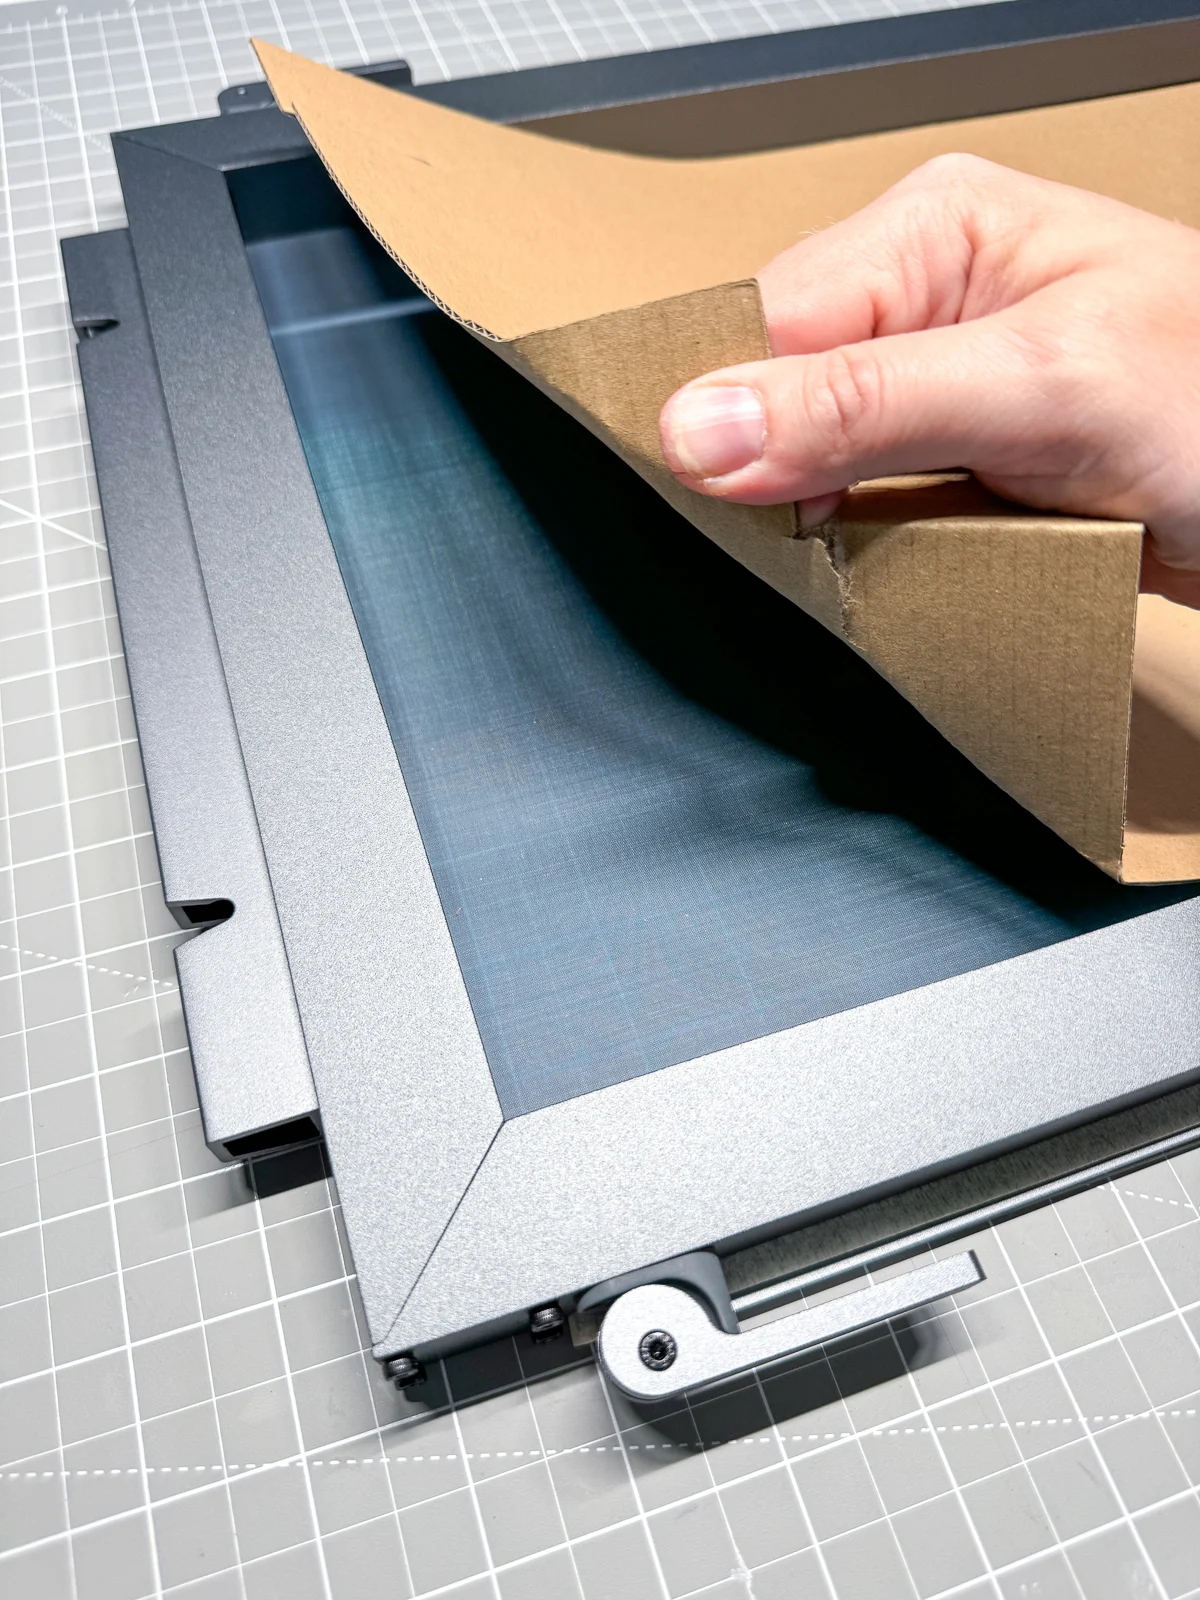
Then you can peel off the cardboard to reveal the screen. It should sound like a drum when you tap the surface.

Insert the screen in the laser
The xTool D1 and S1 have frame fixing pieces that ensure that you get the perfect positioning in your machine. The xTool P2 doesn't have one yet, but I found this YouTube tutorial that I plan to use if I want to make a multicolor design.
You'll need to have the riser base in order for the screen to fit in the P2. Pull out the bottom tray, flip it over, and insert it into the top slot. Then slide the screen through the gap, being careful not to scratch the surface.
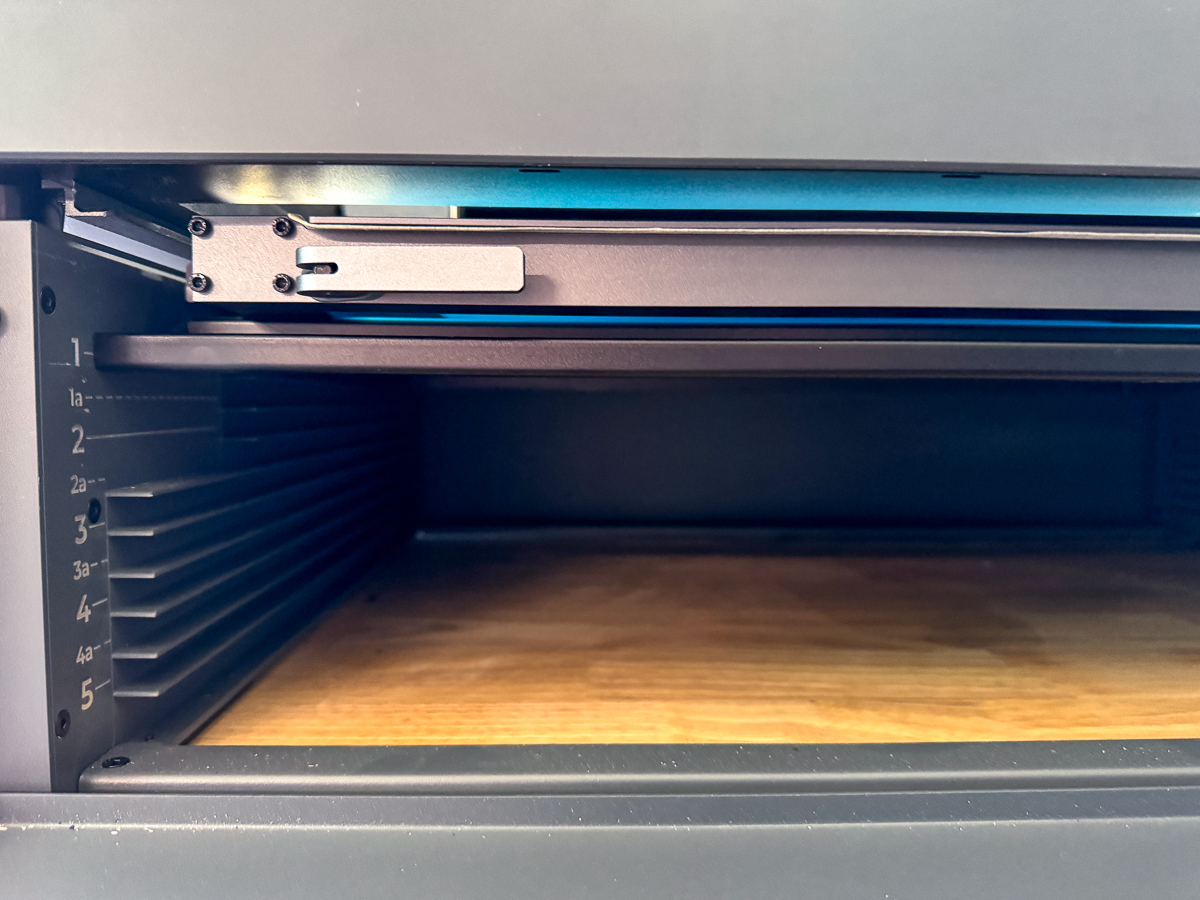
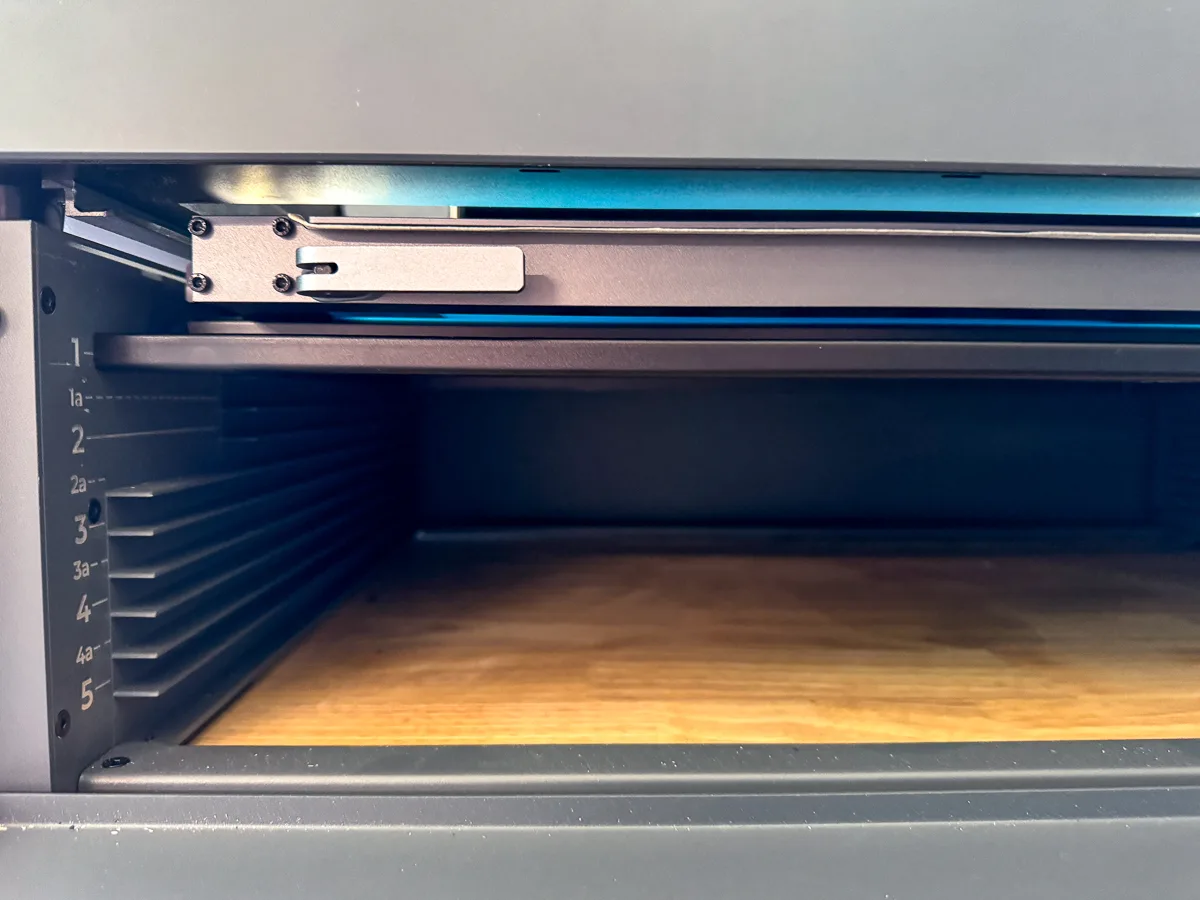
Push the frame all the way to the left and center the screen in the opening. I used a speed square to make sure everything was straight in the machine.

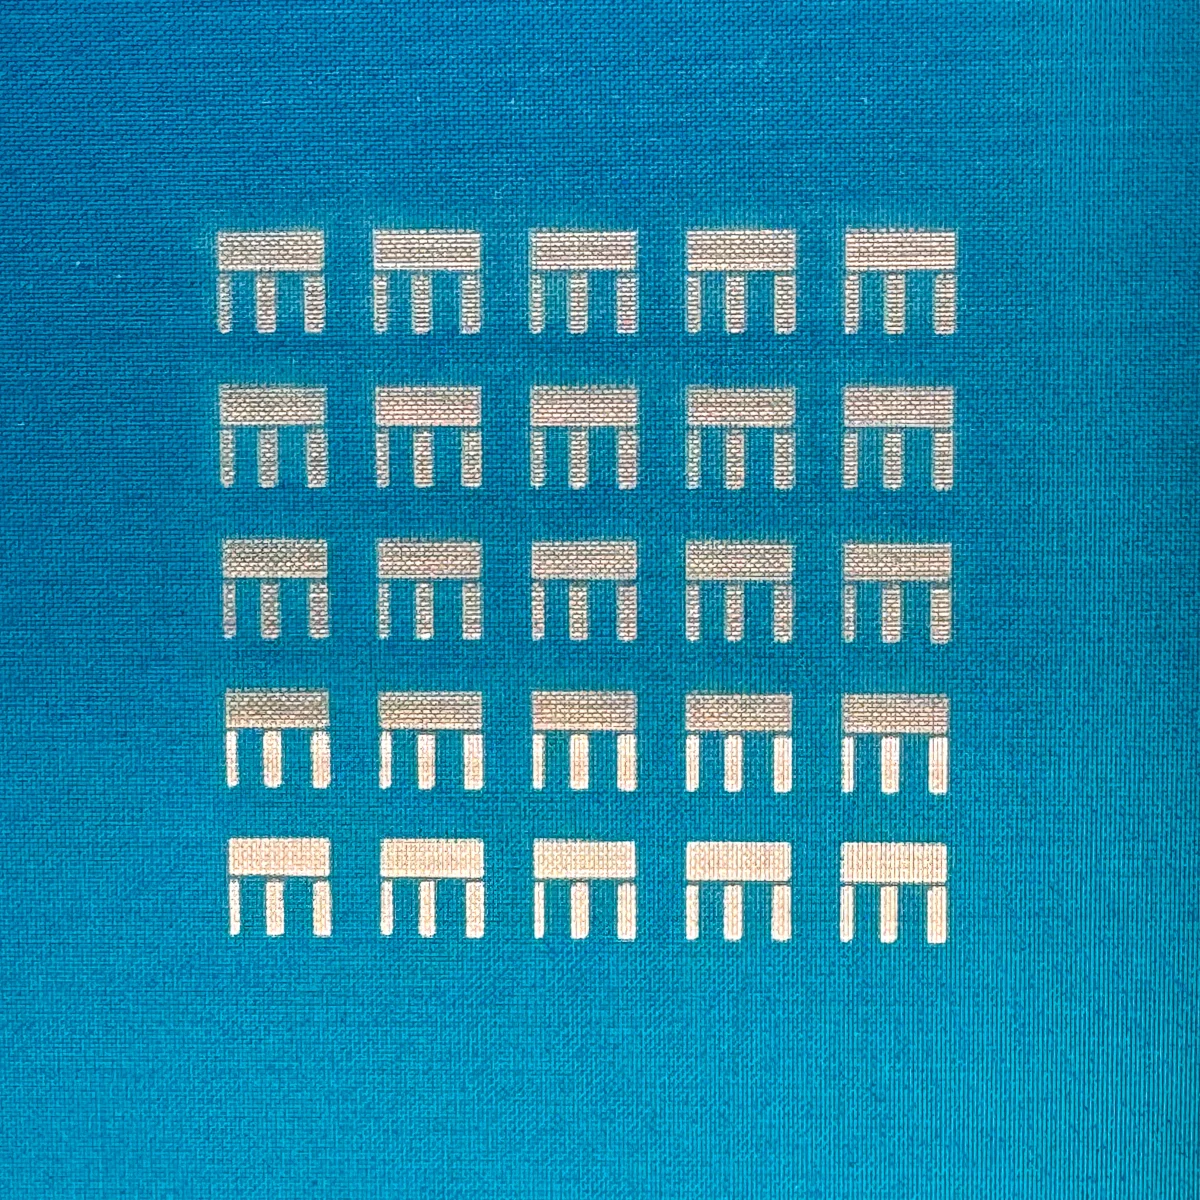
Run a test grid first
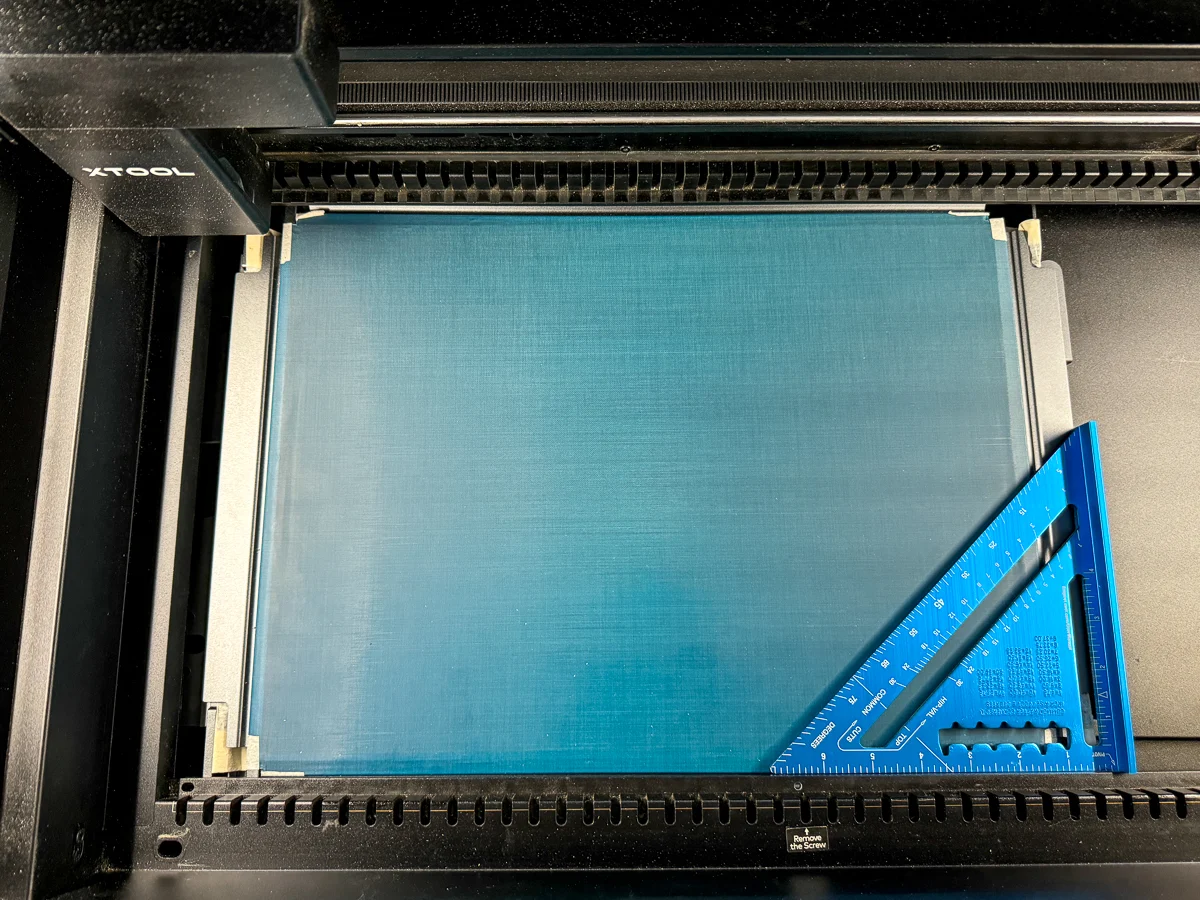
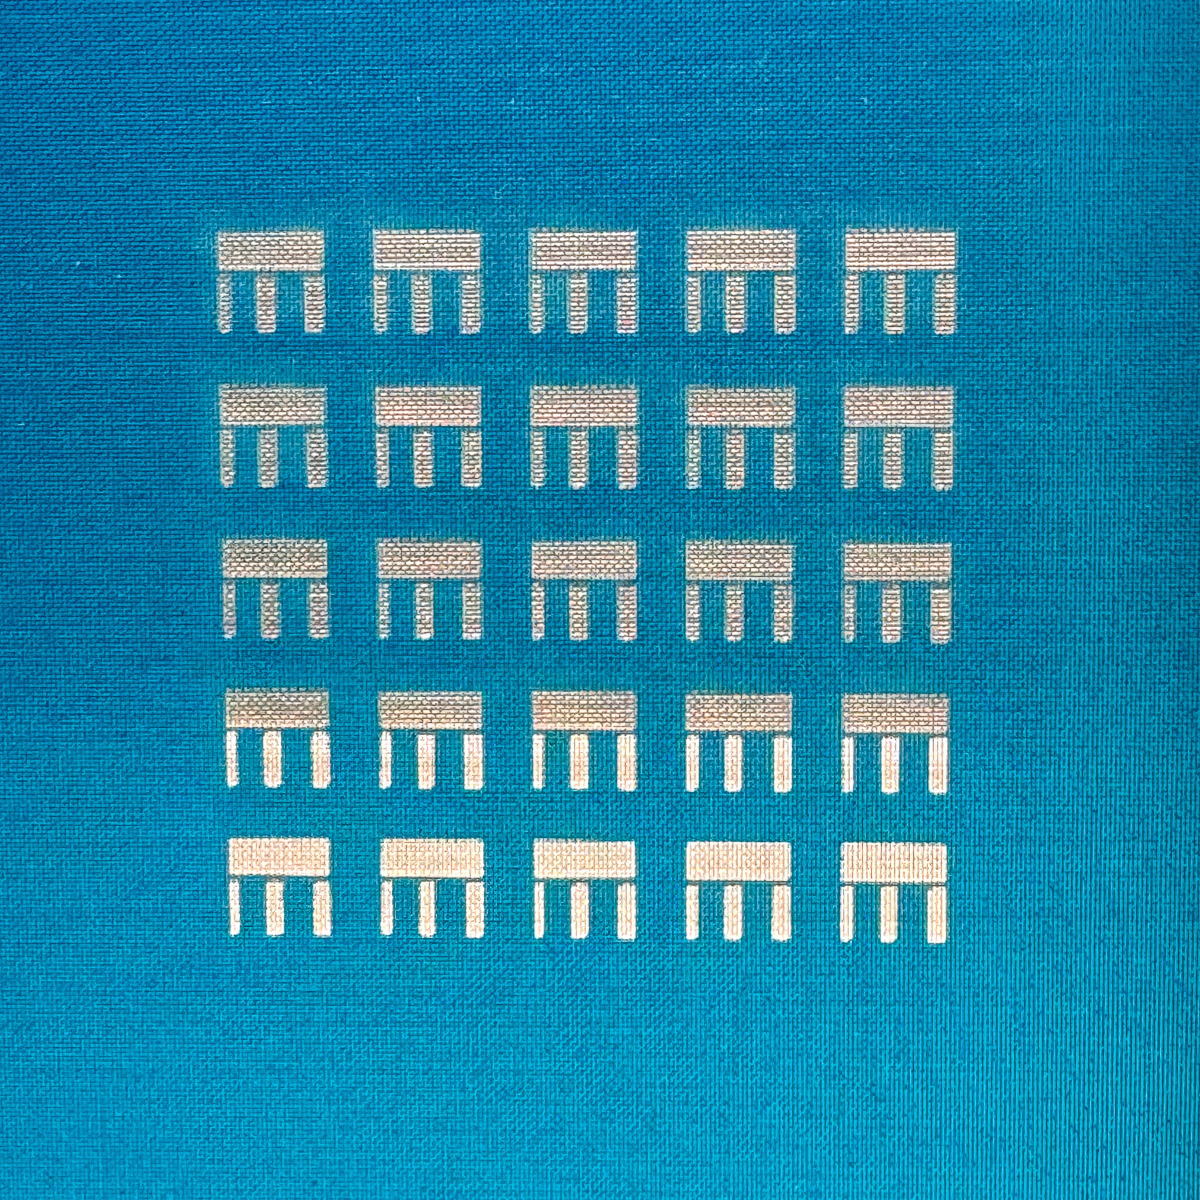
Whenever I'm using a new material, I always run a test file first to get the optimal settings. You want to make sure that all the emulsion is engraved away in your design without burning the screen.
I used this article to get the range of recommended settings for the xTool P2, as well as the test image. I positioned the test grid in the corner of the screen so I could use the rest of it for my actual project.
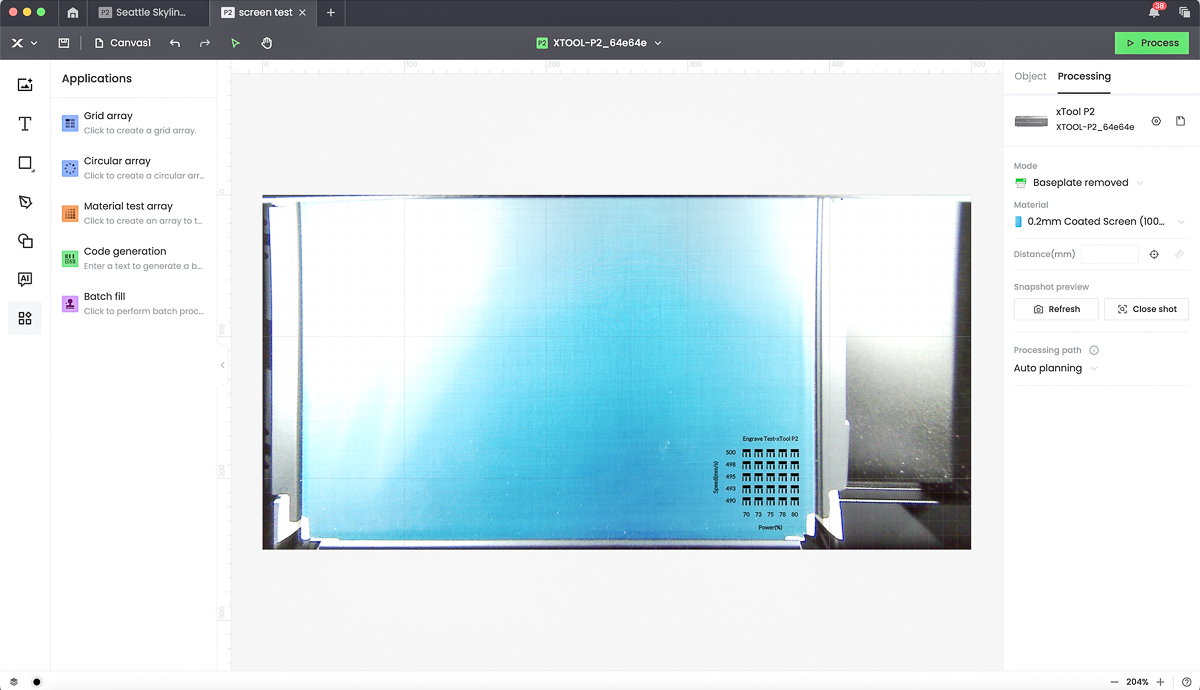

When you look at the test grid, you want the settings with the crispest corners and edges, with no leftover emulsion in the engraved areas. It looks like any of the 490mm/s settings (bottom row) would work best for my machine.
Now it's time for the real thing!
Engrave your design on the screen
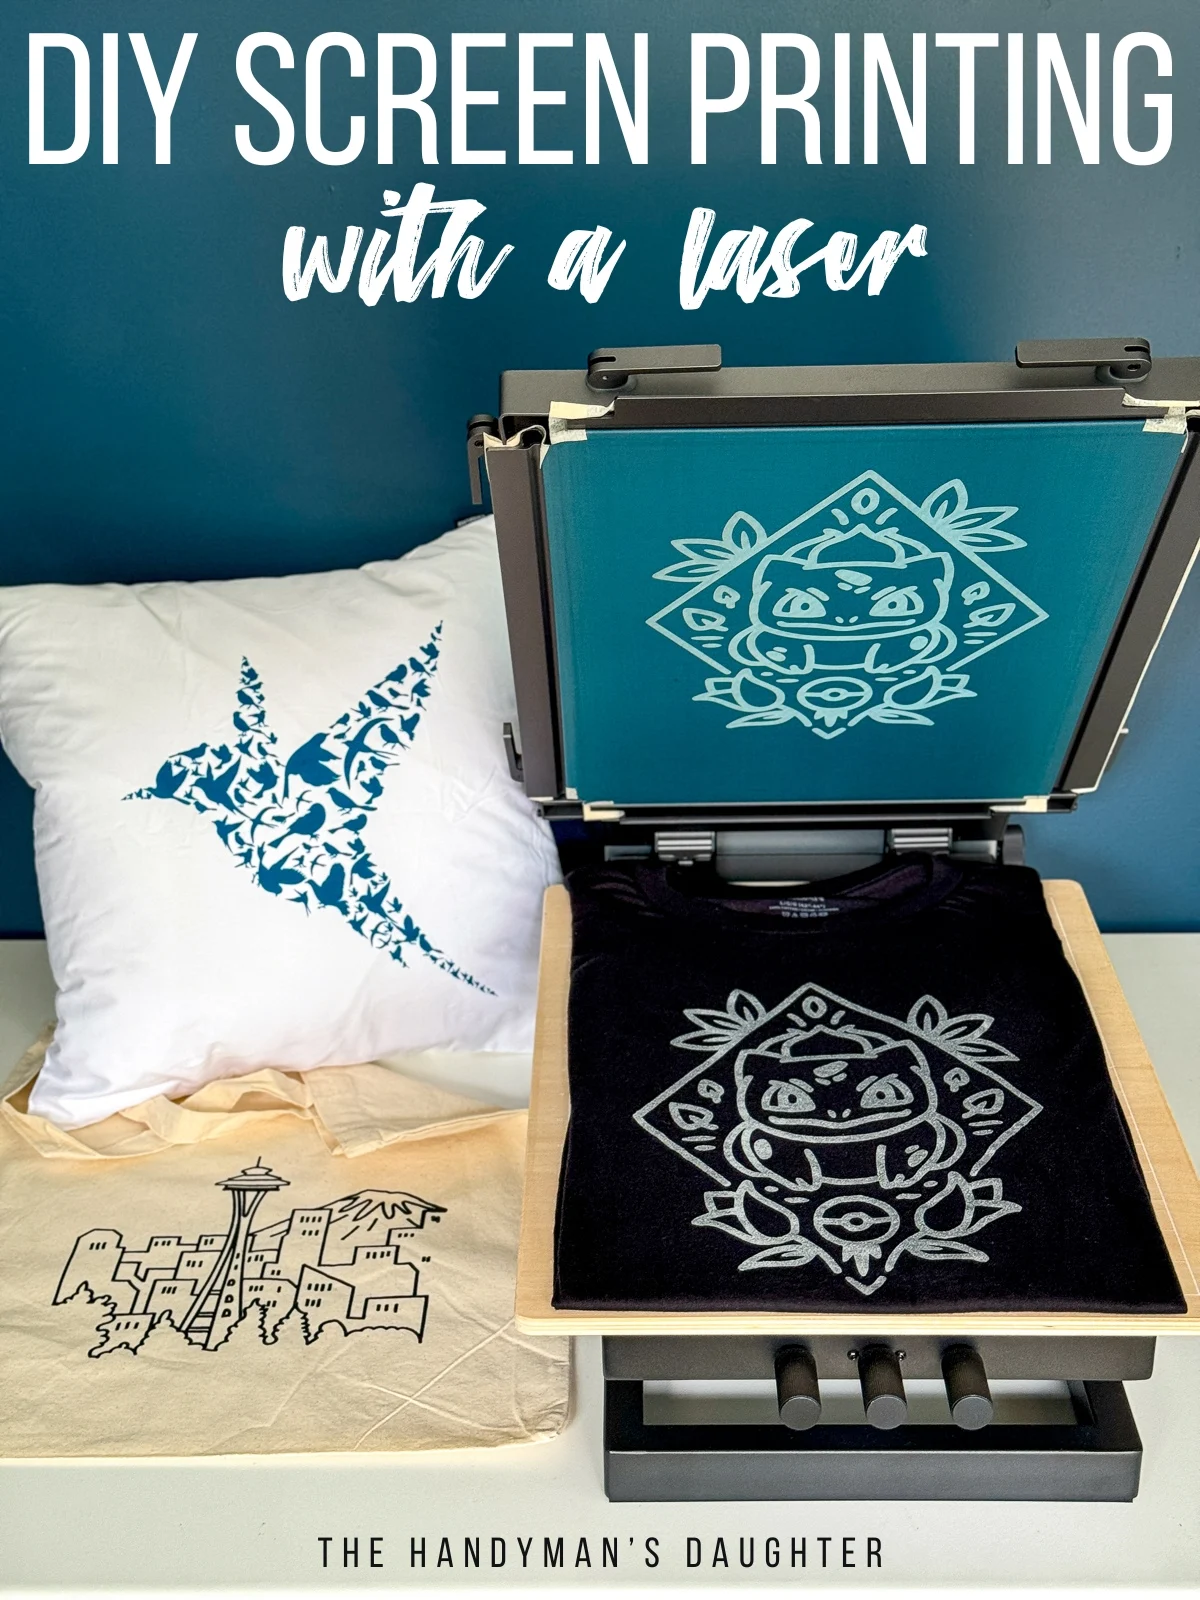
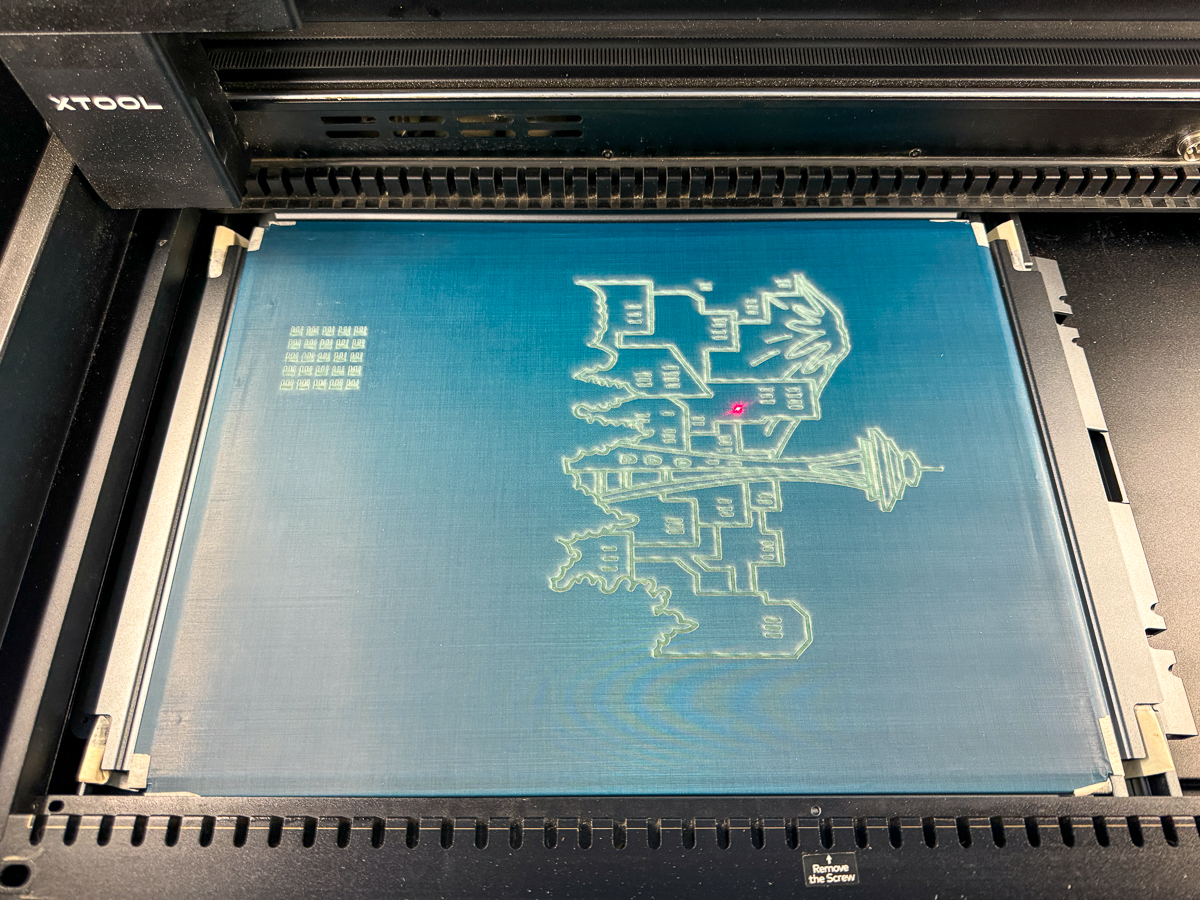
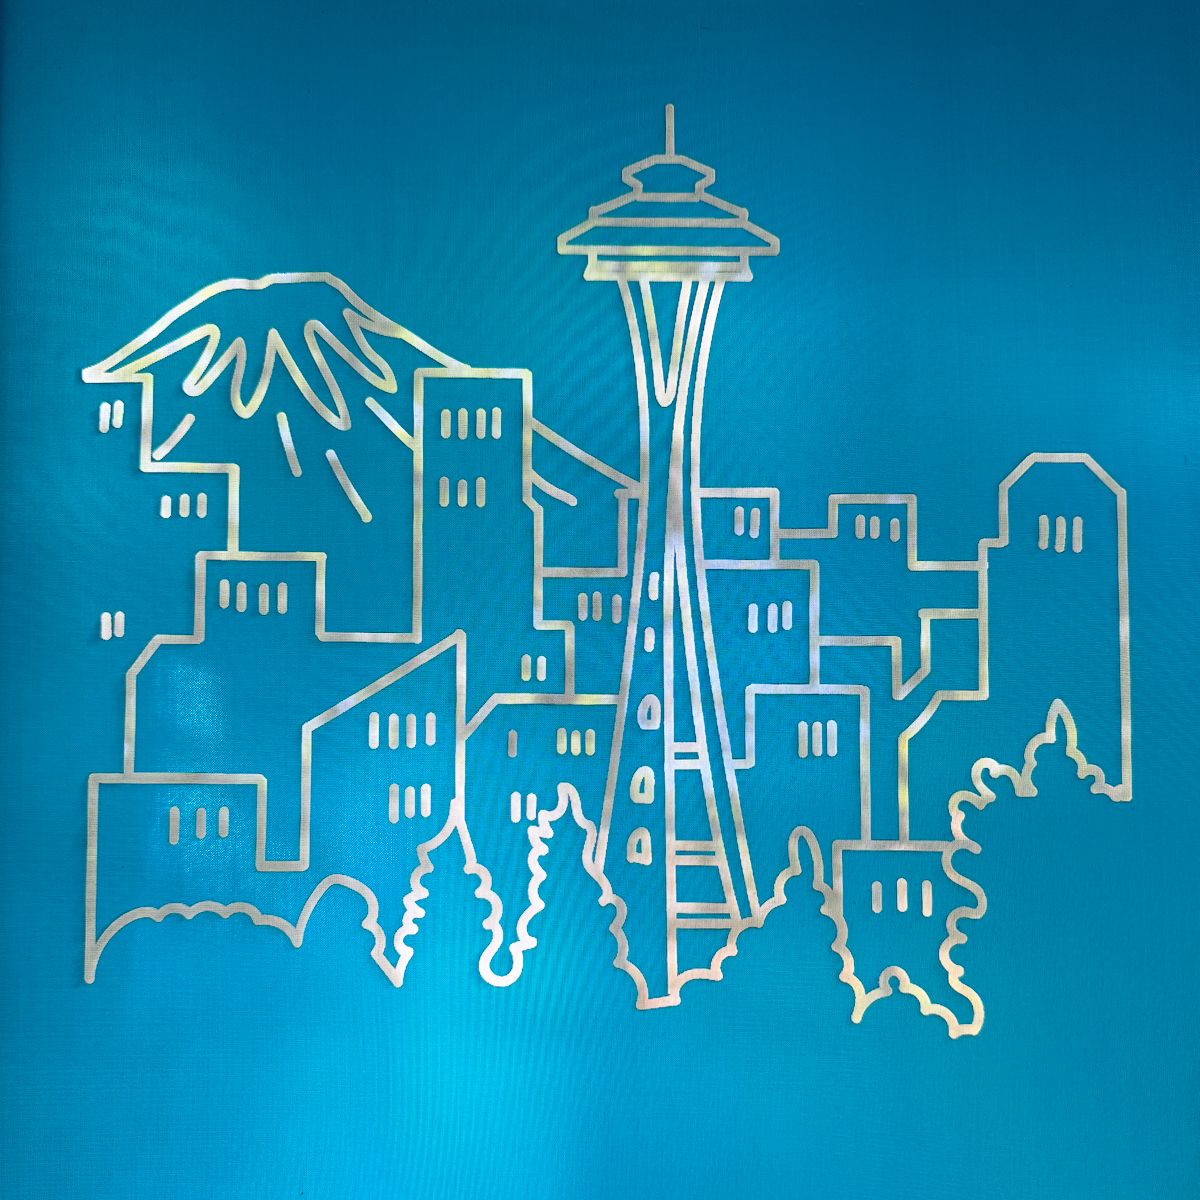
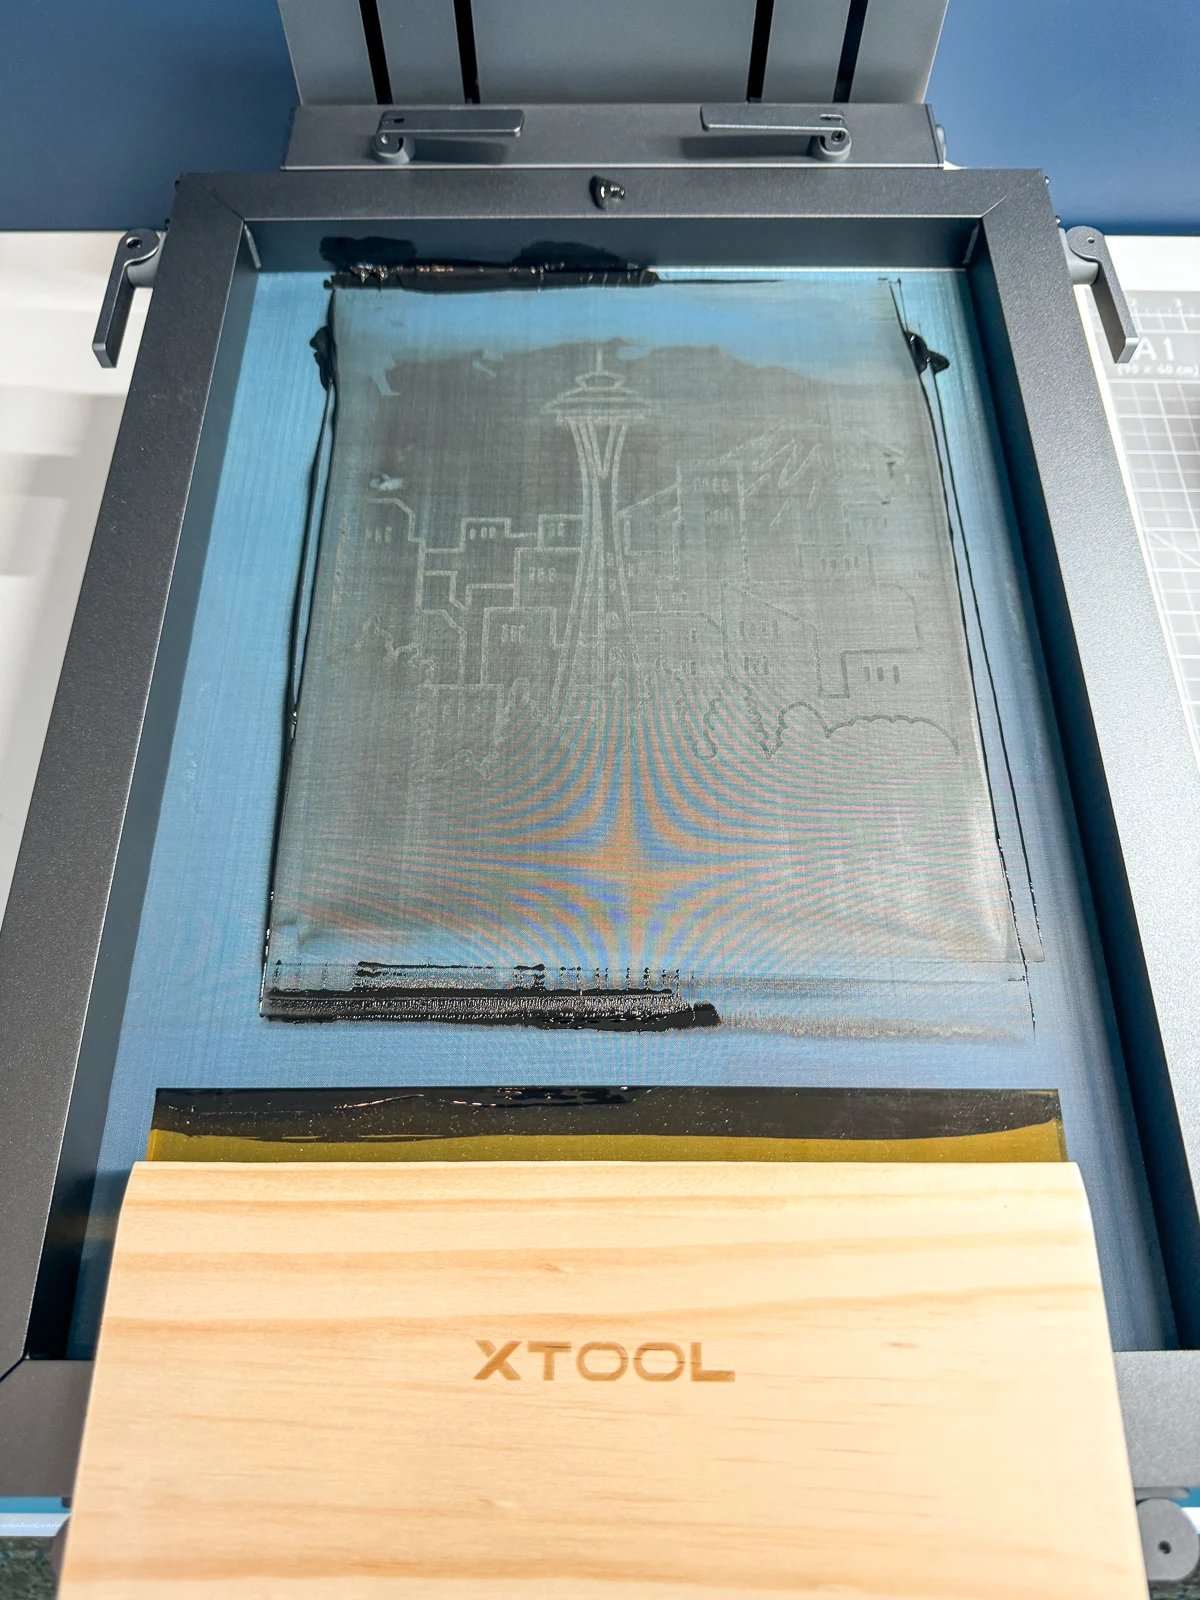
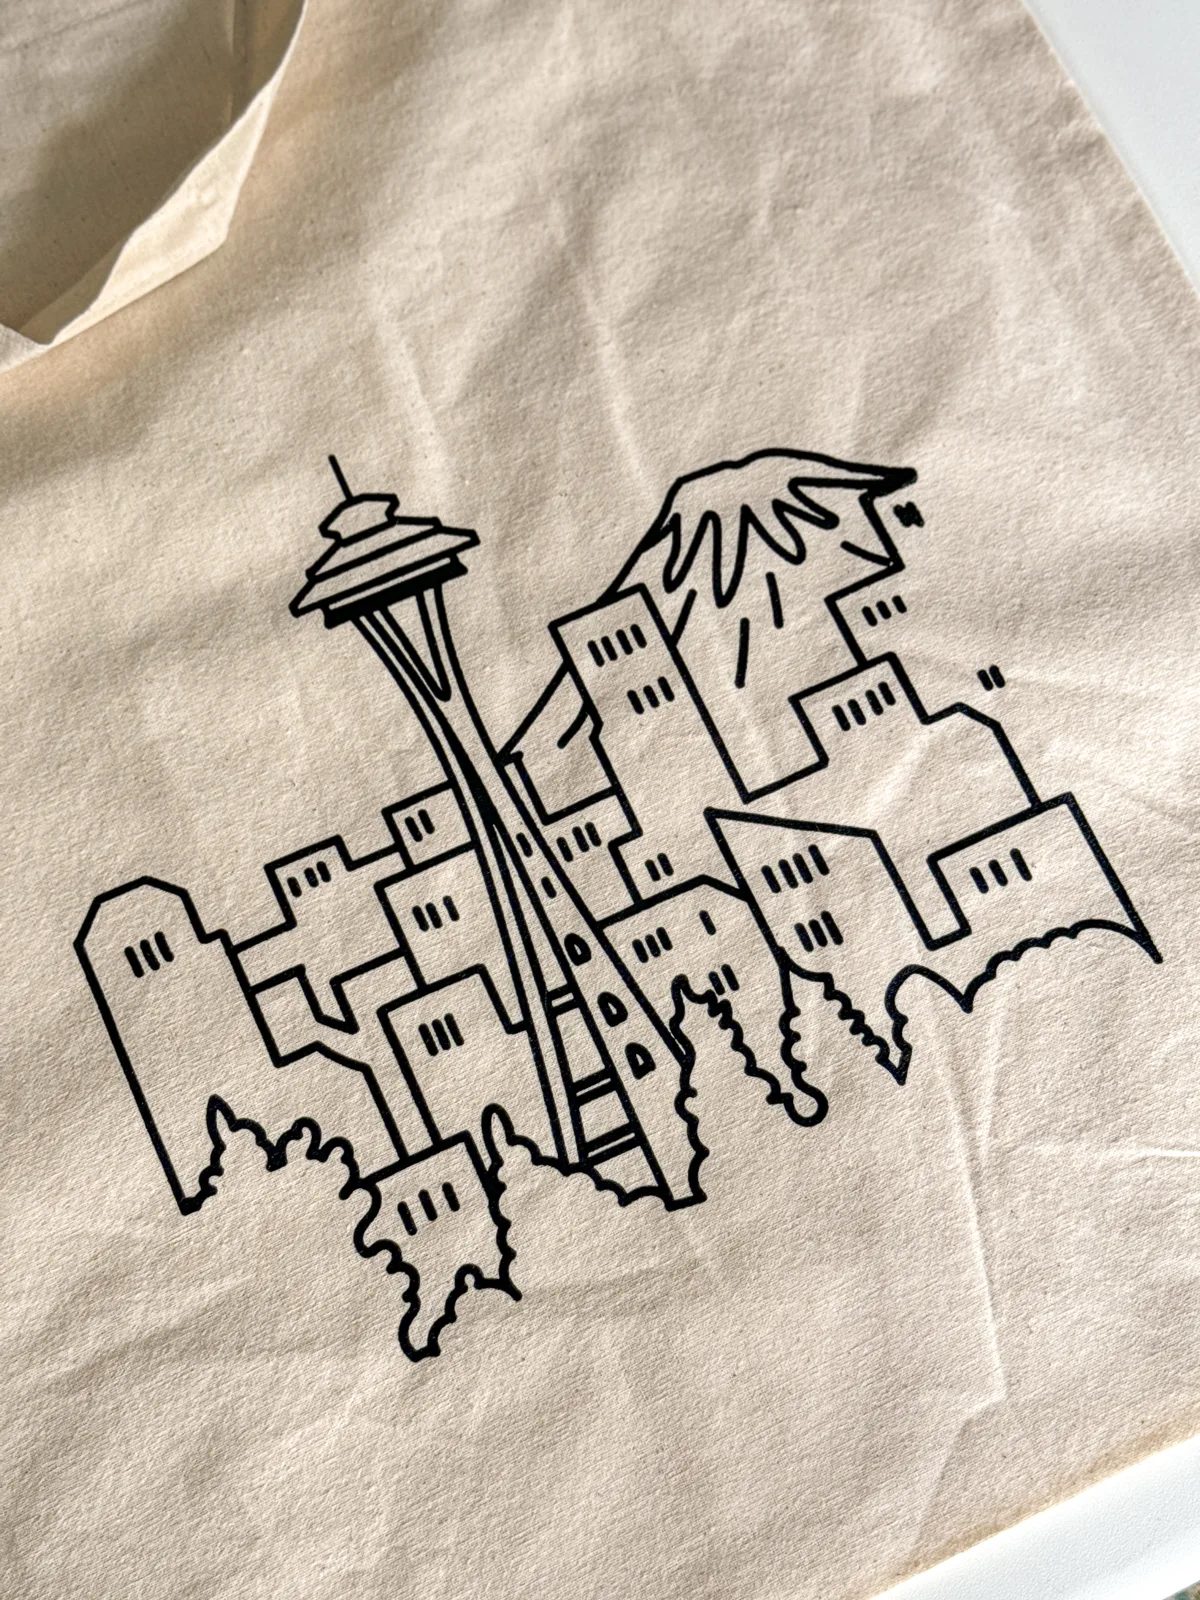
For my first design, I found this SVG of the Seattle skyline with Mt. Rainier in the background. This particular view of the city can only be seen from a tiny park on Queen Anne hill that's always filled with tourists wanting to get that "Frasier view" photo.

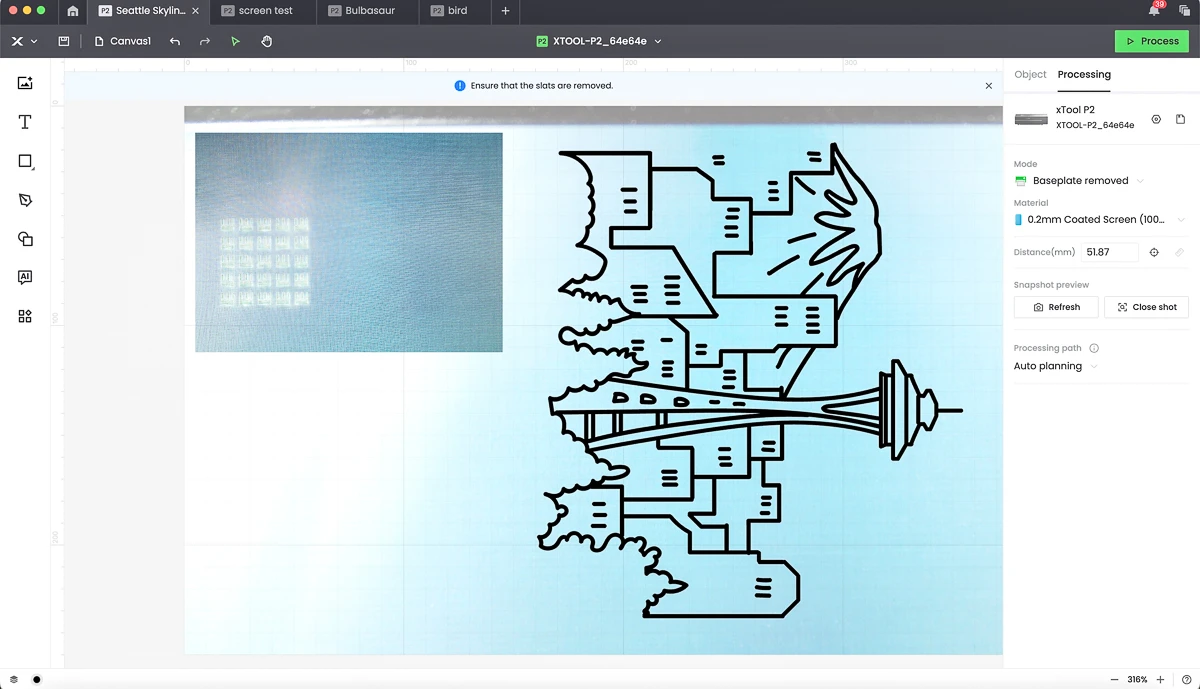
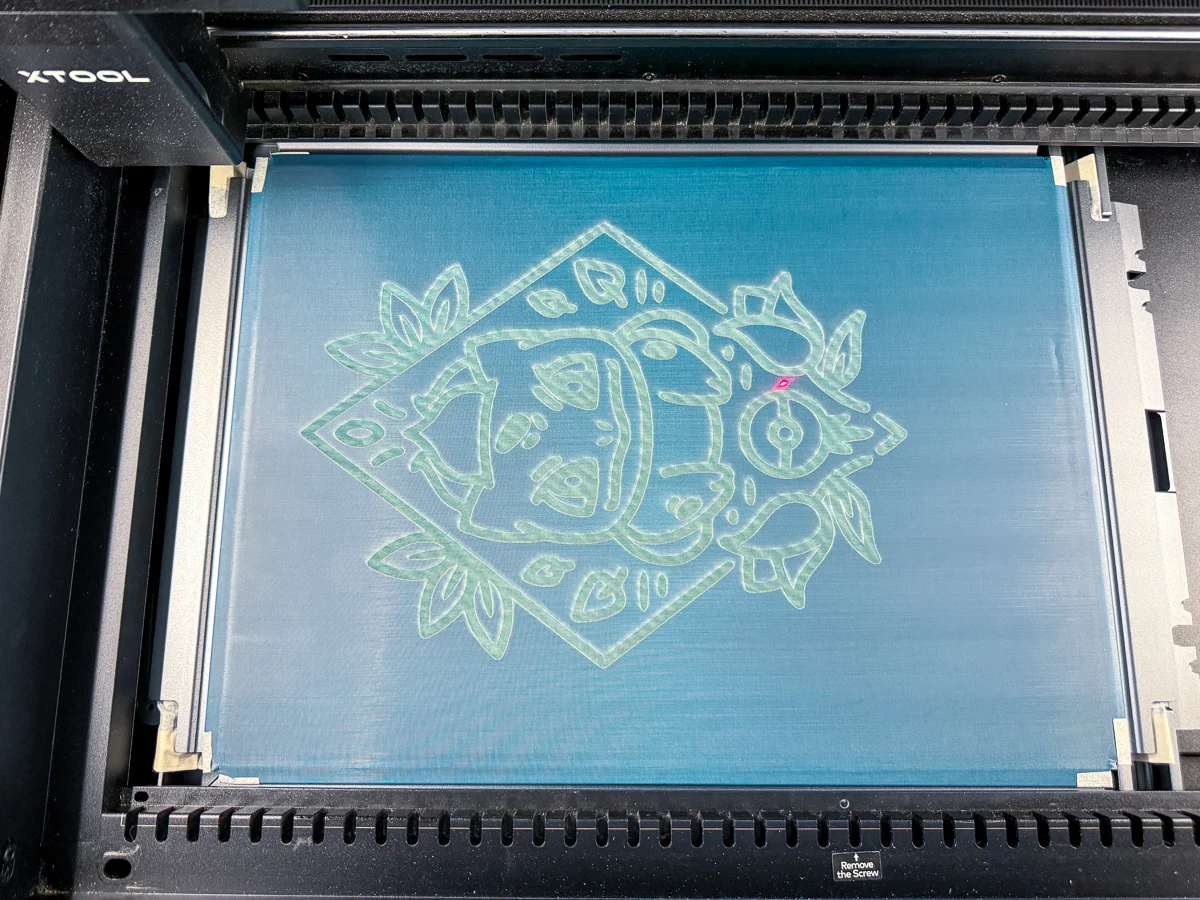
Remember that your design will be engraved on the back of the screen, so make sure to mirror your image if there's text or a specific layout you want. I used the close up camera view to make sure that the test grid was well outside the design area.
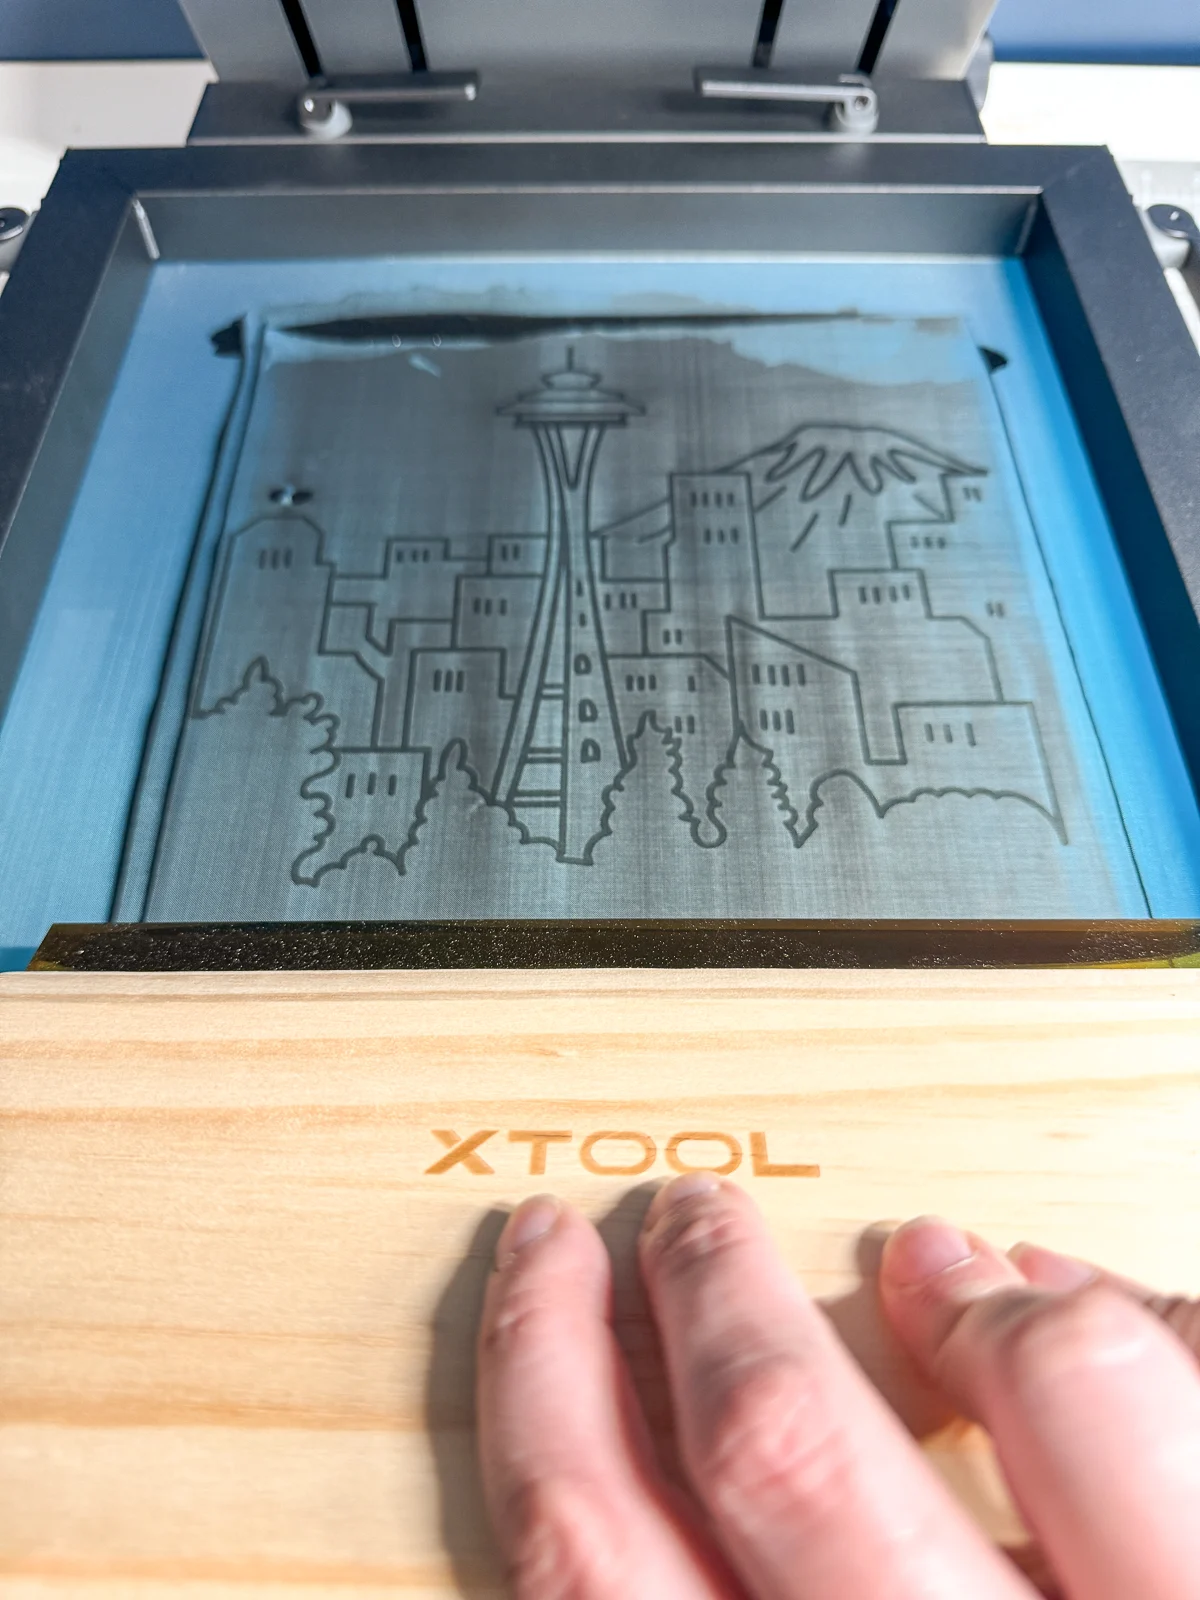
Set the material to coated screen, and click the button to have the laser measure the distance to the screen. I changed the preset settings to the ones I liked best from the test, then hit Process.
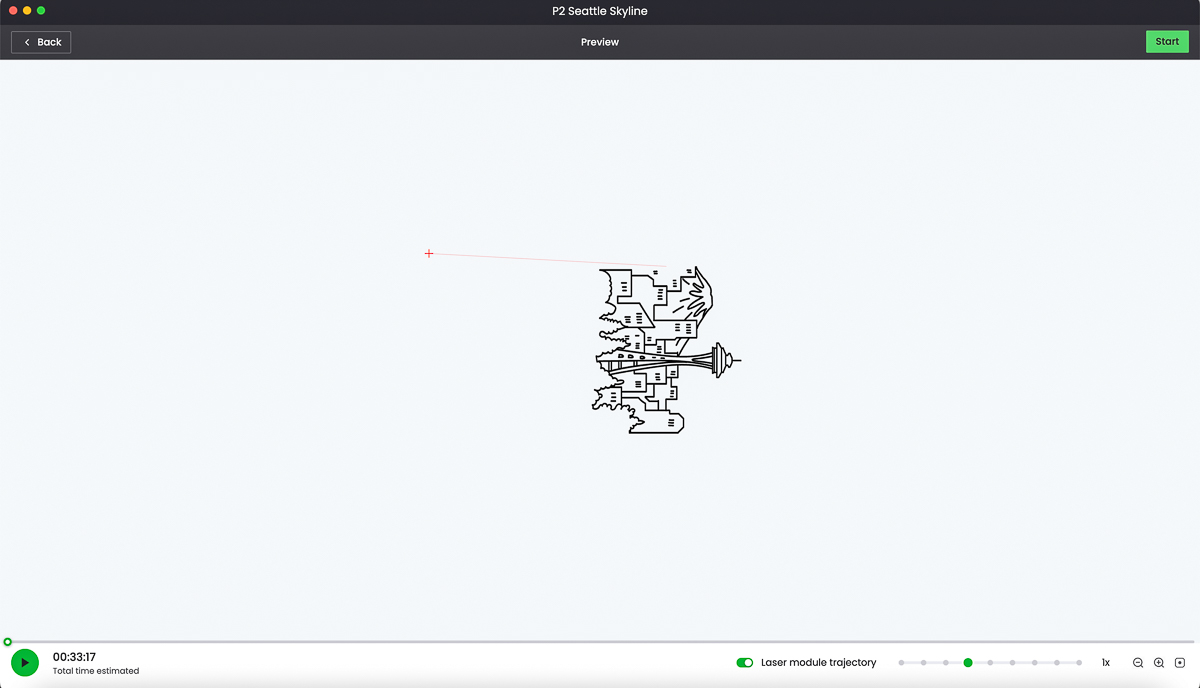
Engraving always takes a while, especially something of this size. You can see the estimated processing time in the bottom left corner is 33 minutes and 17 seconds. A diode laser would probably be much slower!

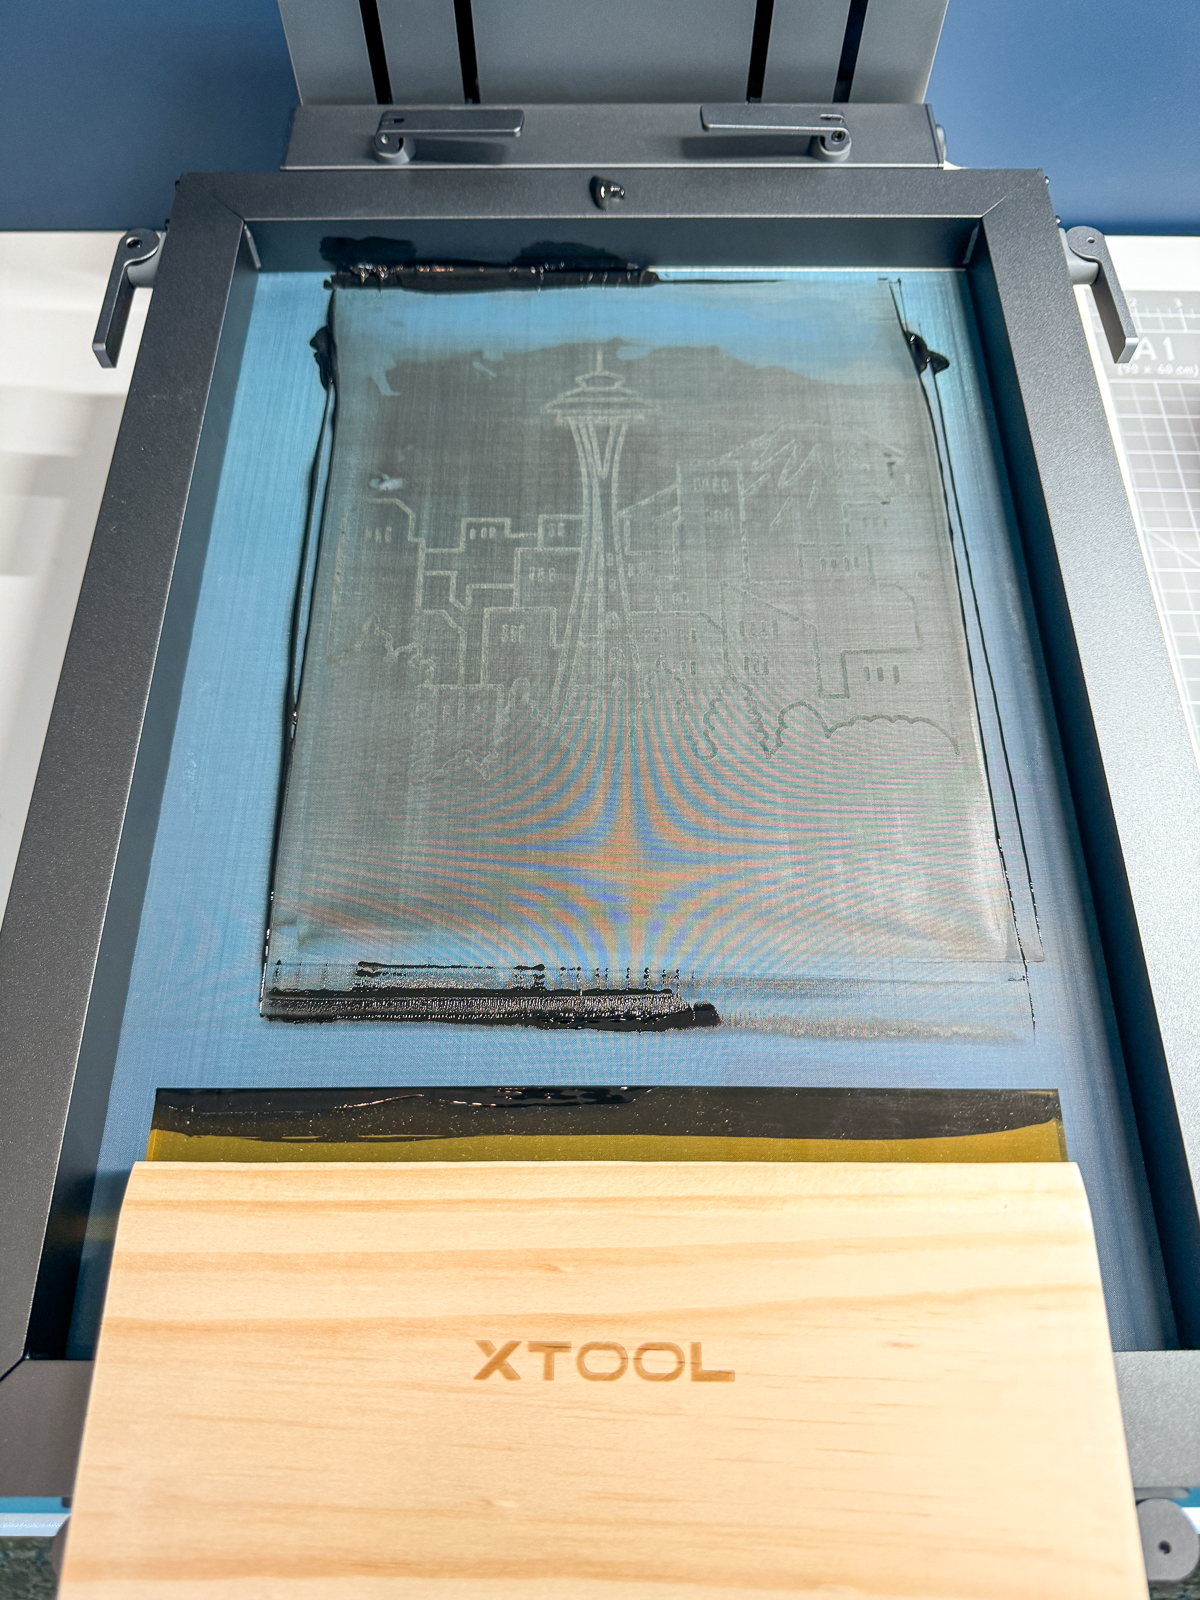
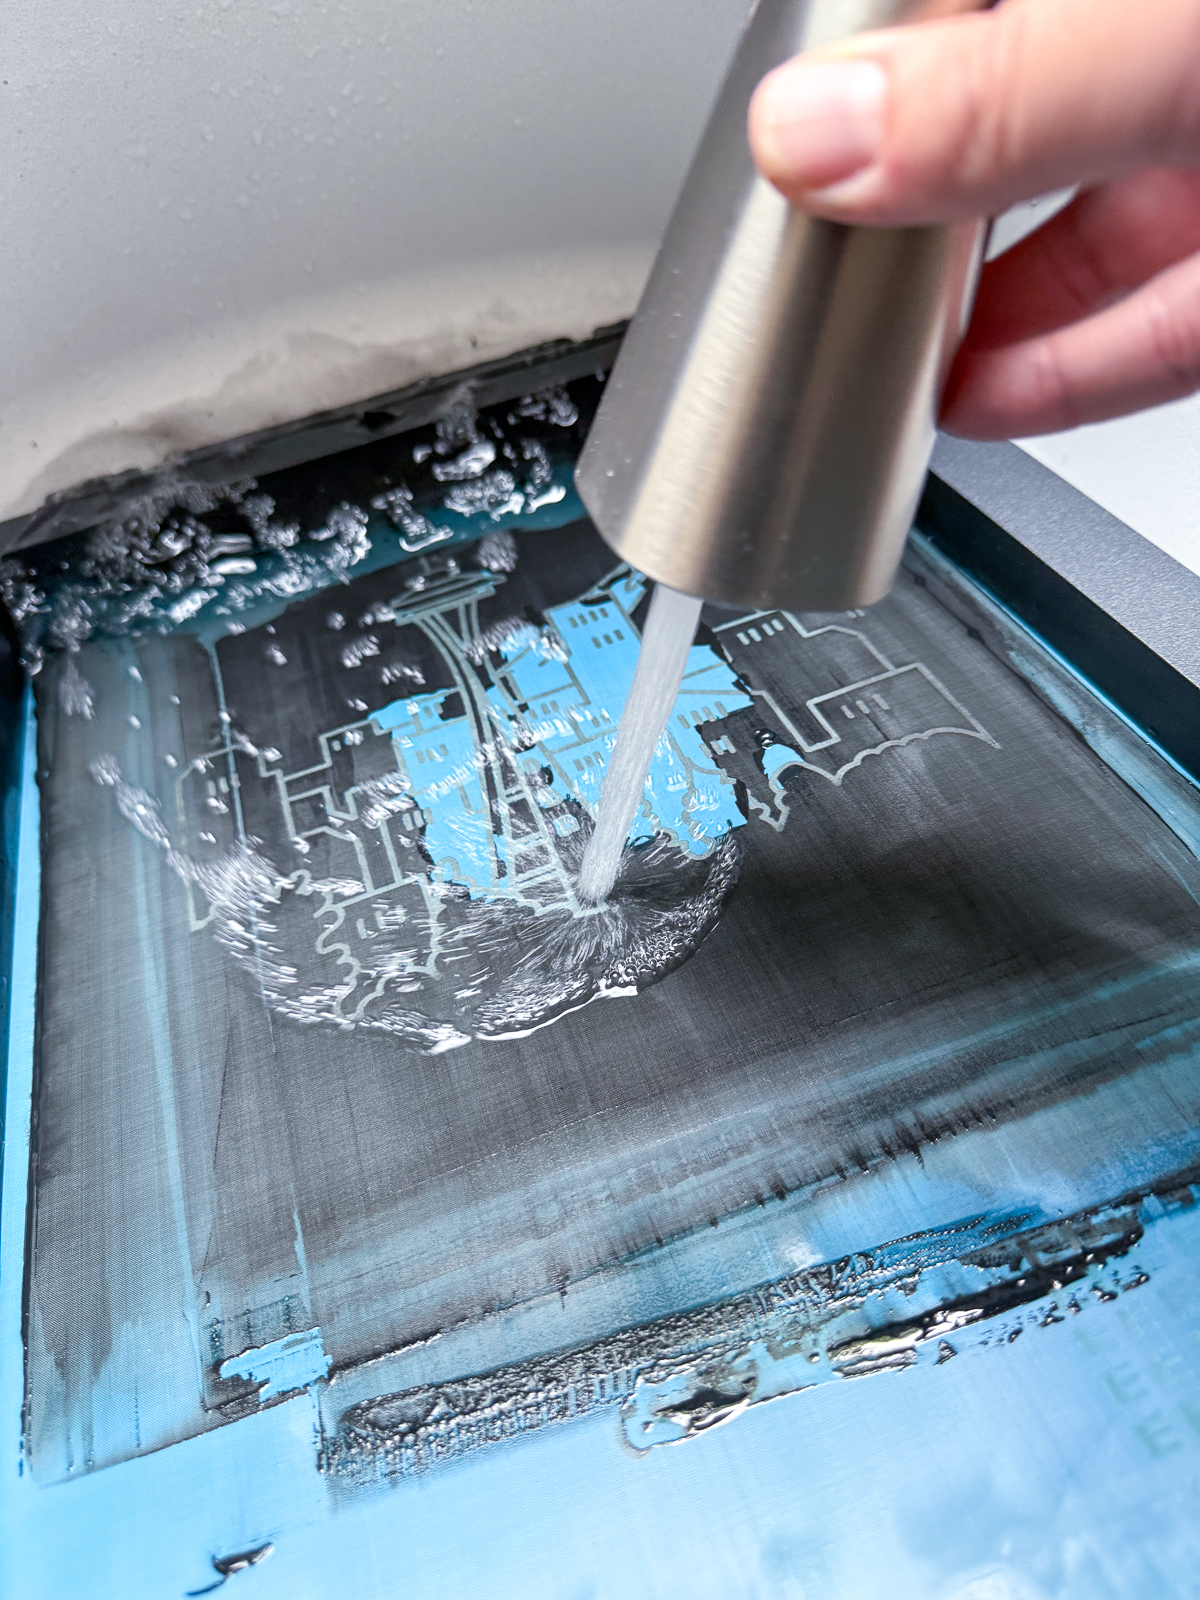
After it's done engraving, clean out any remaining emulsion from the design with compressed air. Hold the screen up to the light to check that it burned all the way through.

Print your design through the screen
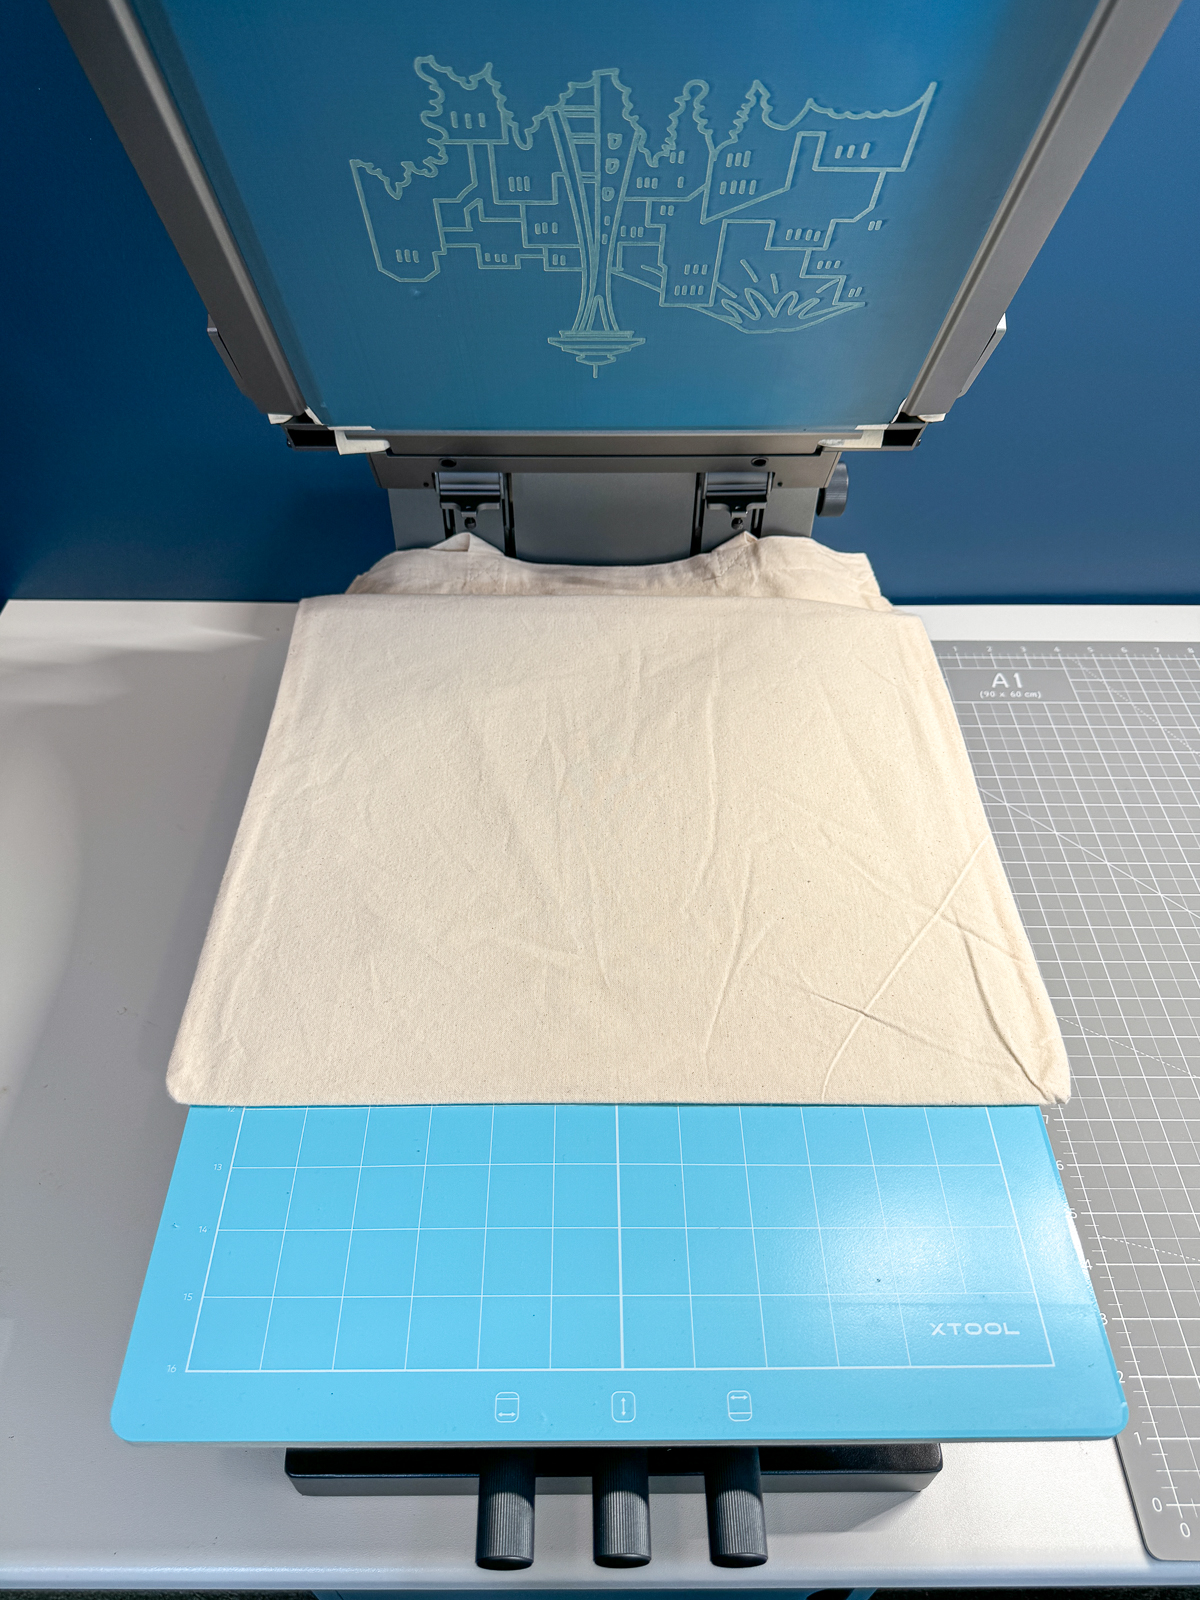
Now it's time for the fun part! Place the frame into the back of the printer and lock it into place.
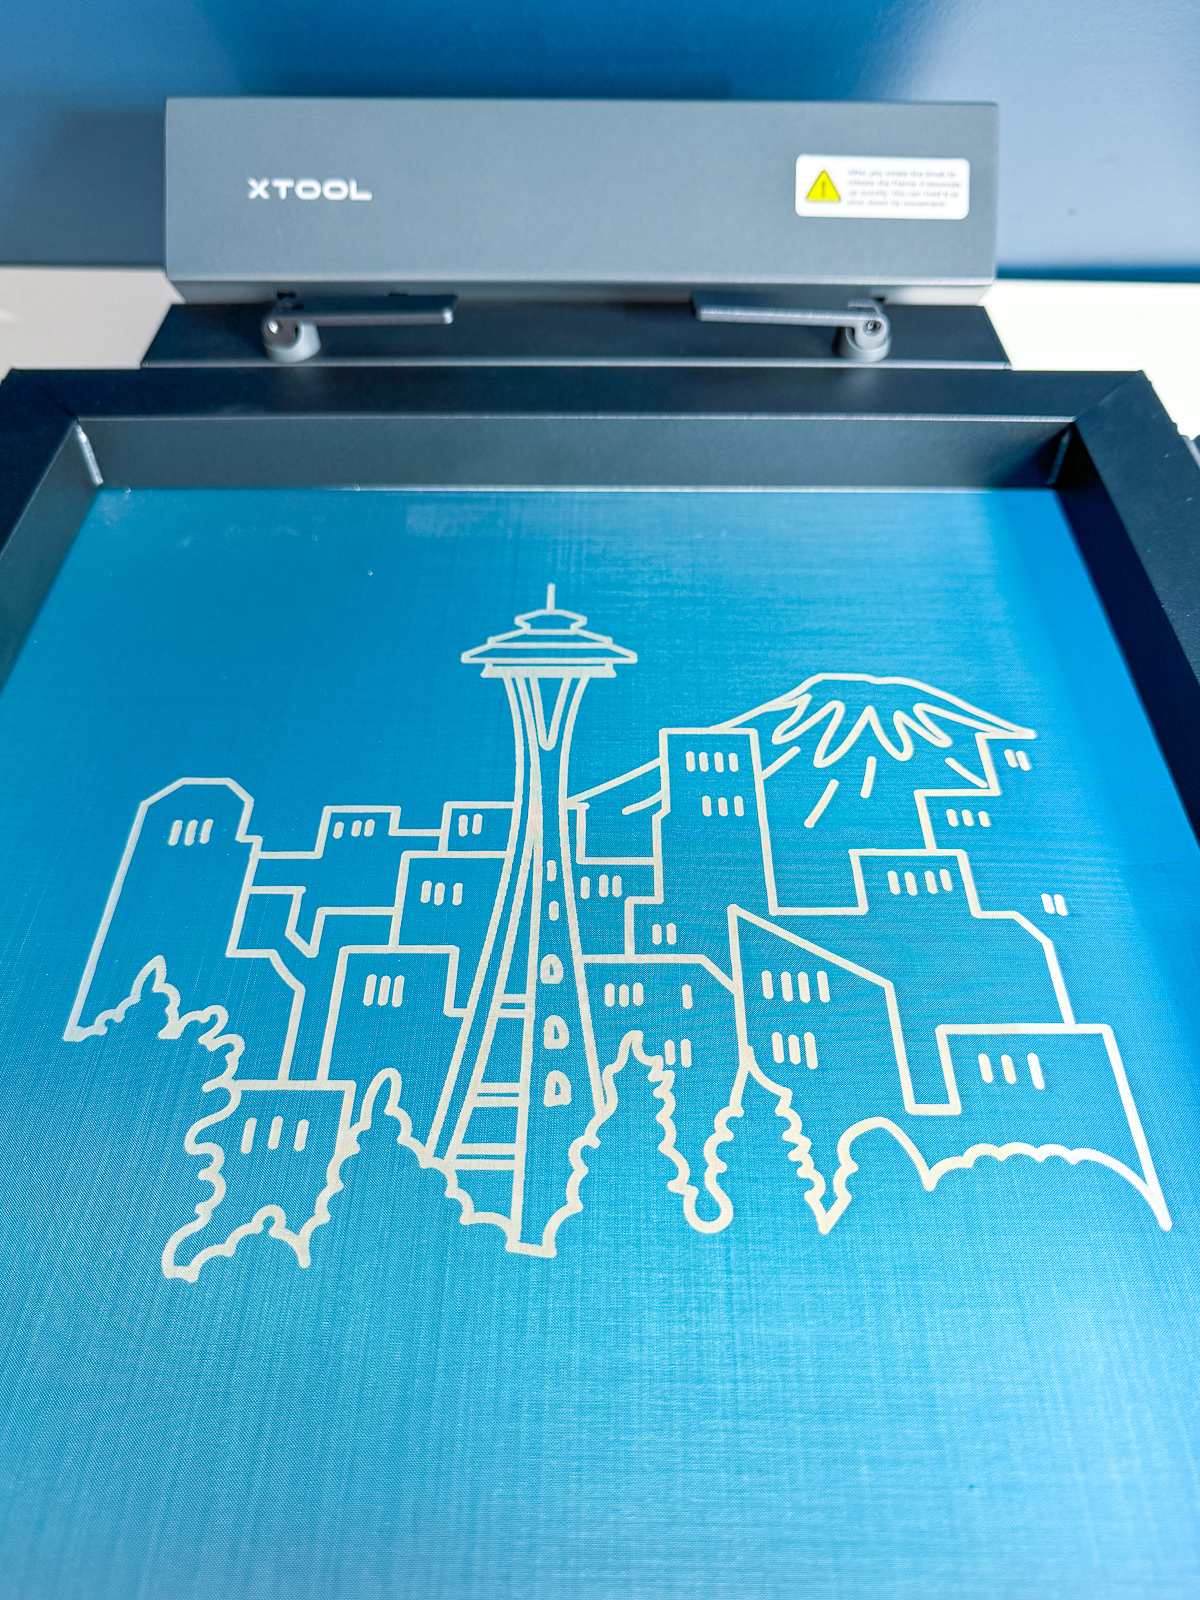
I didn't want to accidentally print the test grid, so I covered that area with painter's tape. If you have a lot of smaller designs, you can engrave them all on one screen and cover them up as needed.


I'm testing with the tote bag that comes with the screen printing kit first. After you've positioned your blank, use the knob in the back to lower the screen height down so it hovers just above the surface. You can also fine tune the position of the bottom plate with the knobs in the front.

Give the ink a good stir with the spatula, then spread it across the top of the screen. Make sure the ink spans the entire design, and you have enough to cover all the engraved areas.

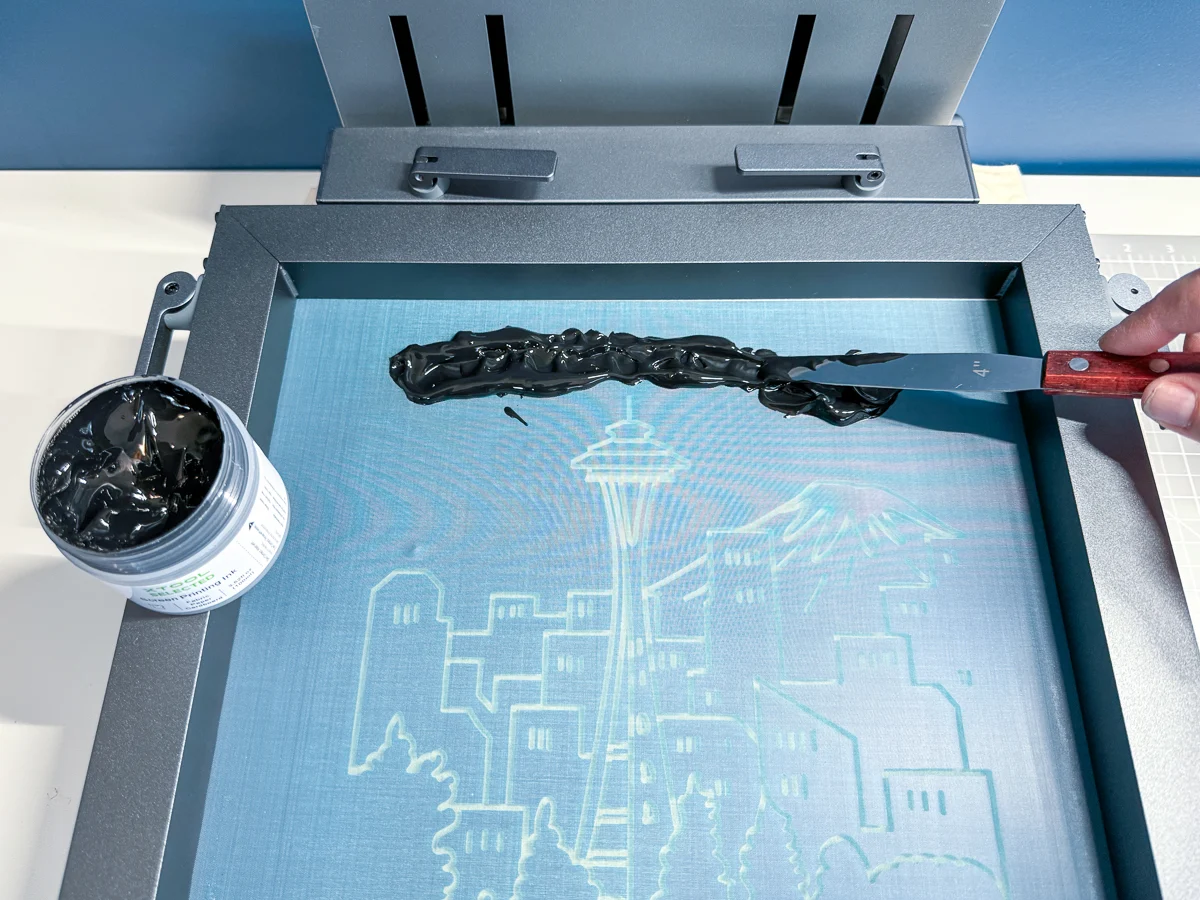
One way to avoid inconsistent ink coverage in your print is to flood the screen first. This fills the mesh with ink, so the next print flows through easily.
Use the squeegee to quickly pull the ink across the screen without pressing on the blank below. Then you can use the spatula to scrape the ink off the squeegee across the top and use it again to print the screen.

Use both hands to apply even pressure with the squeegee across the entire design. You want to press fairly hard so all the ink transfers through.
One great feature of the xTool screen printer is that the squeegee is magnetic so you can stick it on the front of the screen when you're done. This keeps your work area clean and ink-free!
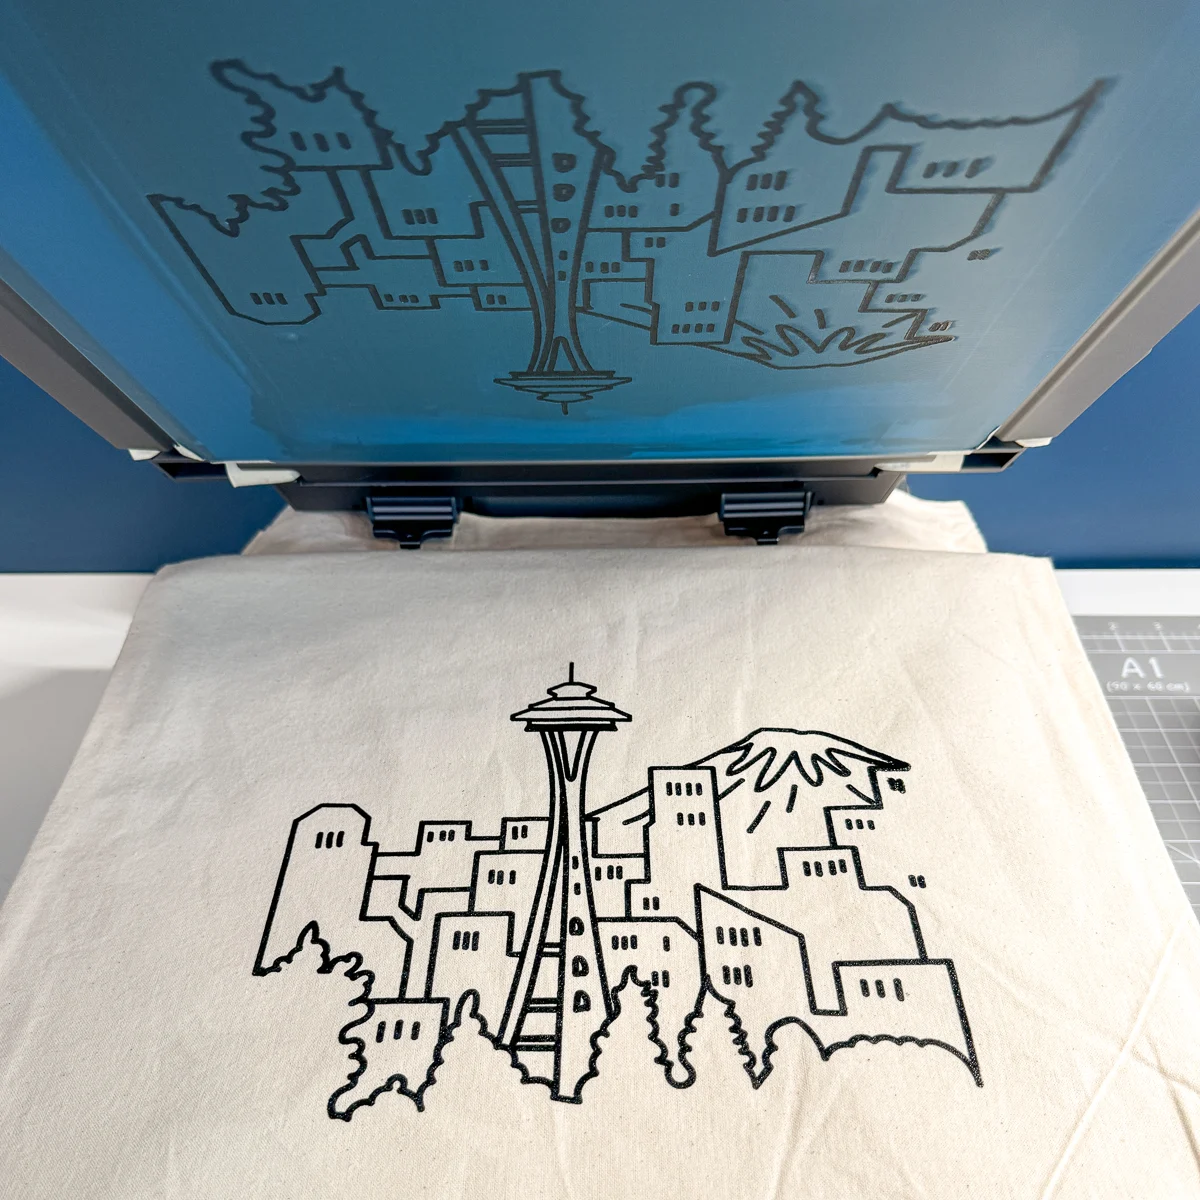
My first screen print came out almost perfect! I didn't apply quite enough pressure on the right side, so there was a couple of light spots.

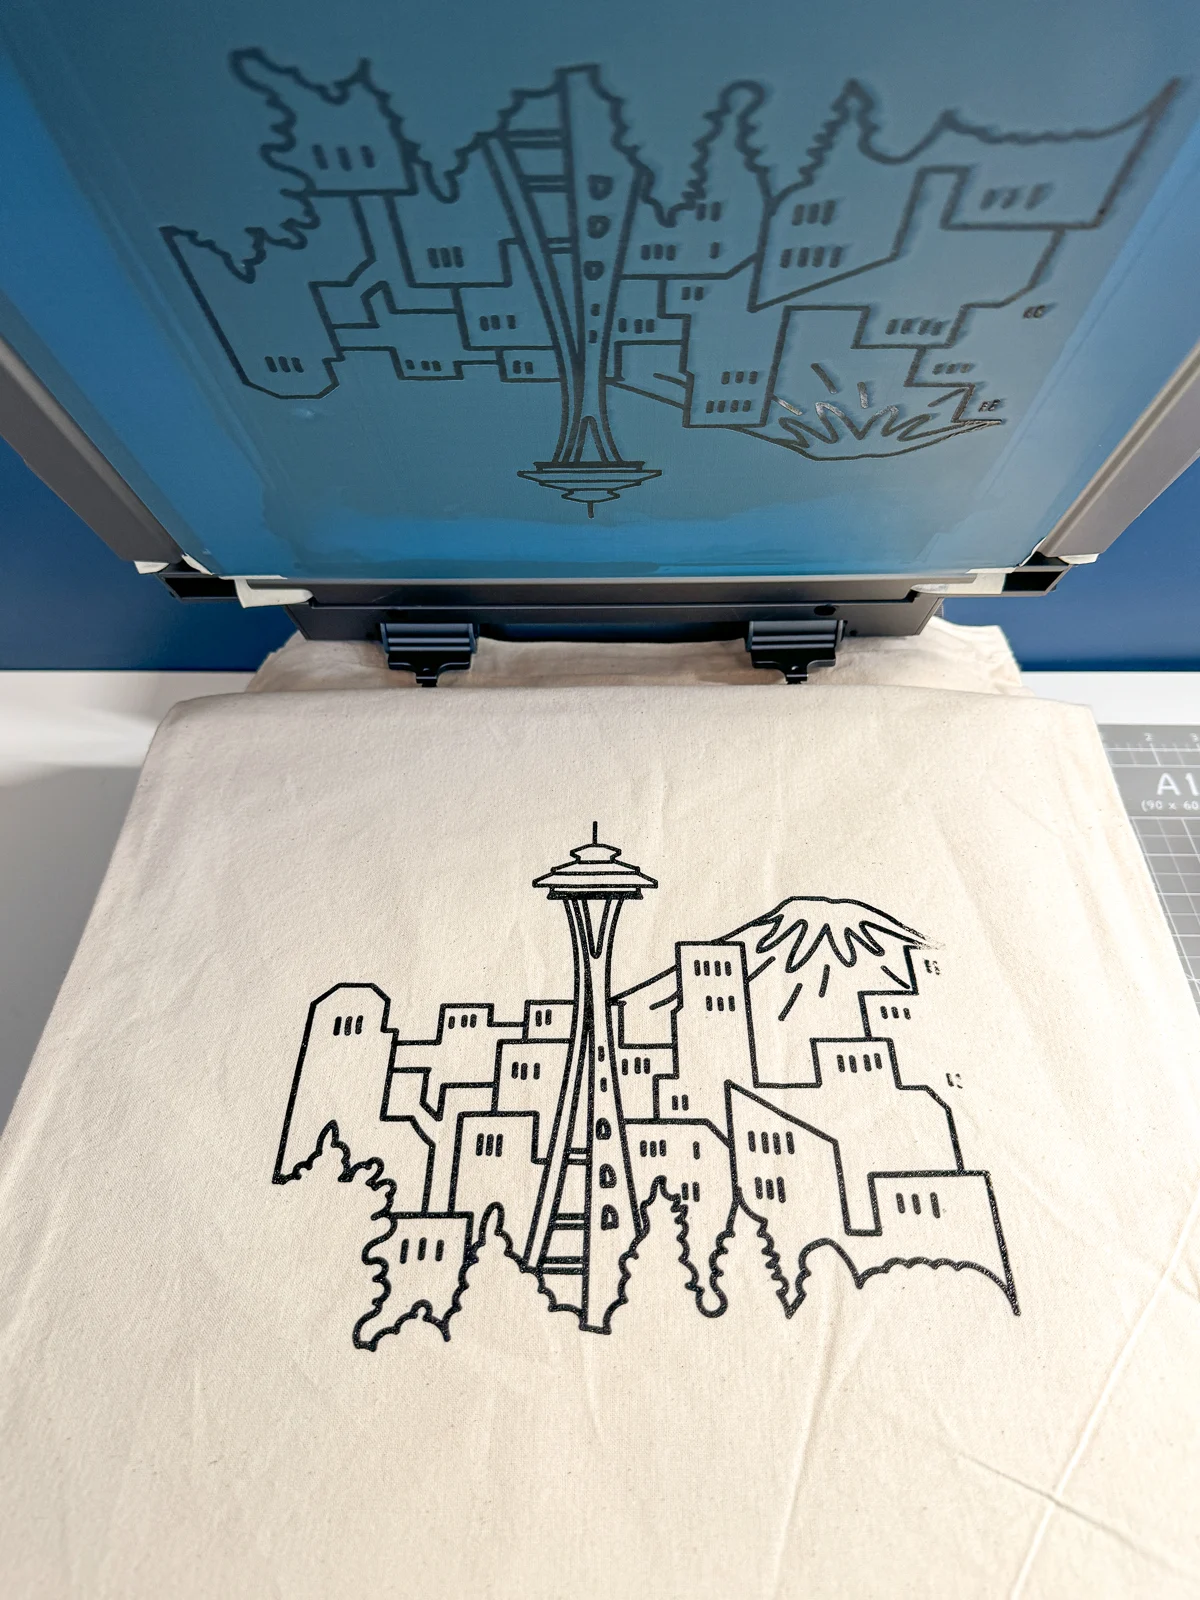
The sticky mat underneath kept the fabric in place, so I was able to apply a bit more ink to just that section of the screen and fill in the empty spots. There's a little too much ink in the corner of the mountain, but otherwise it turned out great!

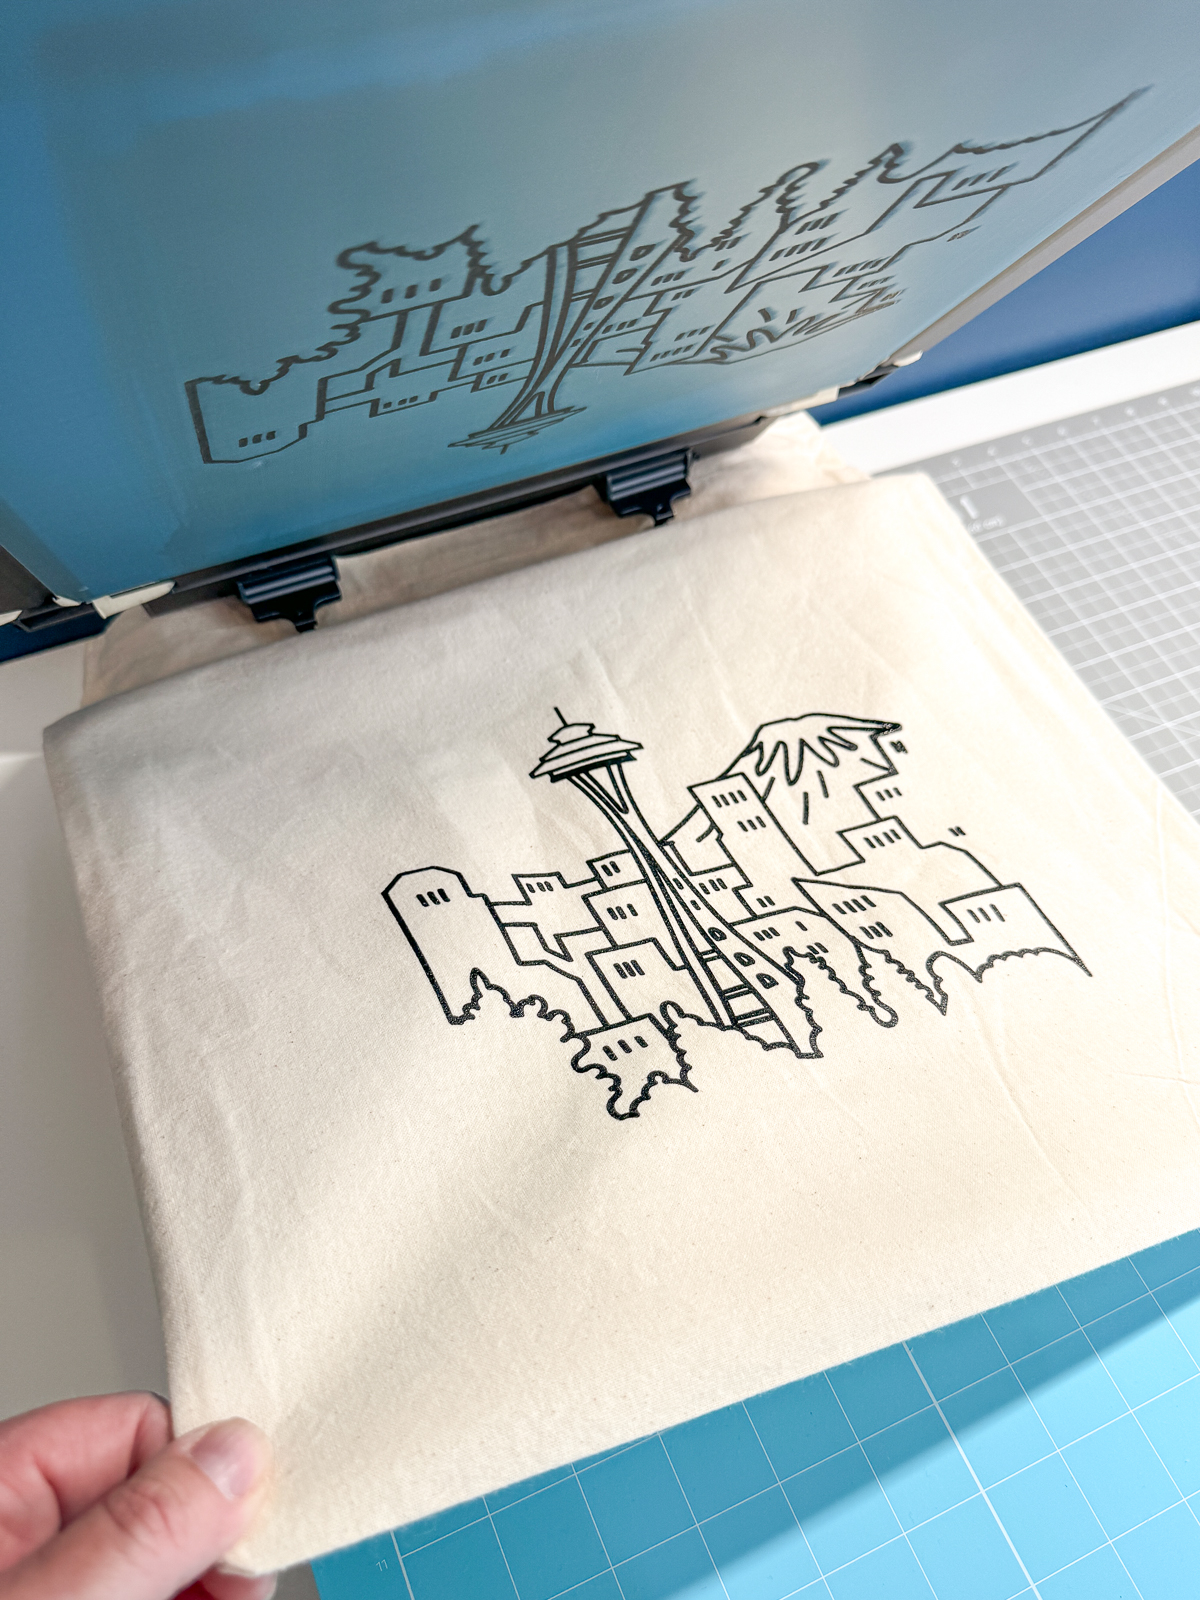
Carefully pull the blank off the sticky mat. You don't want it to touch anything and smudge the ink!

Set it aside to dry. You can use a heat gun or hair dryer to speed up the process, but I just draped it over a chair until it was dry to the touch. You'll want to wait 48 hours before washing a t-shirt or other garment.

Clean the screen
You can get several prints done with one screen before the ink starts to dry in the mesh. If you're doing a run of t-shirts or bags and notice that the print is starting to show blank spots, it's time to wash the screen.
The xTool screen printing ink is water-based, and cleans up easily with water. I used the sprayer in my kitchen sink to blast away most of the ink, then wiped off the stubborn spots with a paper towel.
Allow the screen to dry thoroughly before you print again. You don't want to dilute the ink and ruin your next batch!
Screen printing t-shirts
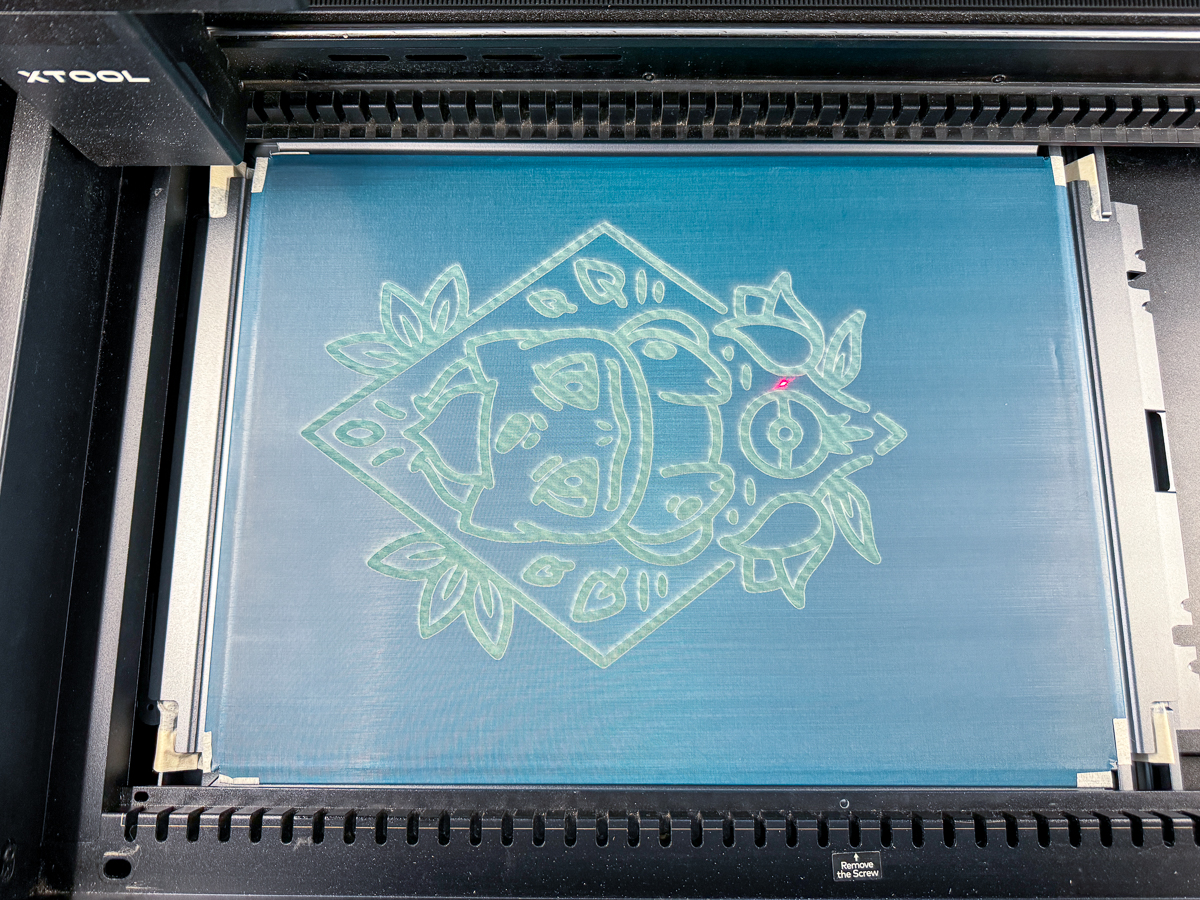
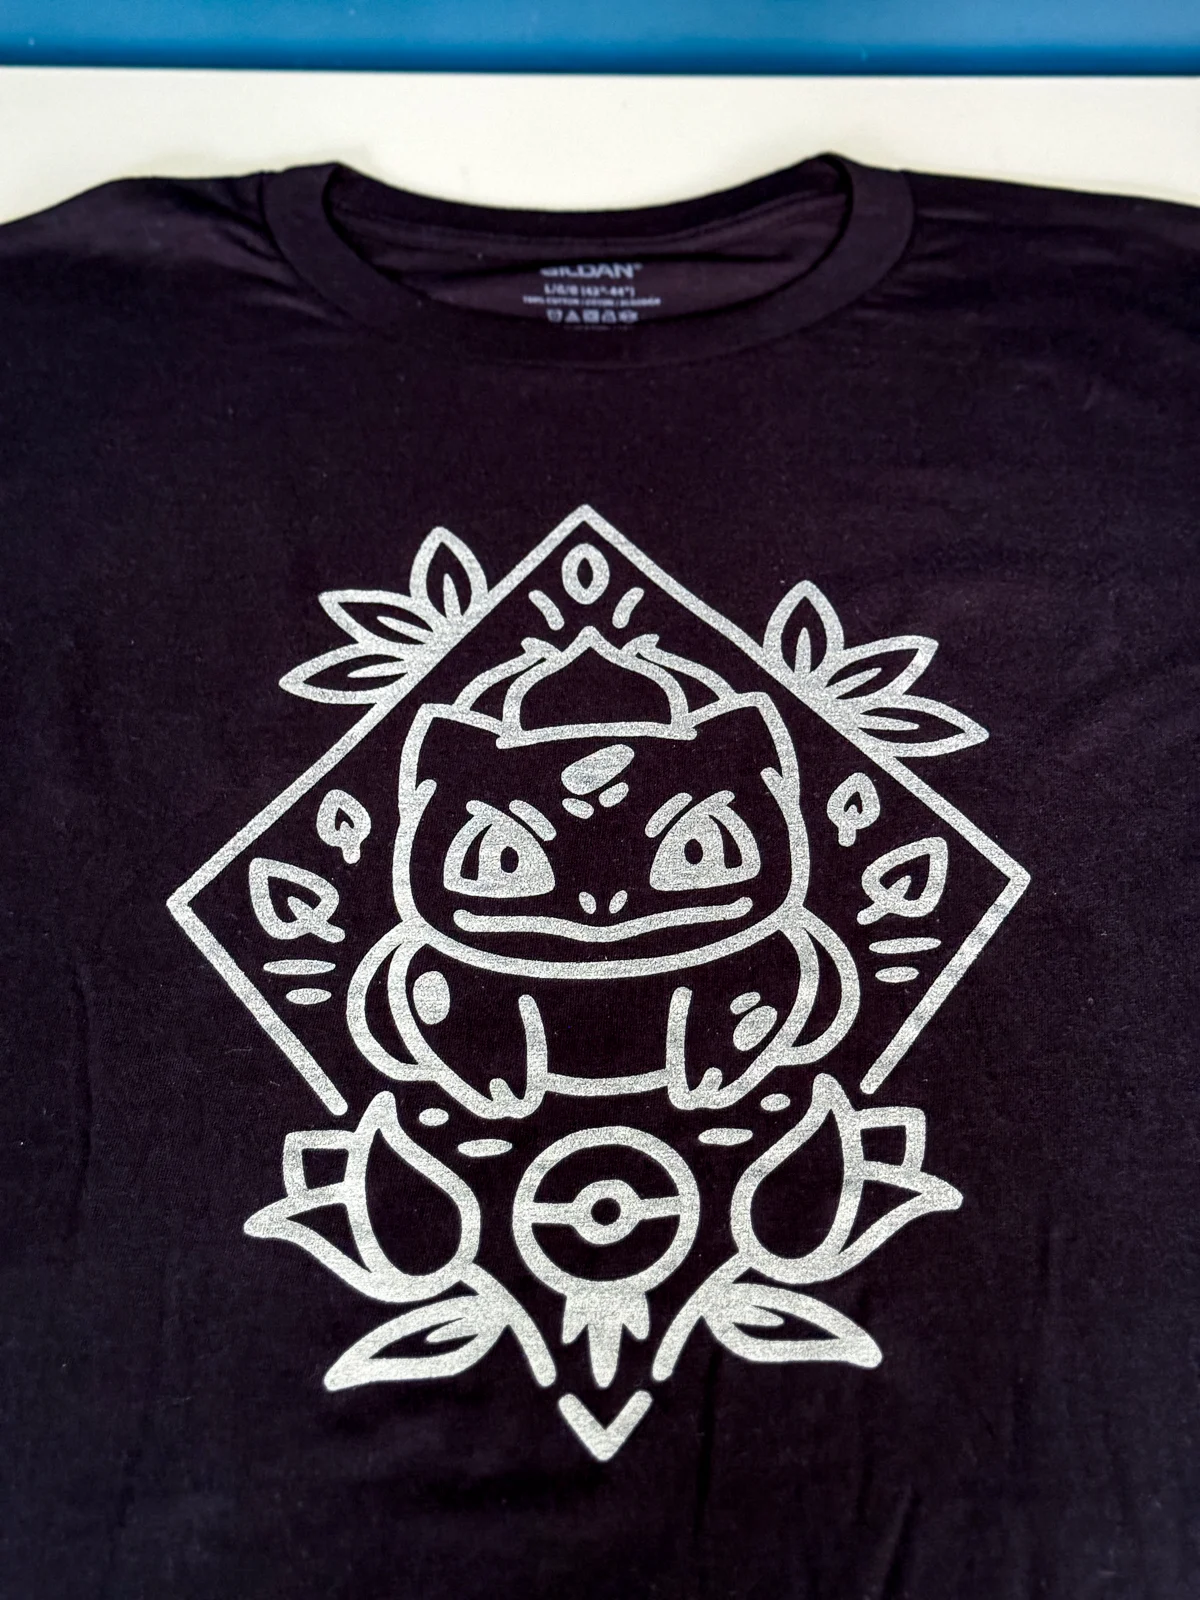
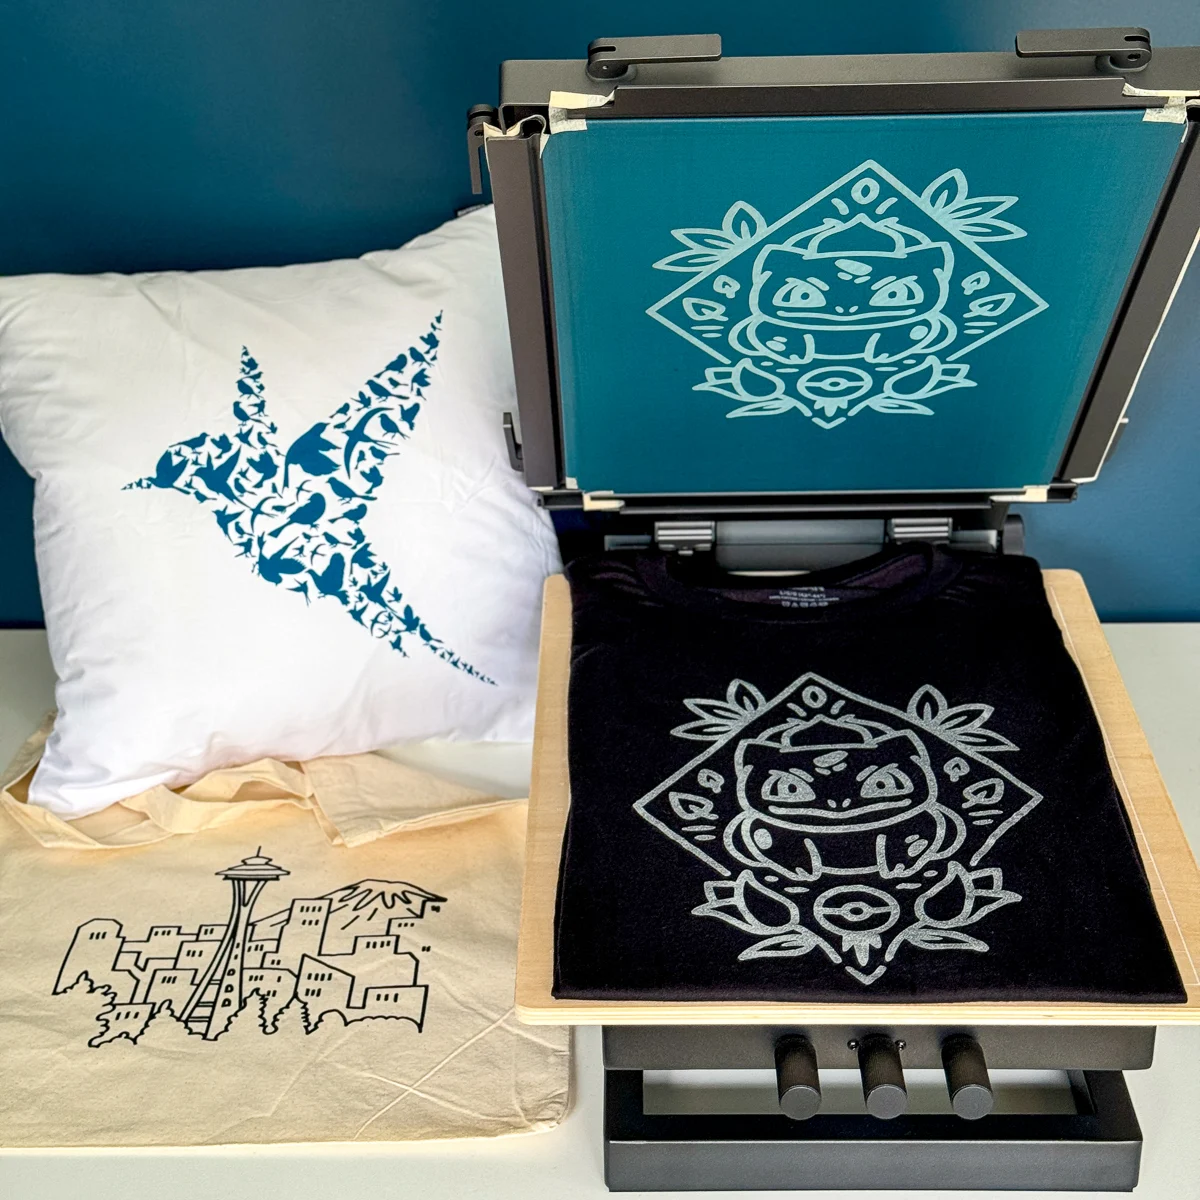
One of the things I'm most excited about with this DIY screen printing kit is the ability to make my own t-shirts. My entire wardrobe consists of nothing but travel and Pokemon t-shirts. Now I can print my own!
I purchased this cute Bulbasaur SVG on Etsy that would be perfect for a t-shirt. I realized when I printed the tote bag that it would be easier to have the design facing away from the hinge, so I rotated the image before engraving.
The design slightly off-center on the screen, so I had to adjust the t-shirt on the mat to line up properly. I used this t-shirt ruler to get the correct placement.

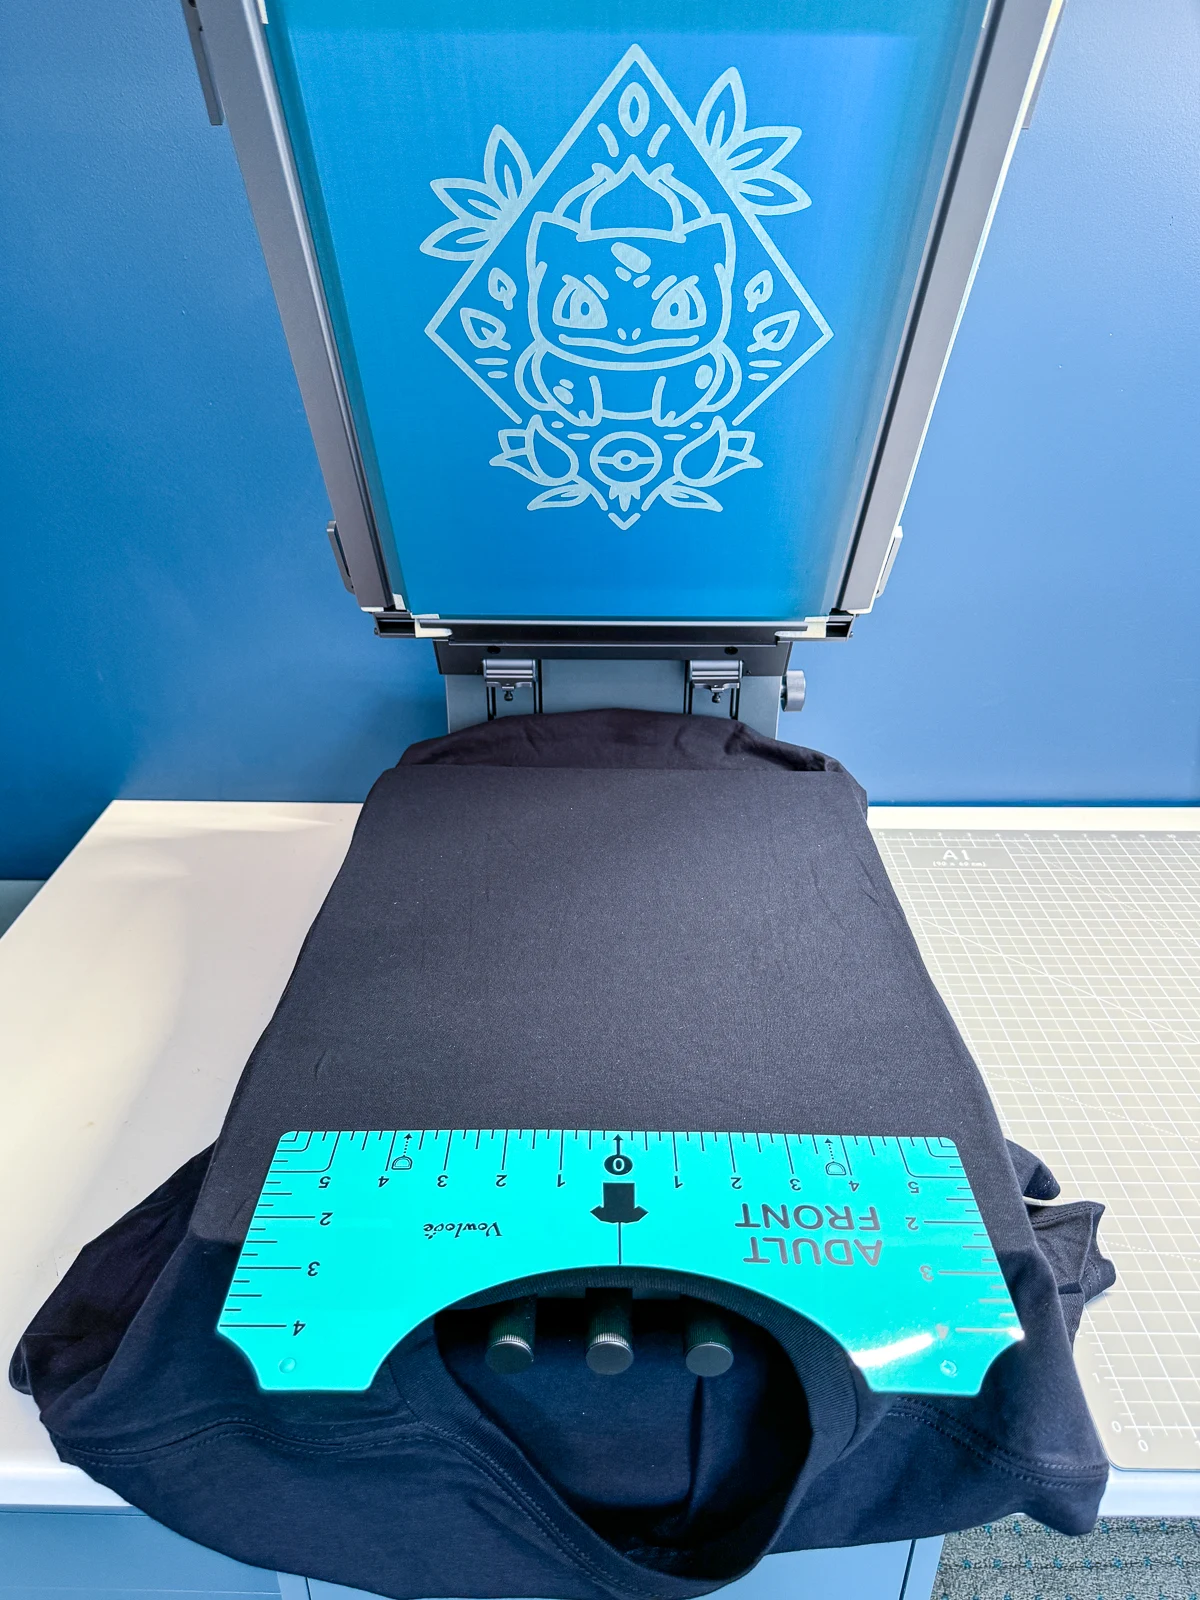
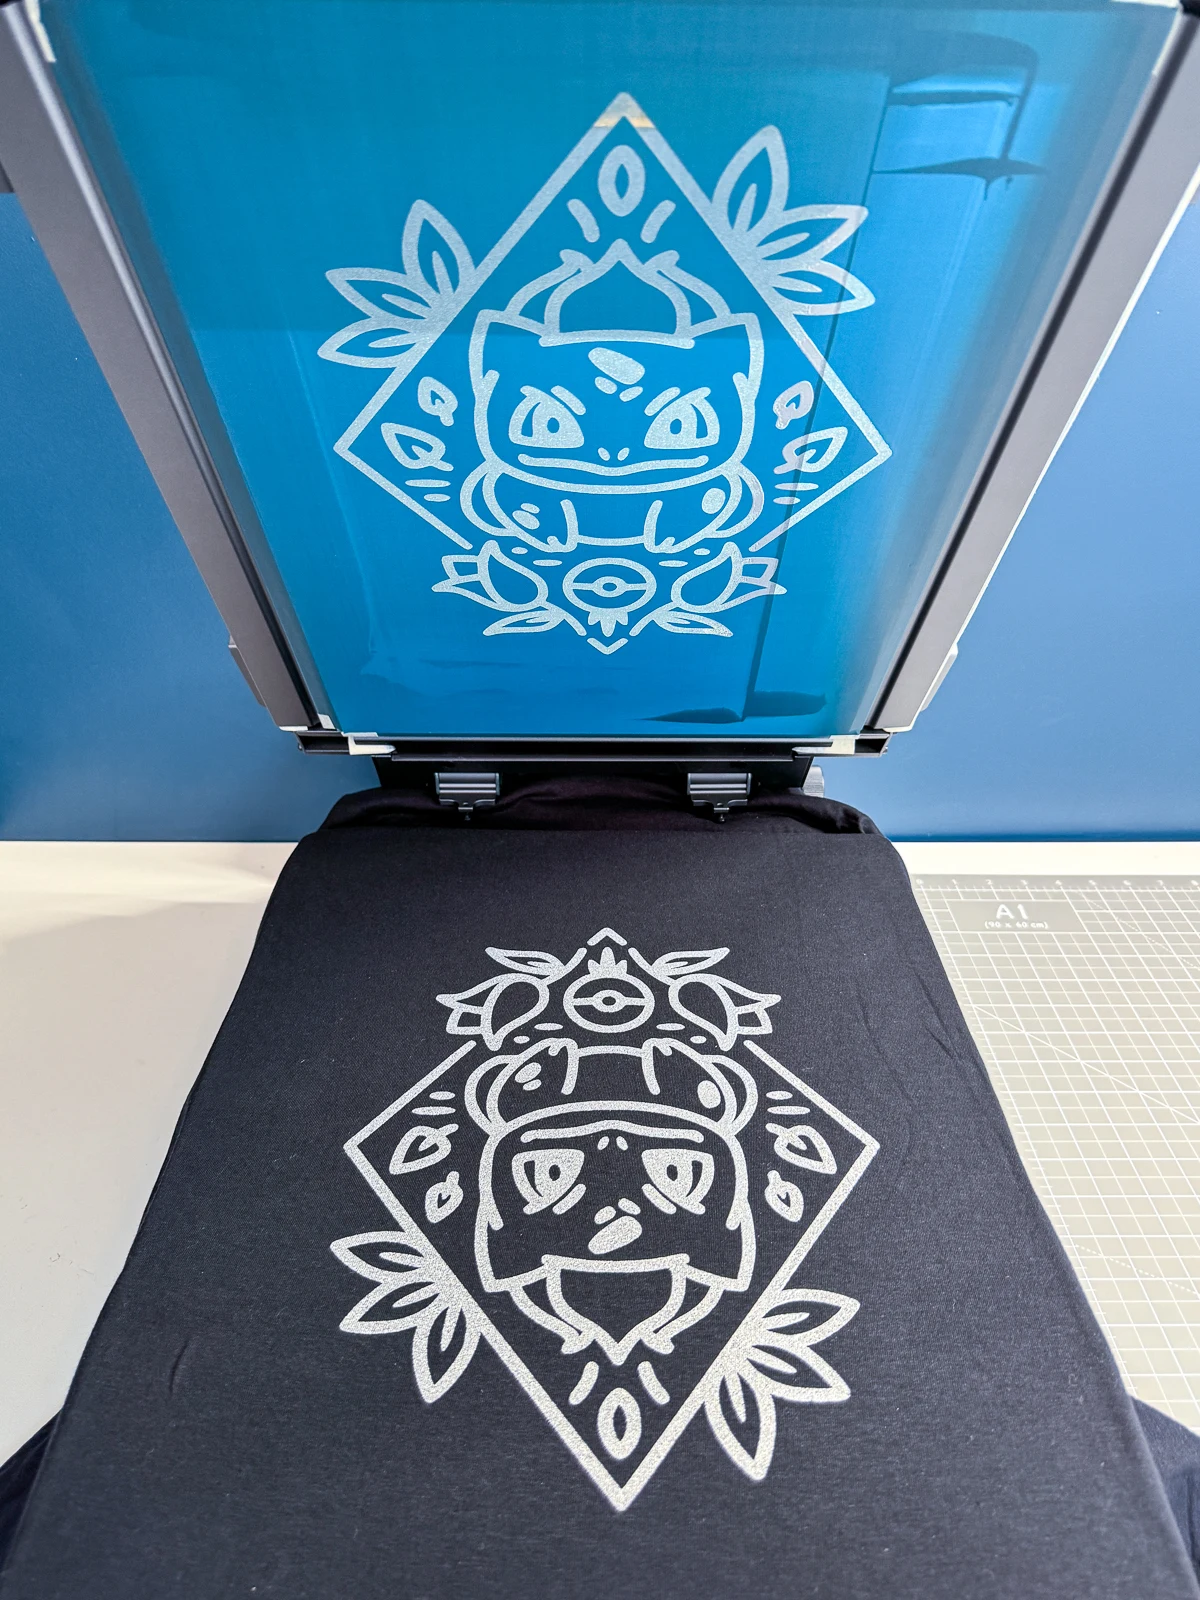
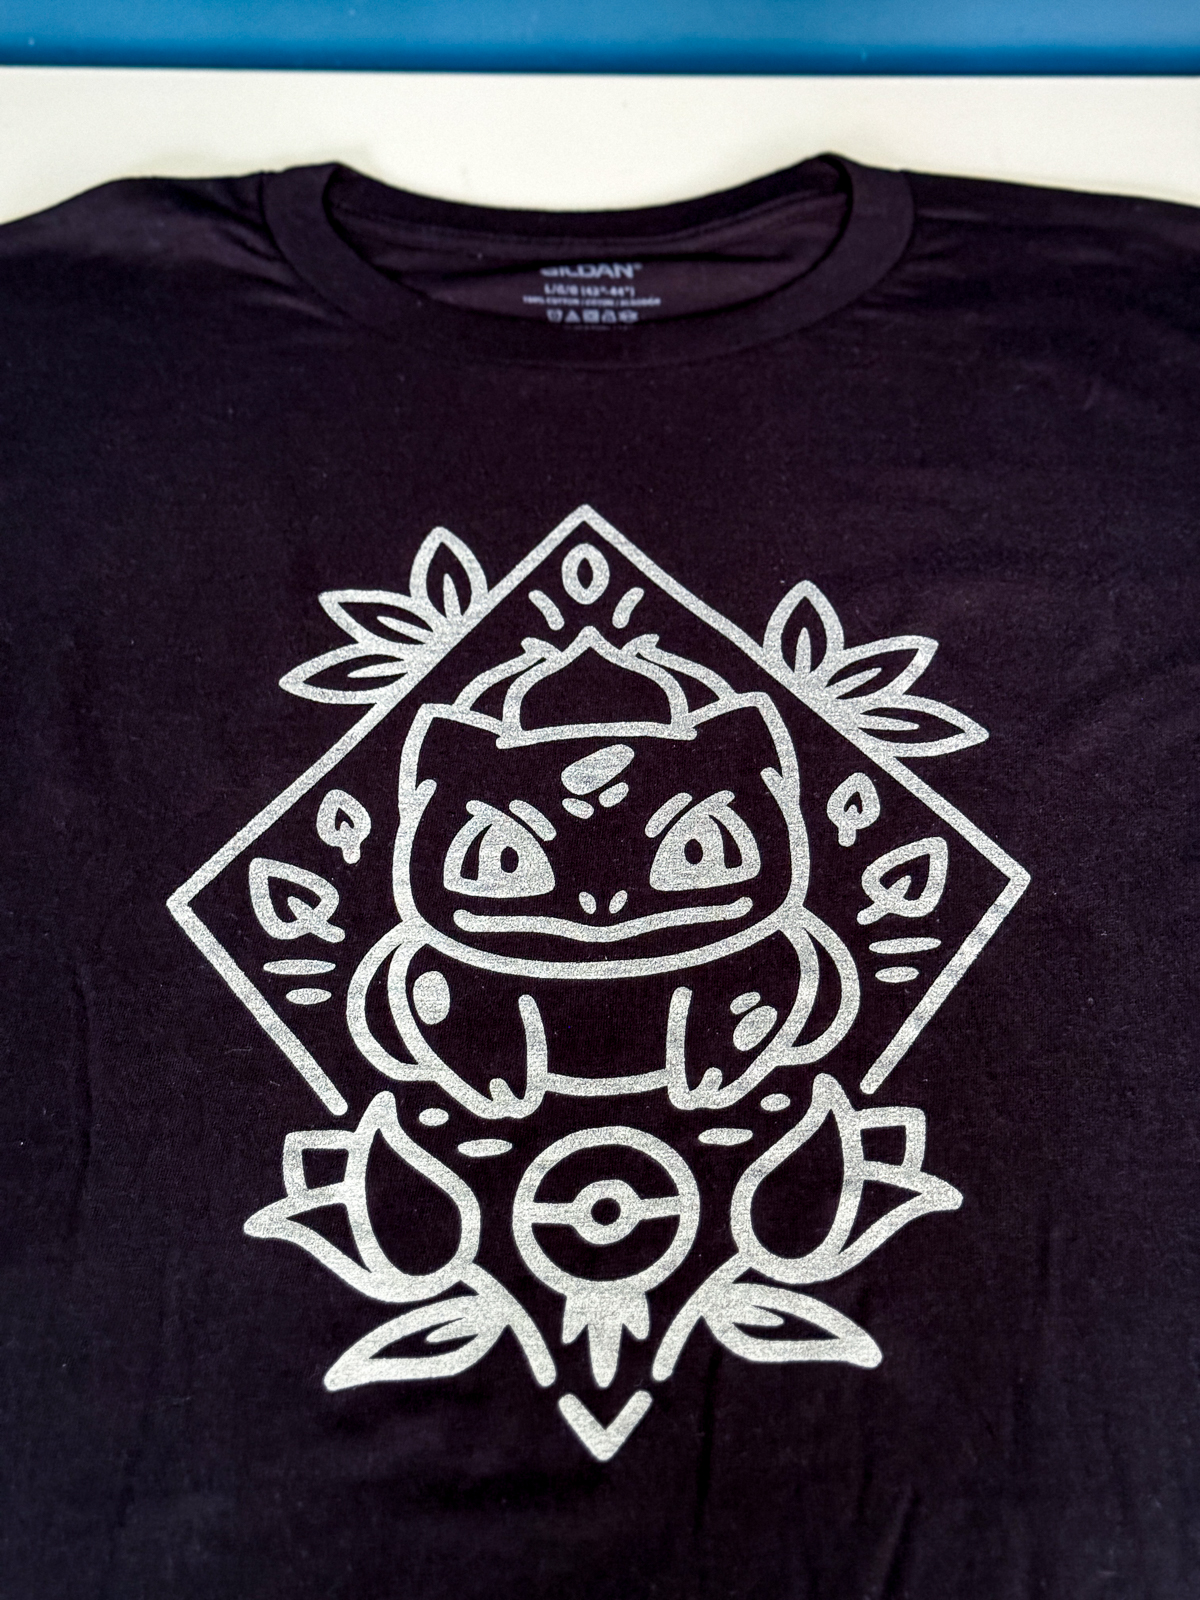
This time, I used the silver ink from the kit so it would show up on the black fabric. It turned out perfect on the very first try!

This DIY screen printer would be a great option for custom t-shirts for kids sports teams or clubs that don't want to order hundreds of items to meet the minimum print orders at a professional shop. Just engrave one screen and print enough for everyone!
Screen printing intricate details
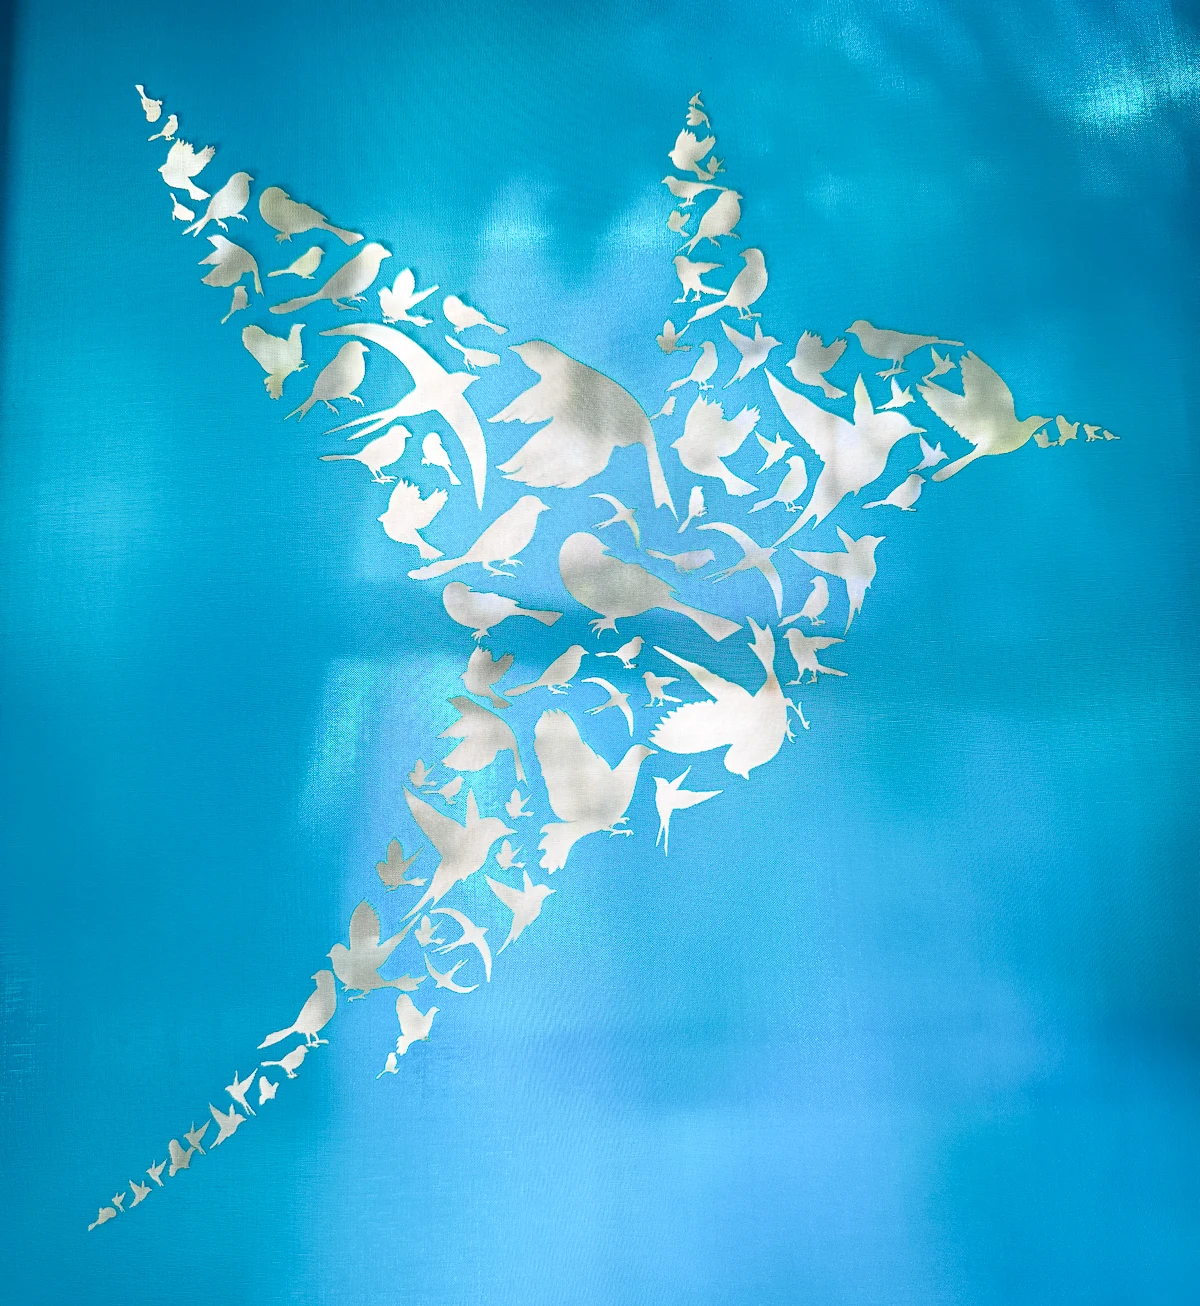
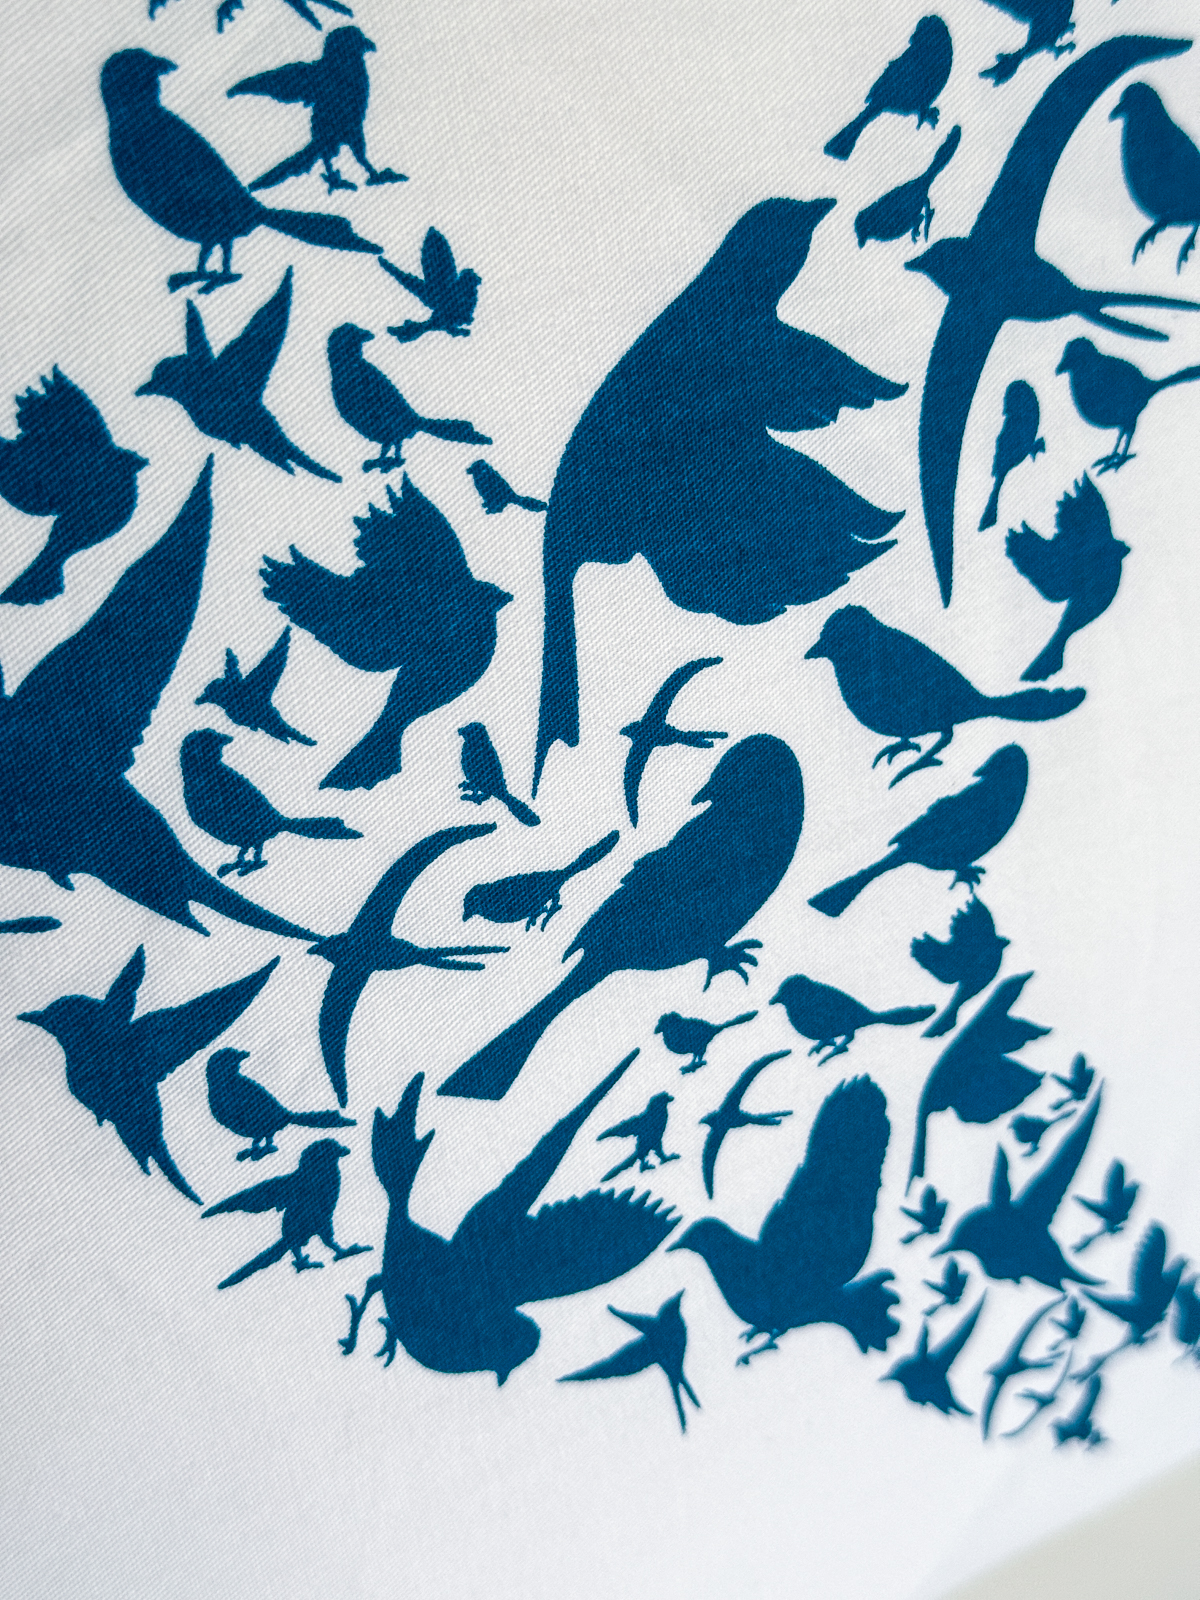
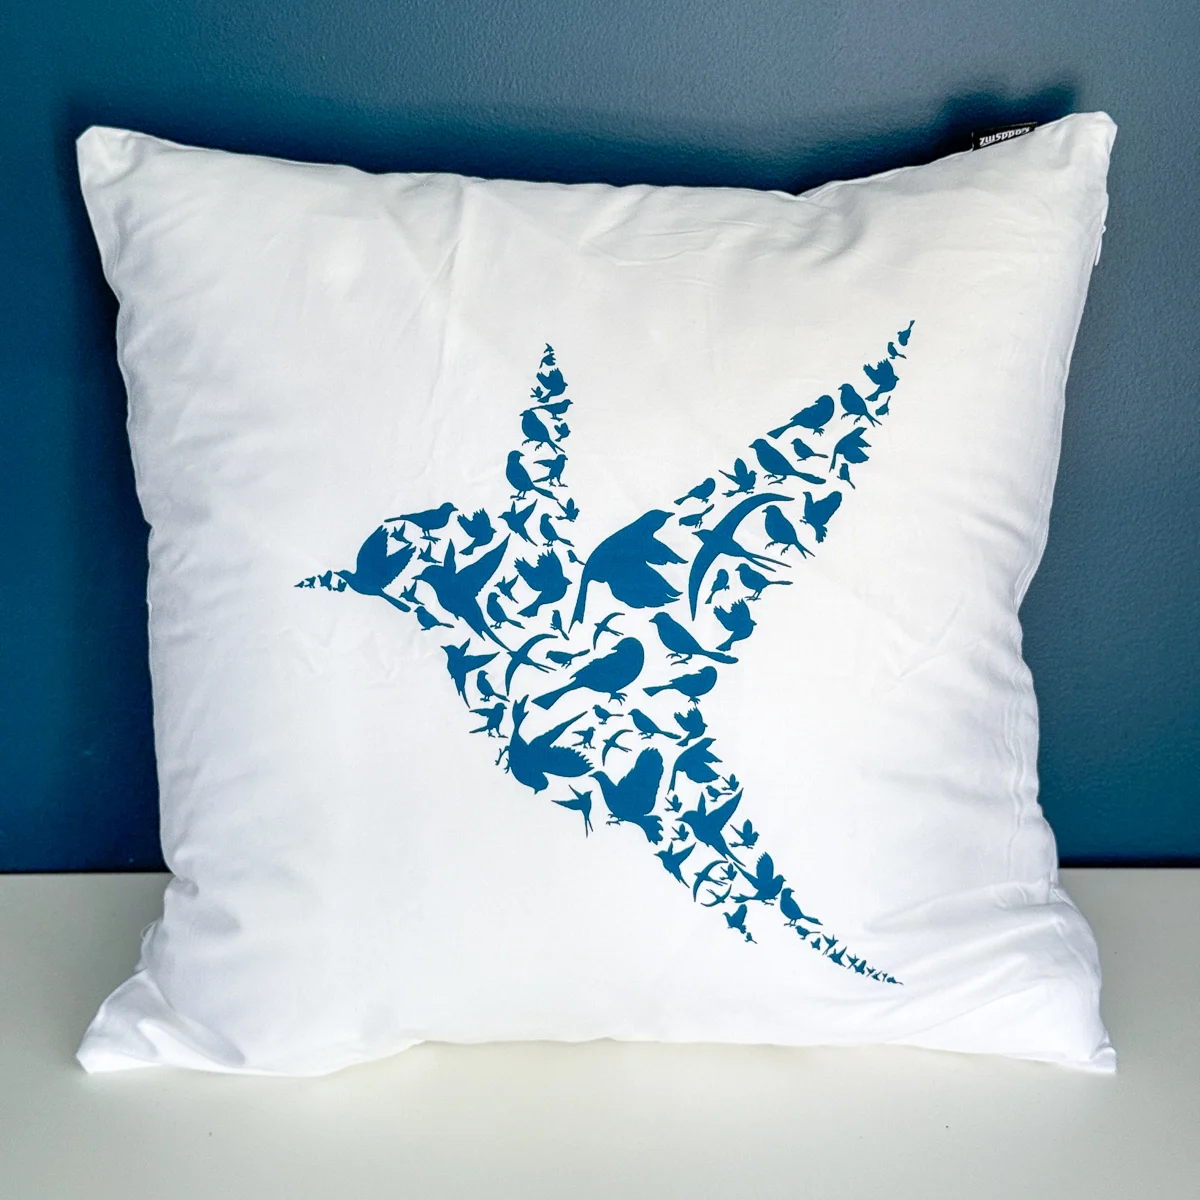
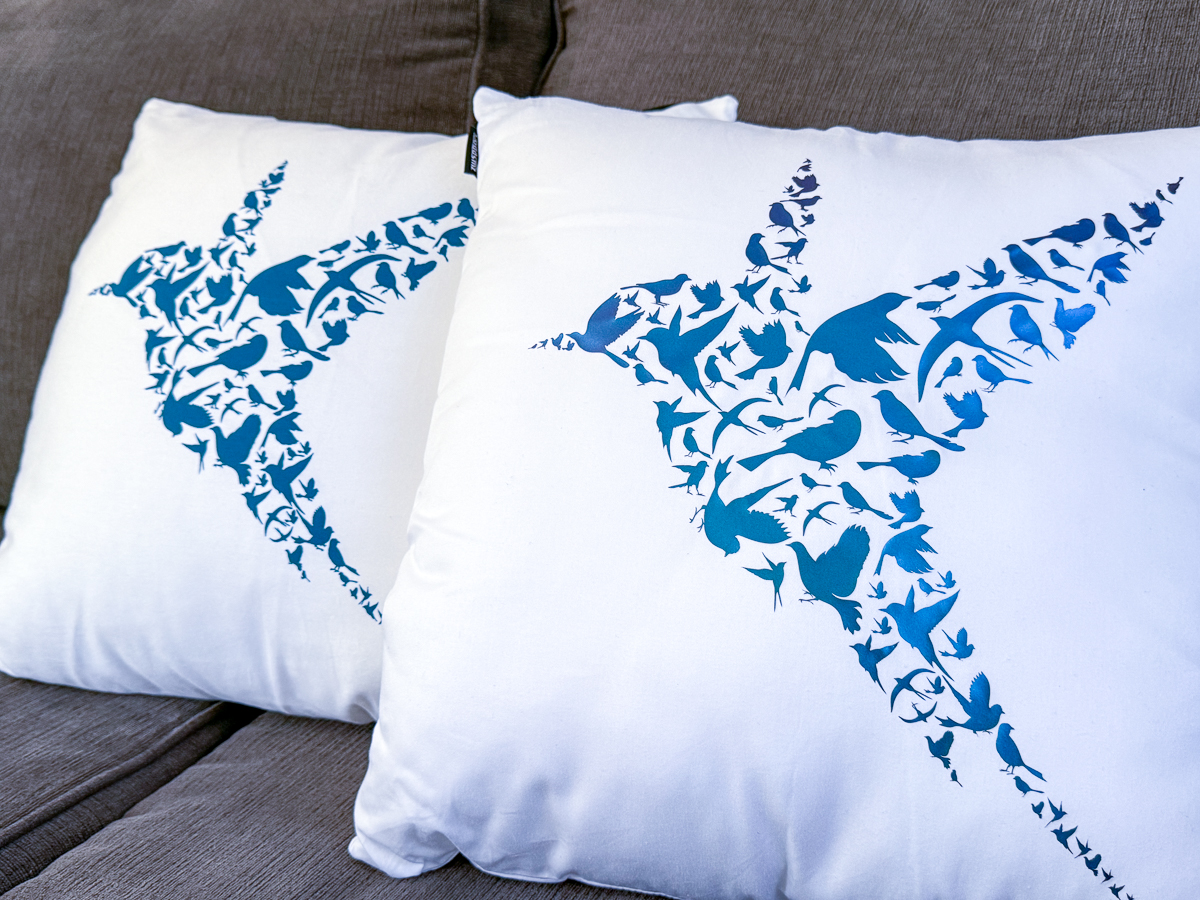
For my third project, I wanted to put both the laser and the screen printer to the test with some tiny, intricate details. We love bird watching, and I found this great file for a bird image made up of other tiny birds that would make a great pillow cover for our living room.
The laser did a great job engraving all those details, especially in the feet. But I was honestly worried that the print would come out as one big blob!

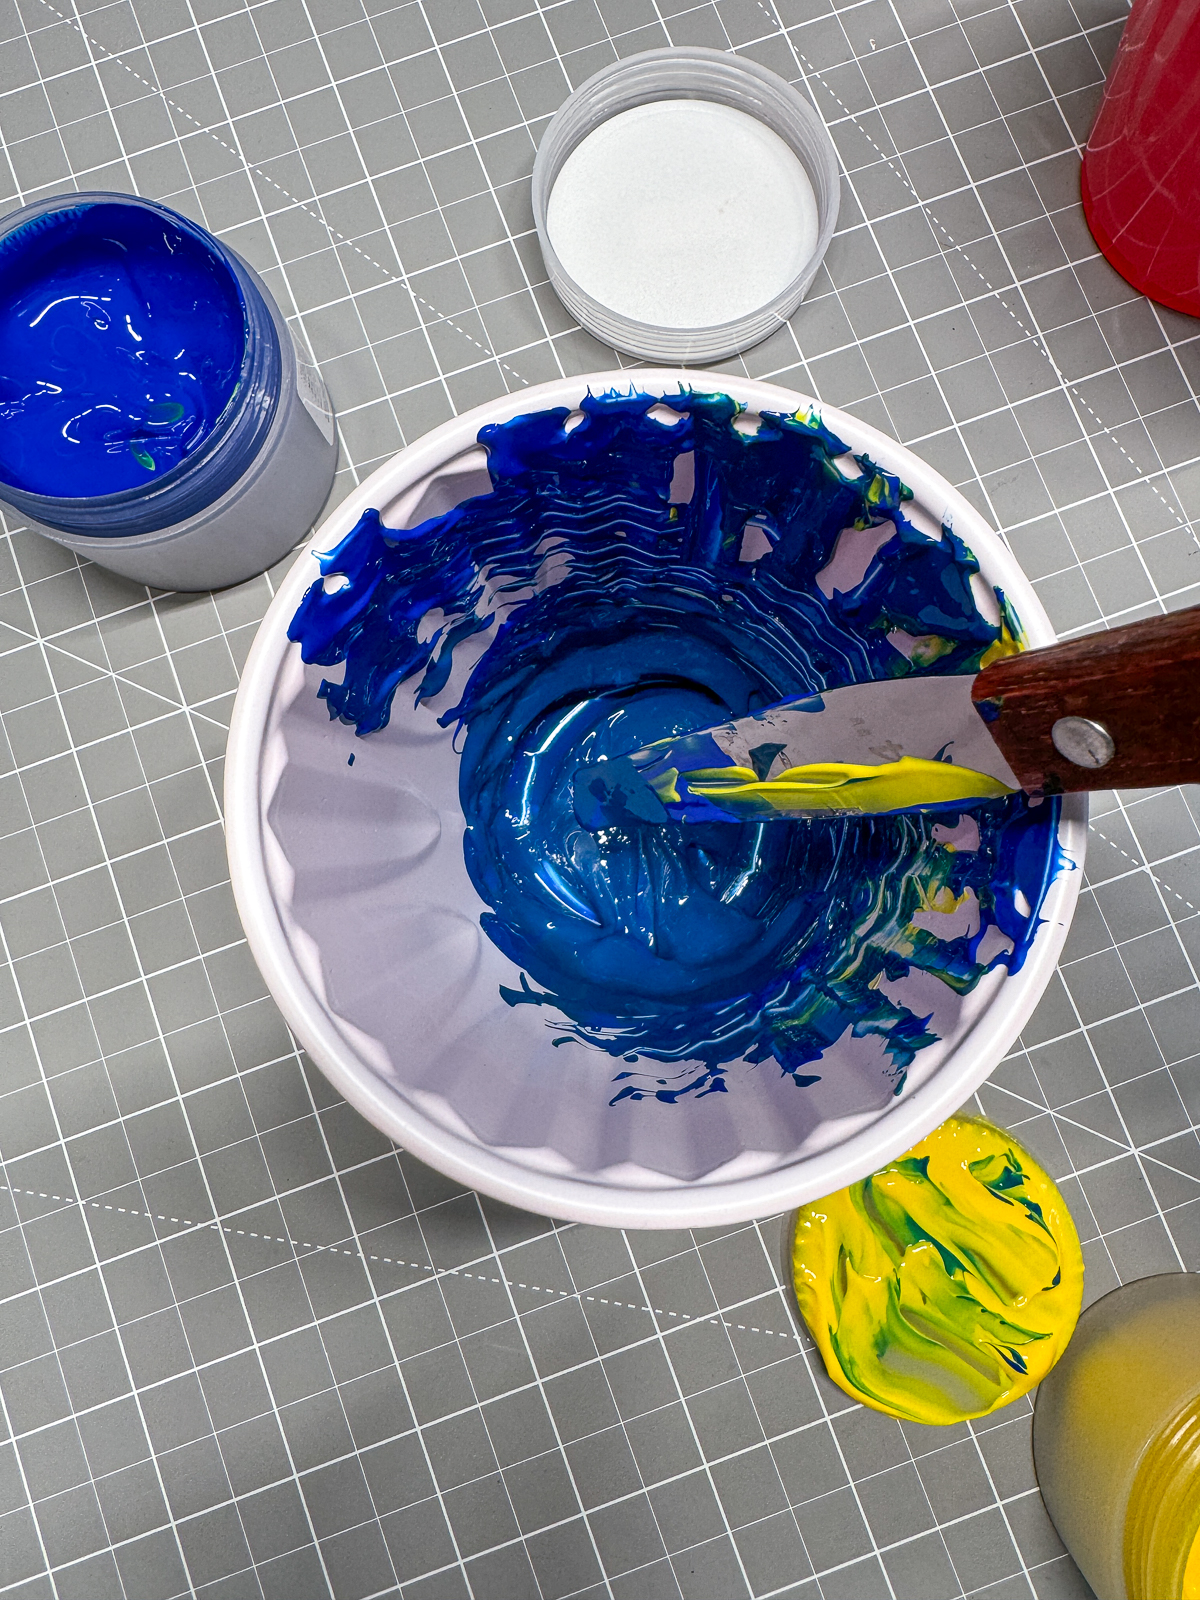
Our living room has a lot of dark turquoise decor, so I tried mixing the blue and yellow inks together in a cup to create a similar color. Not the greatest mixing vessel, but it worked out.
I was honestly surprised by how nice the print turned out! The details are clearly visible, and even the tiniest bird still looks like a bird!

Now I want to screen print new pillowcases everywhere in the house!

Want to see how screen printing compares to heat transfer vinyl? Check out my review of the xTool heat press and how this design looks in vinyl!
I've never screen printed before, but I found the xTool screen printer to be really easy to use right out of the box. I was able to make a bunch of different custom items in just a couple hours that all came out great, and it was a lot of fun too!

I love that xTool is always innovating and coming out with new products and accessories for their lasers. I can't wait to see what they think of next!
Check out these other laser project ideas!