Wow mom with a unique Mother's Day gift that you made yourself! The ACMER P3 2-in-1 laser can engrave jewelry and cut the gift box too!

This post contains affiliate links for your convenience. Purchases made through these links may earn me a small commission at no additional cost to you. Please visit my disclosures page for more information.
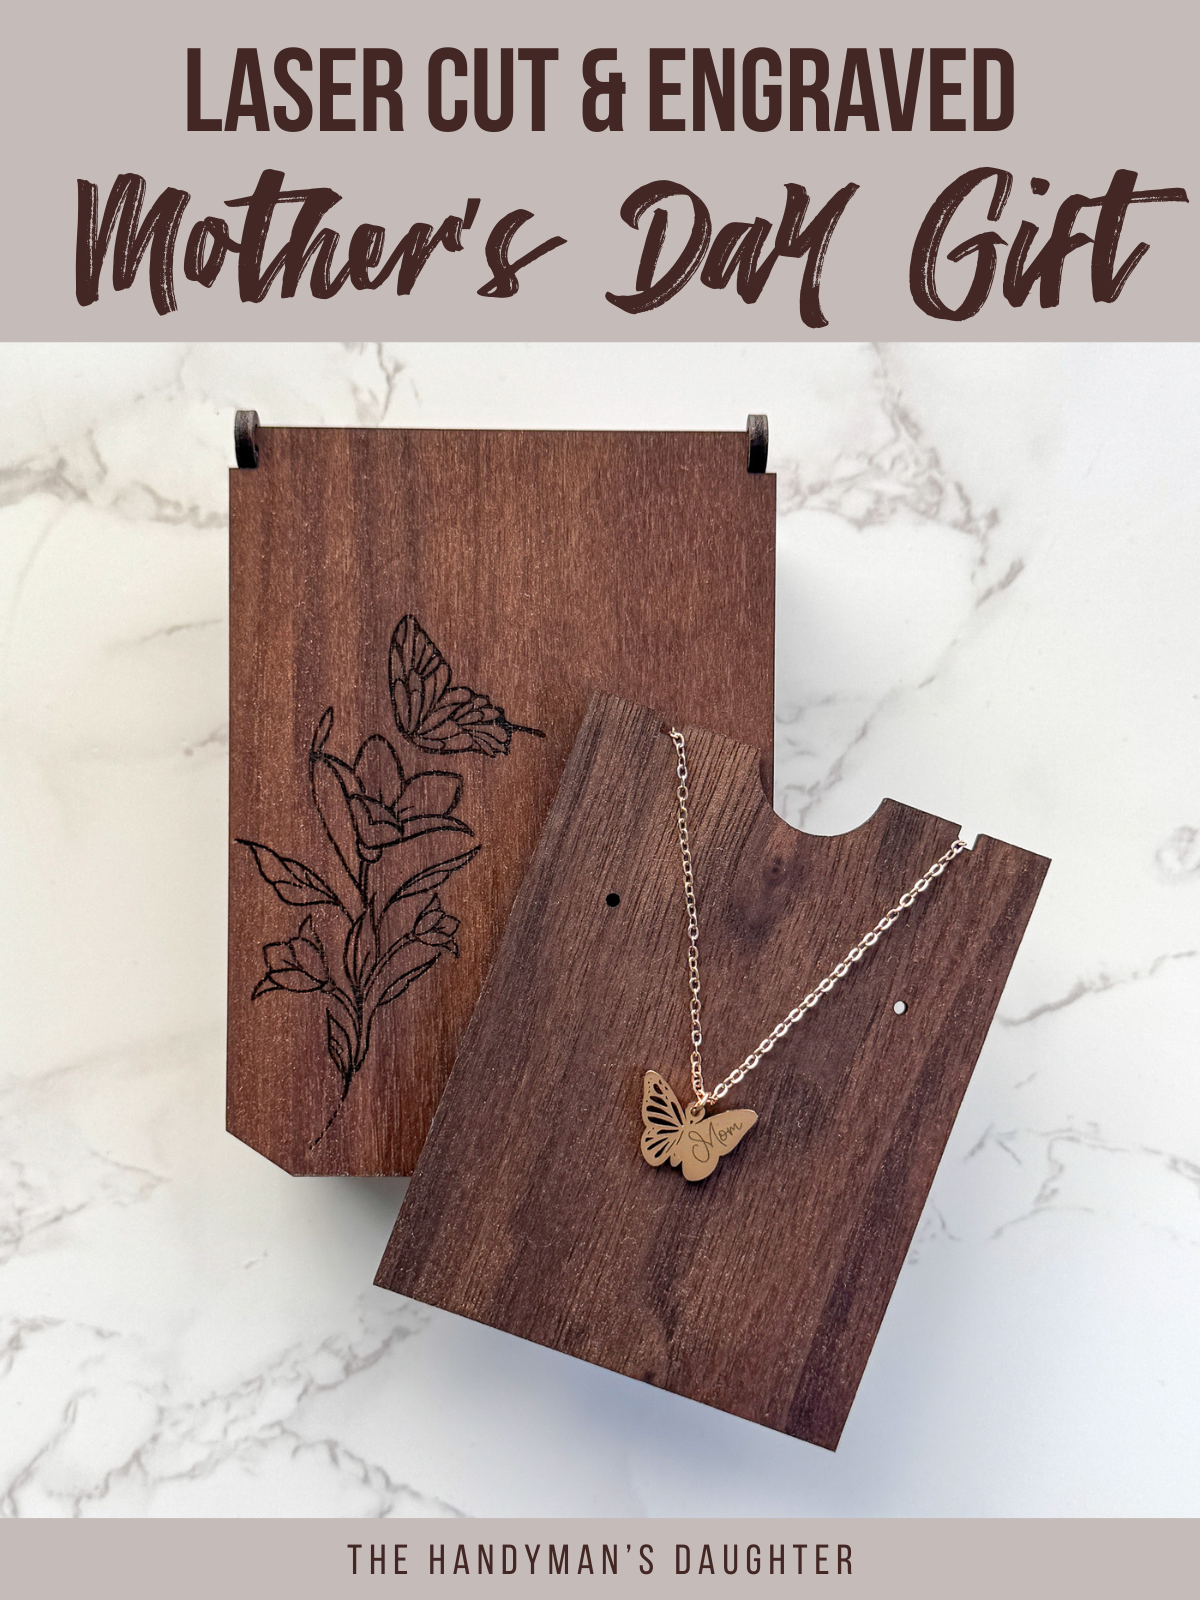
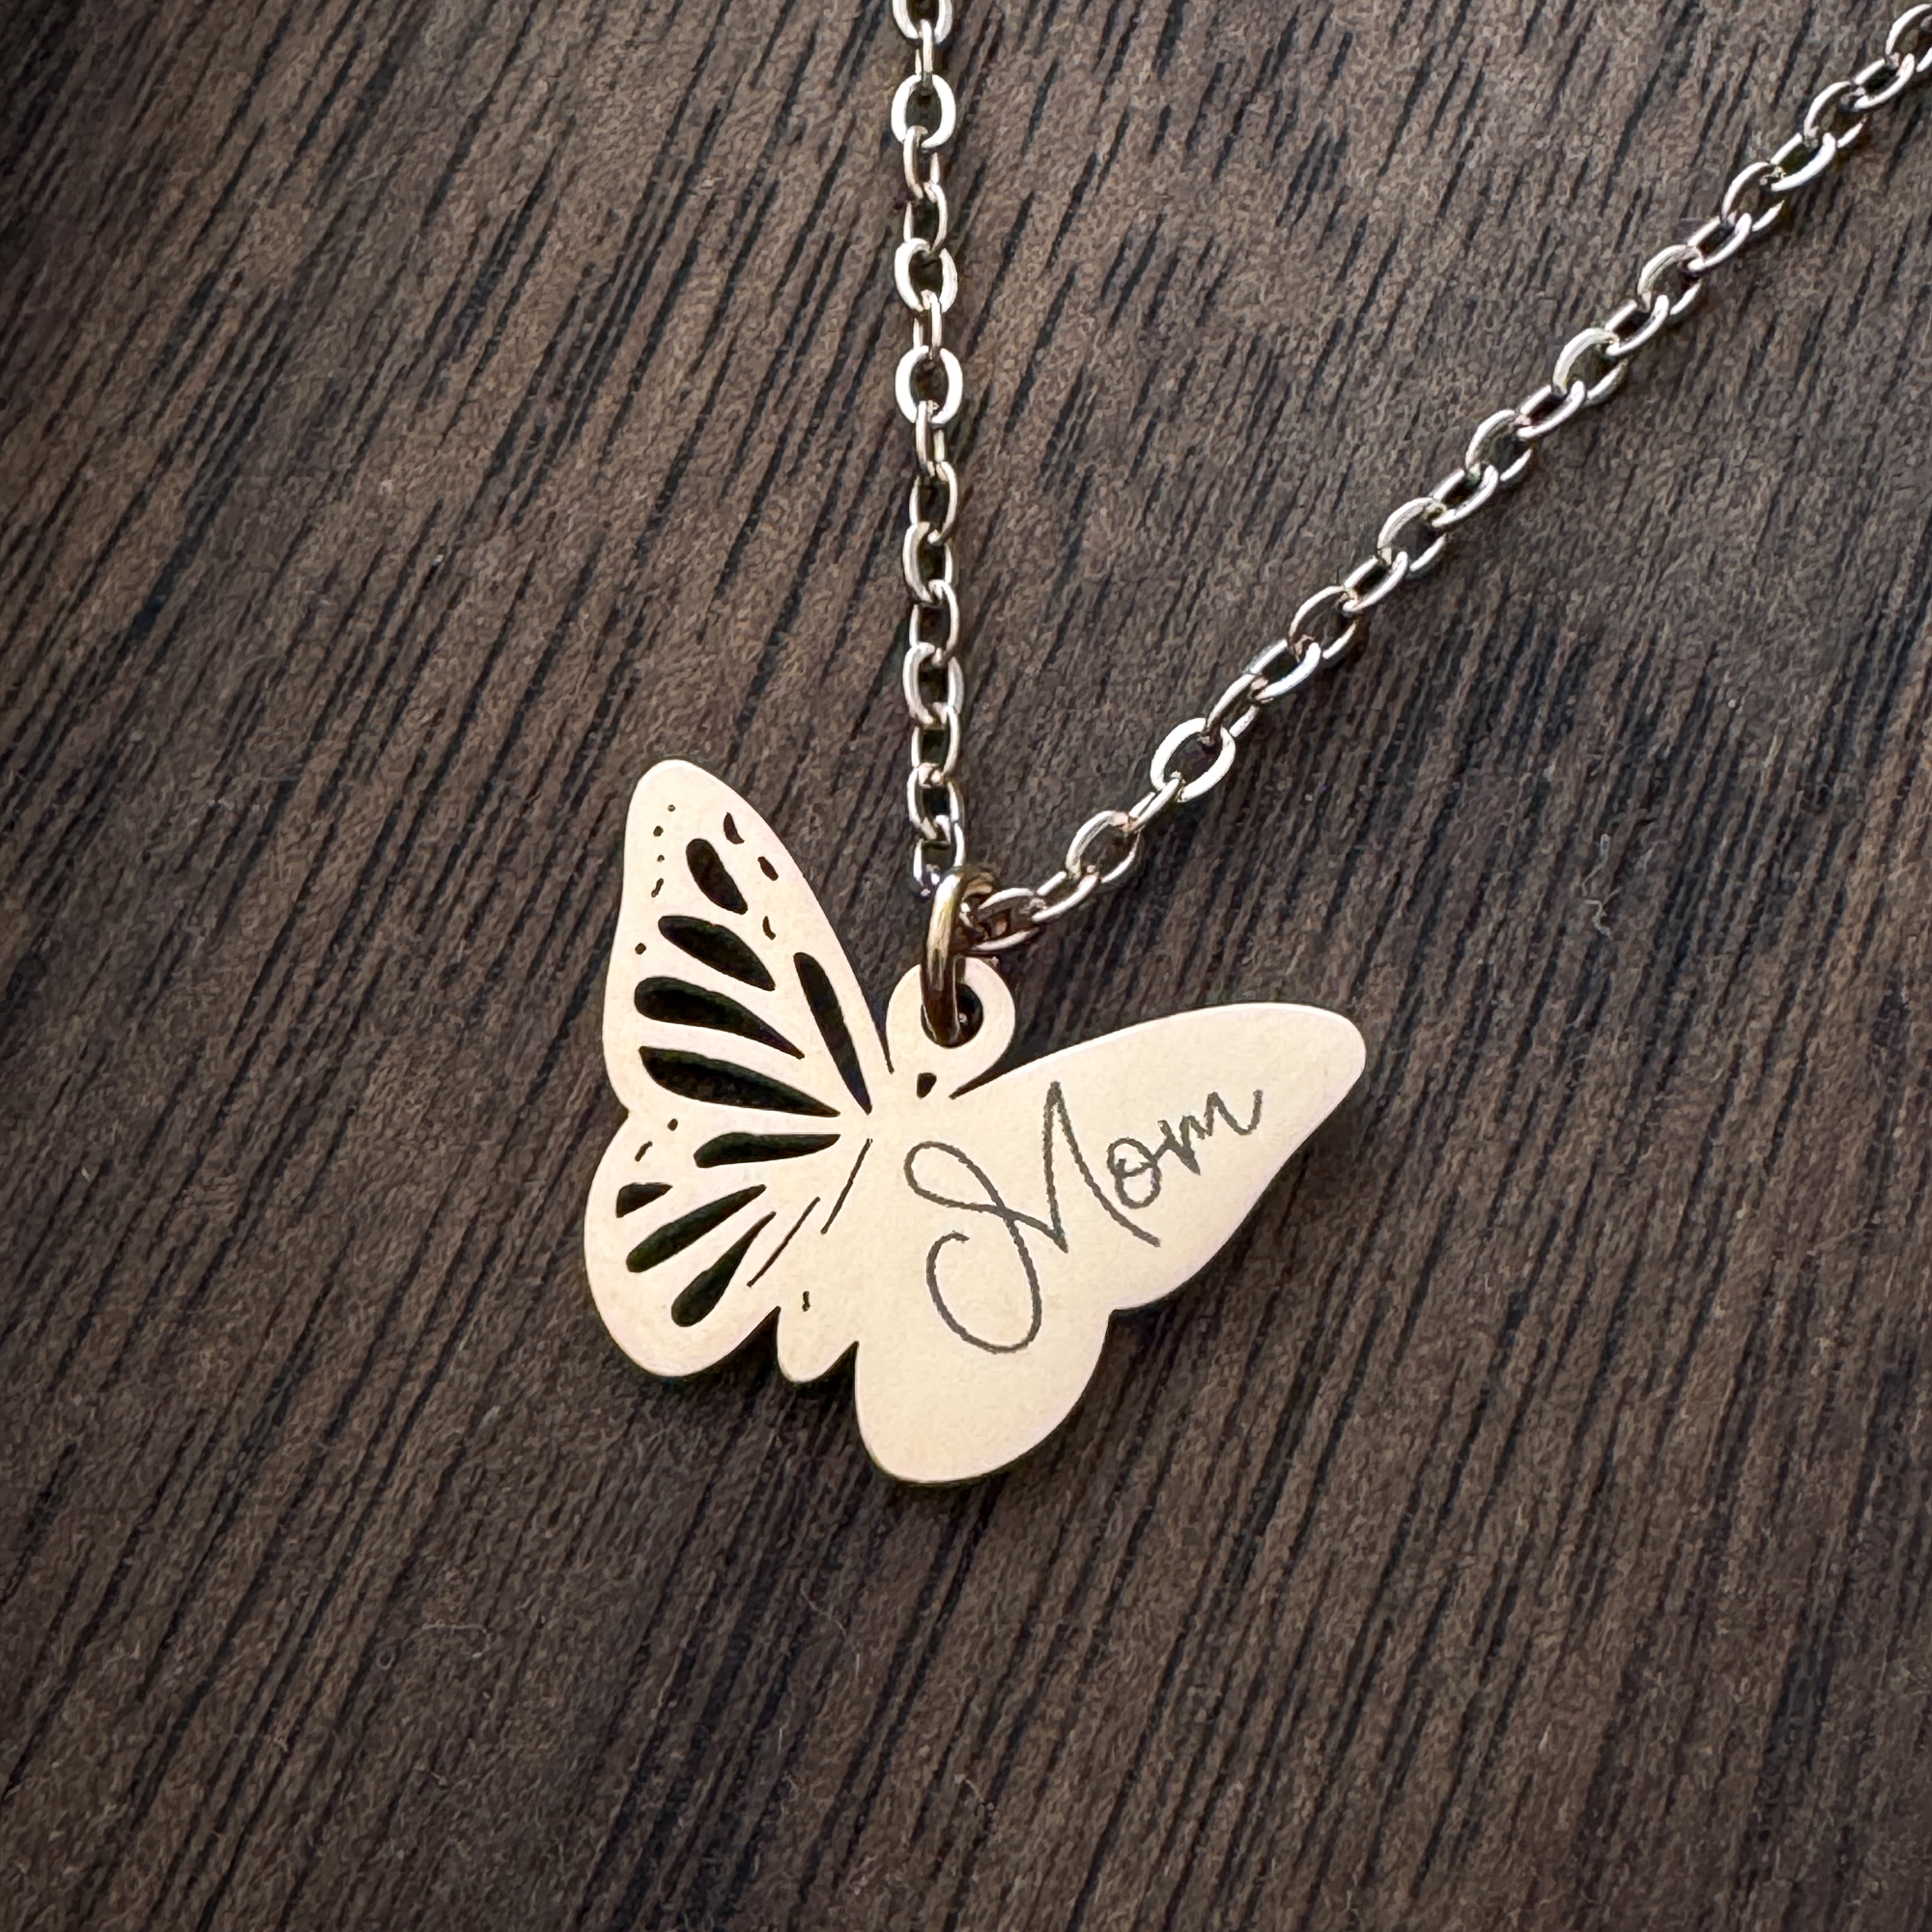
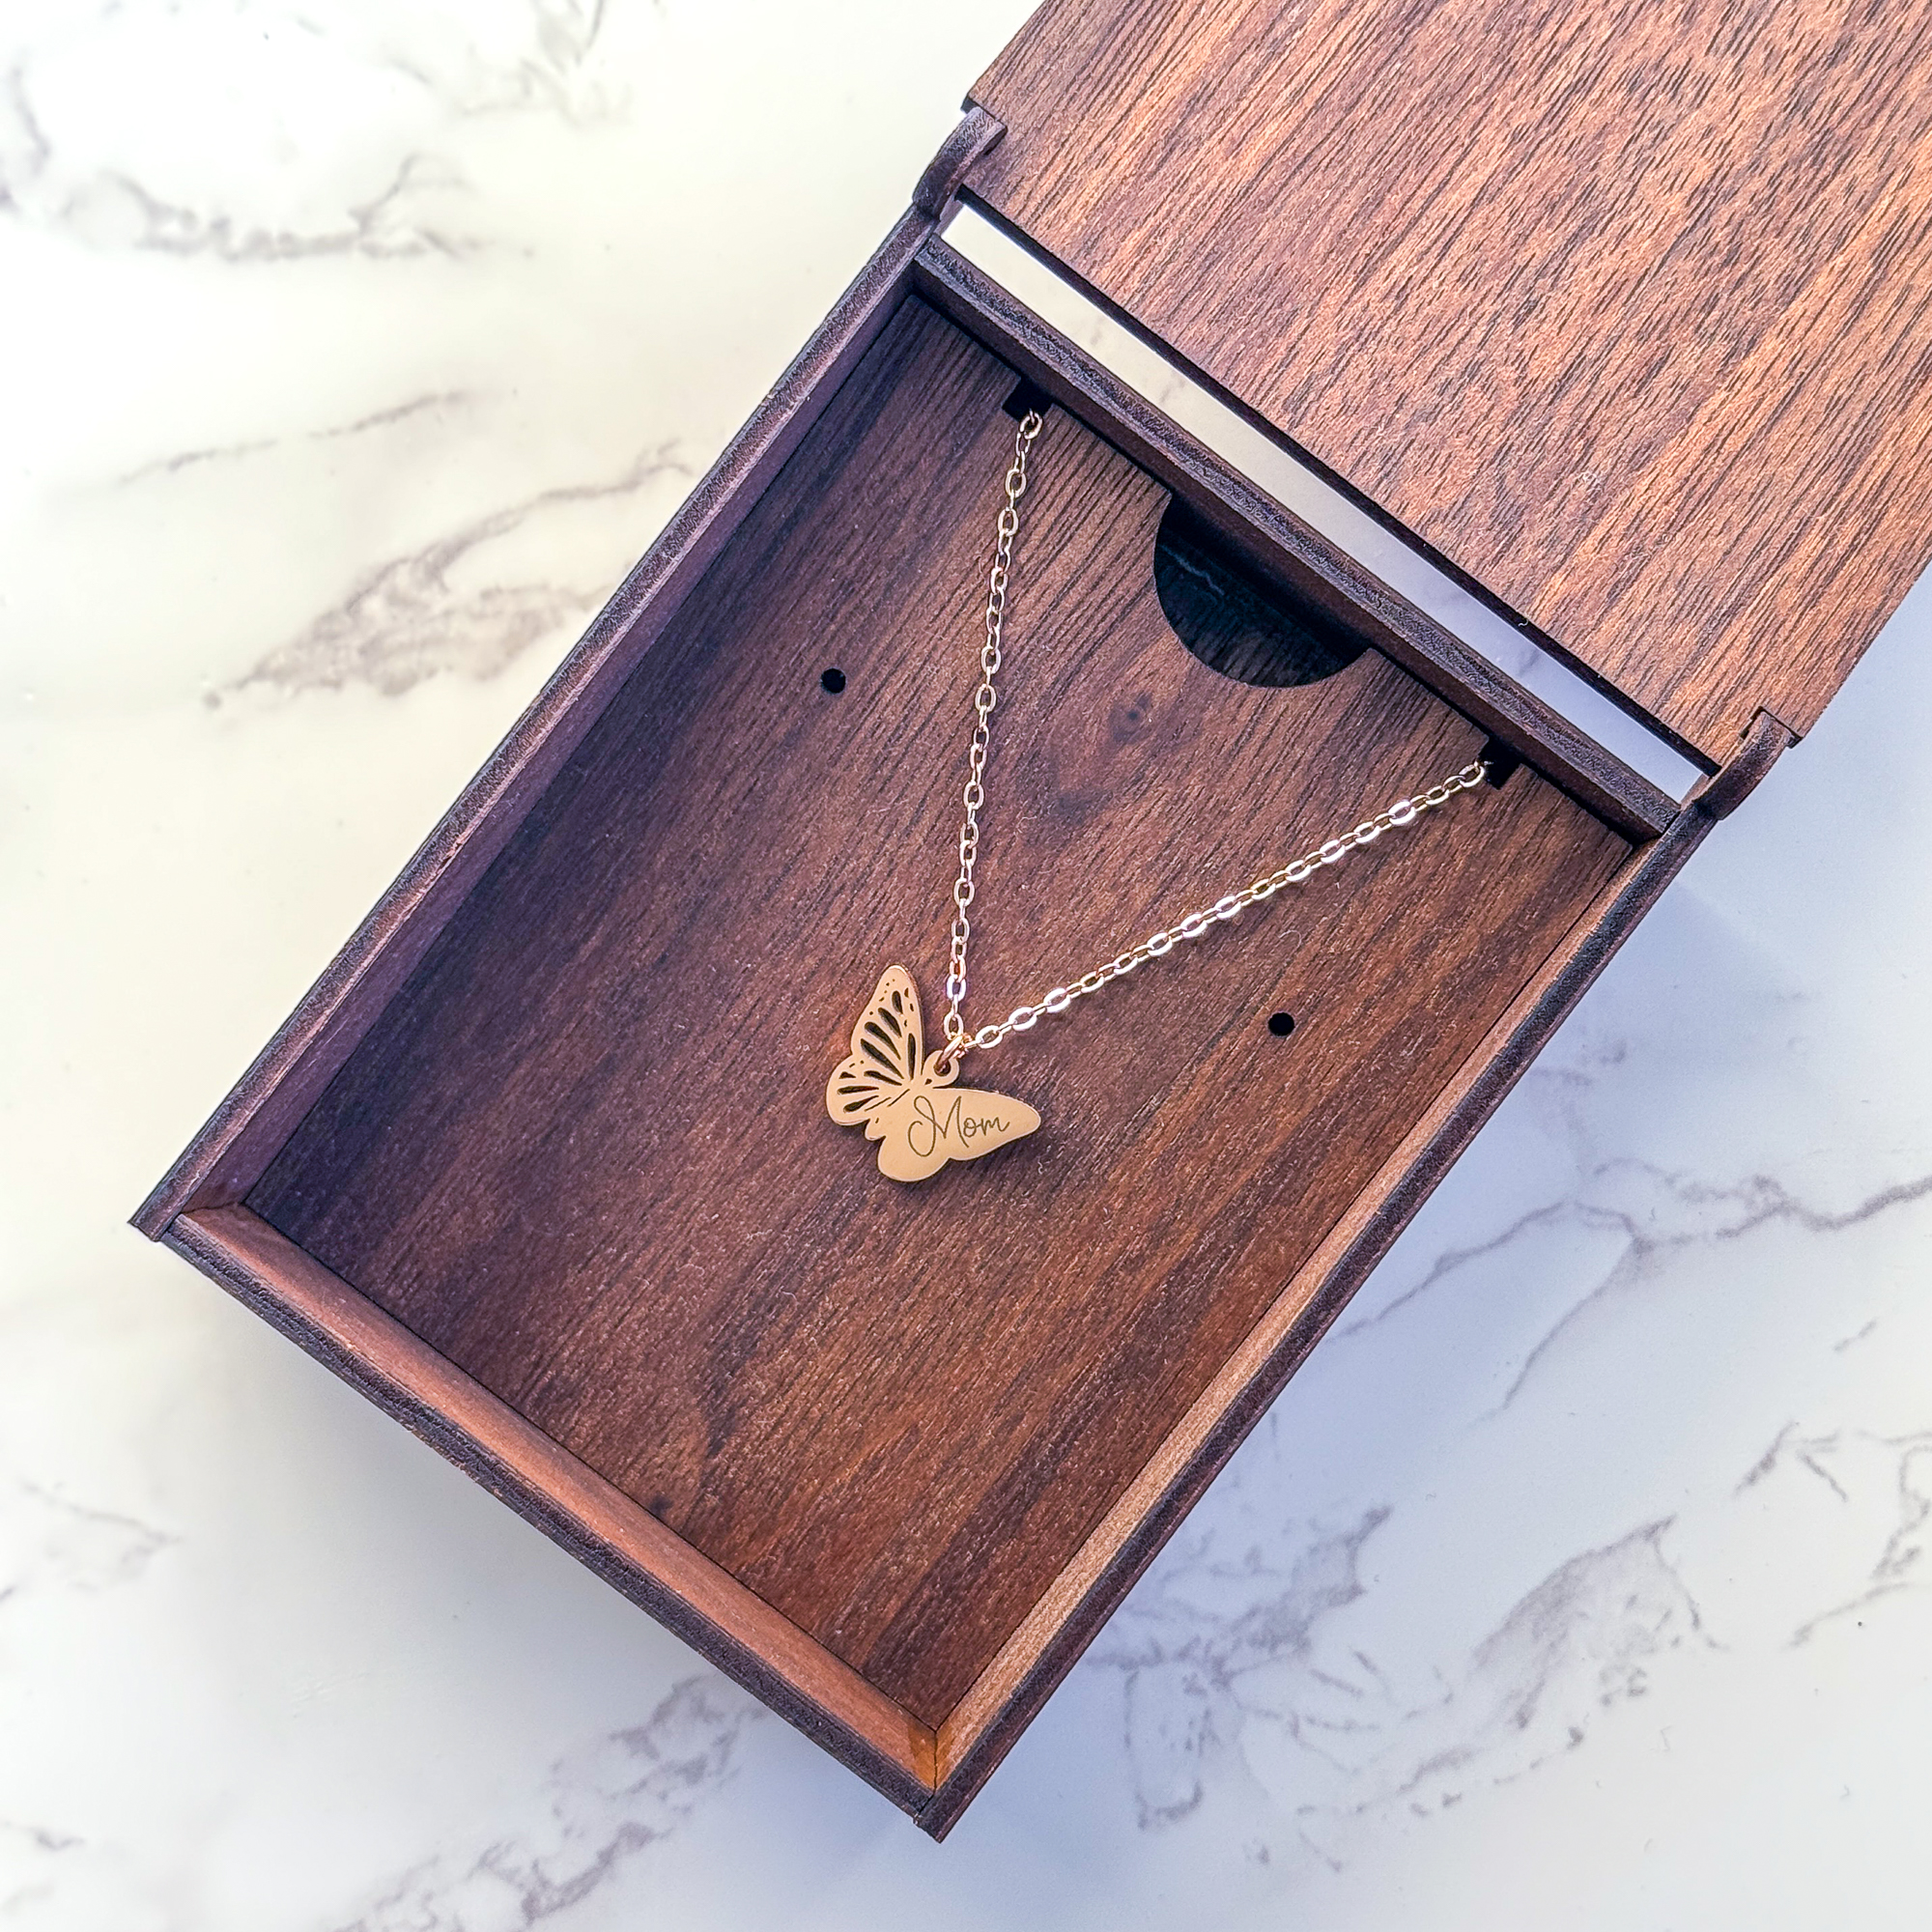
Forget the flowers! This Mother’s Day, give her something personal and custom-made with your laser! My mom loves butterflies, so I wanted to engrave a delicate butterfly pendant and craft a wooden gift box to display it.
However, diode and CO2 lasers can only mark or etch the surface of metal using a special spray or coating. For this project, I'm using the ACMER P3 2-in-1 laser, which was kindly sent to me for free to try out.
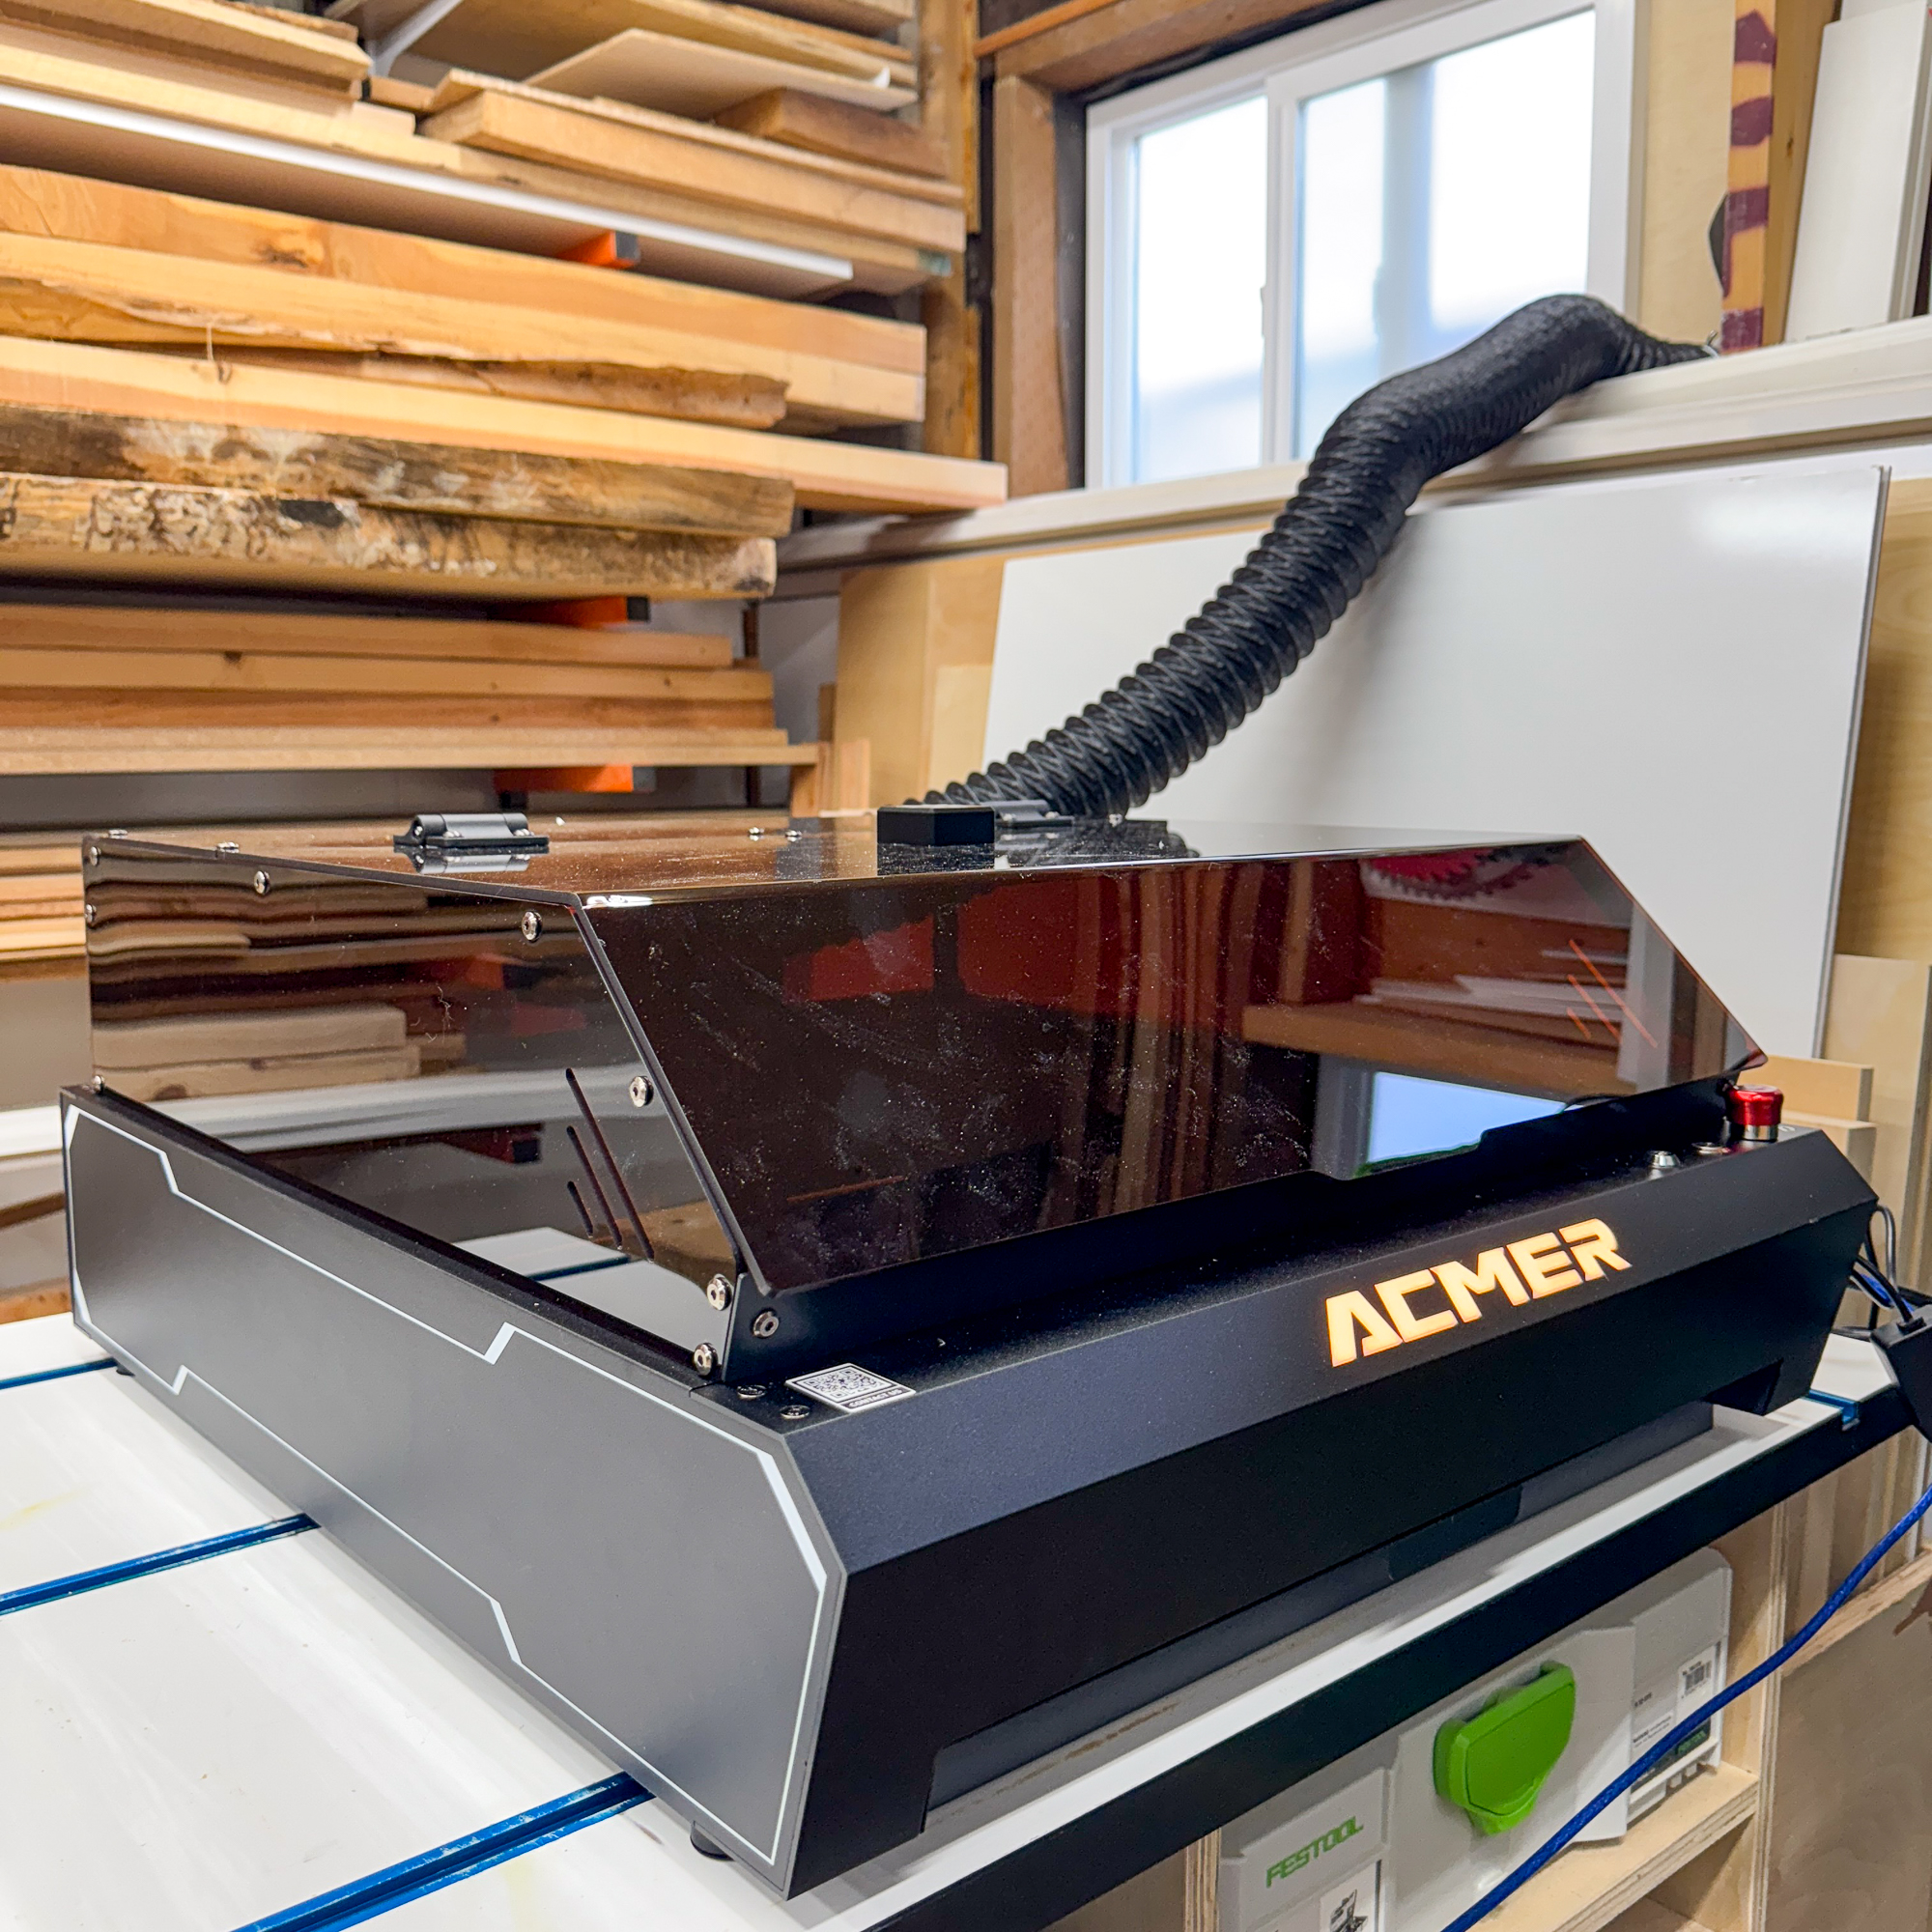

It has both a 10W diode laser AND a 2W infrared laser that can engrave metal! Both lasers are housed in the same module, so you don't have to swap between different units to complete this project. Just flick a switch to go from blue diode to IR!
Need more power? Swap out the 2-in-1 module for the 48W diode laser module to cut through plywood up to 30mm thick!
Testing the settings
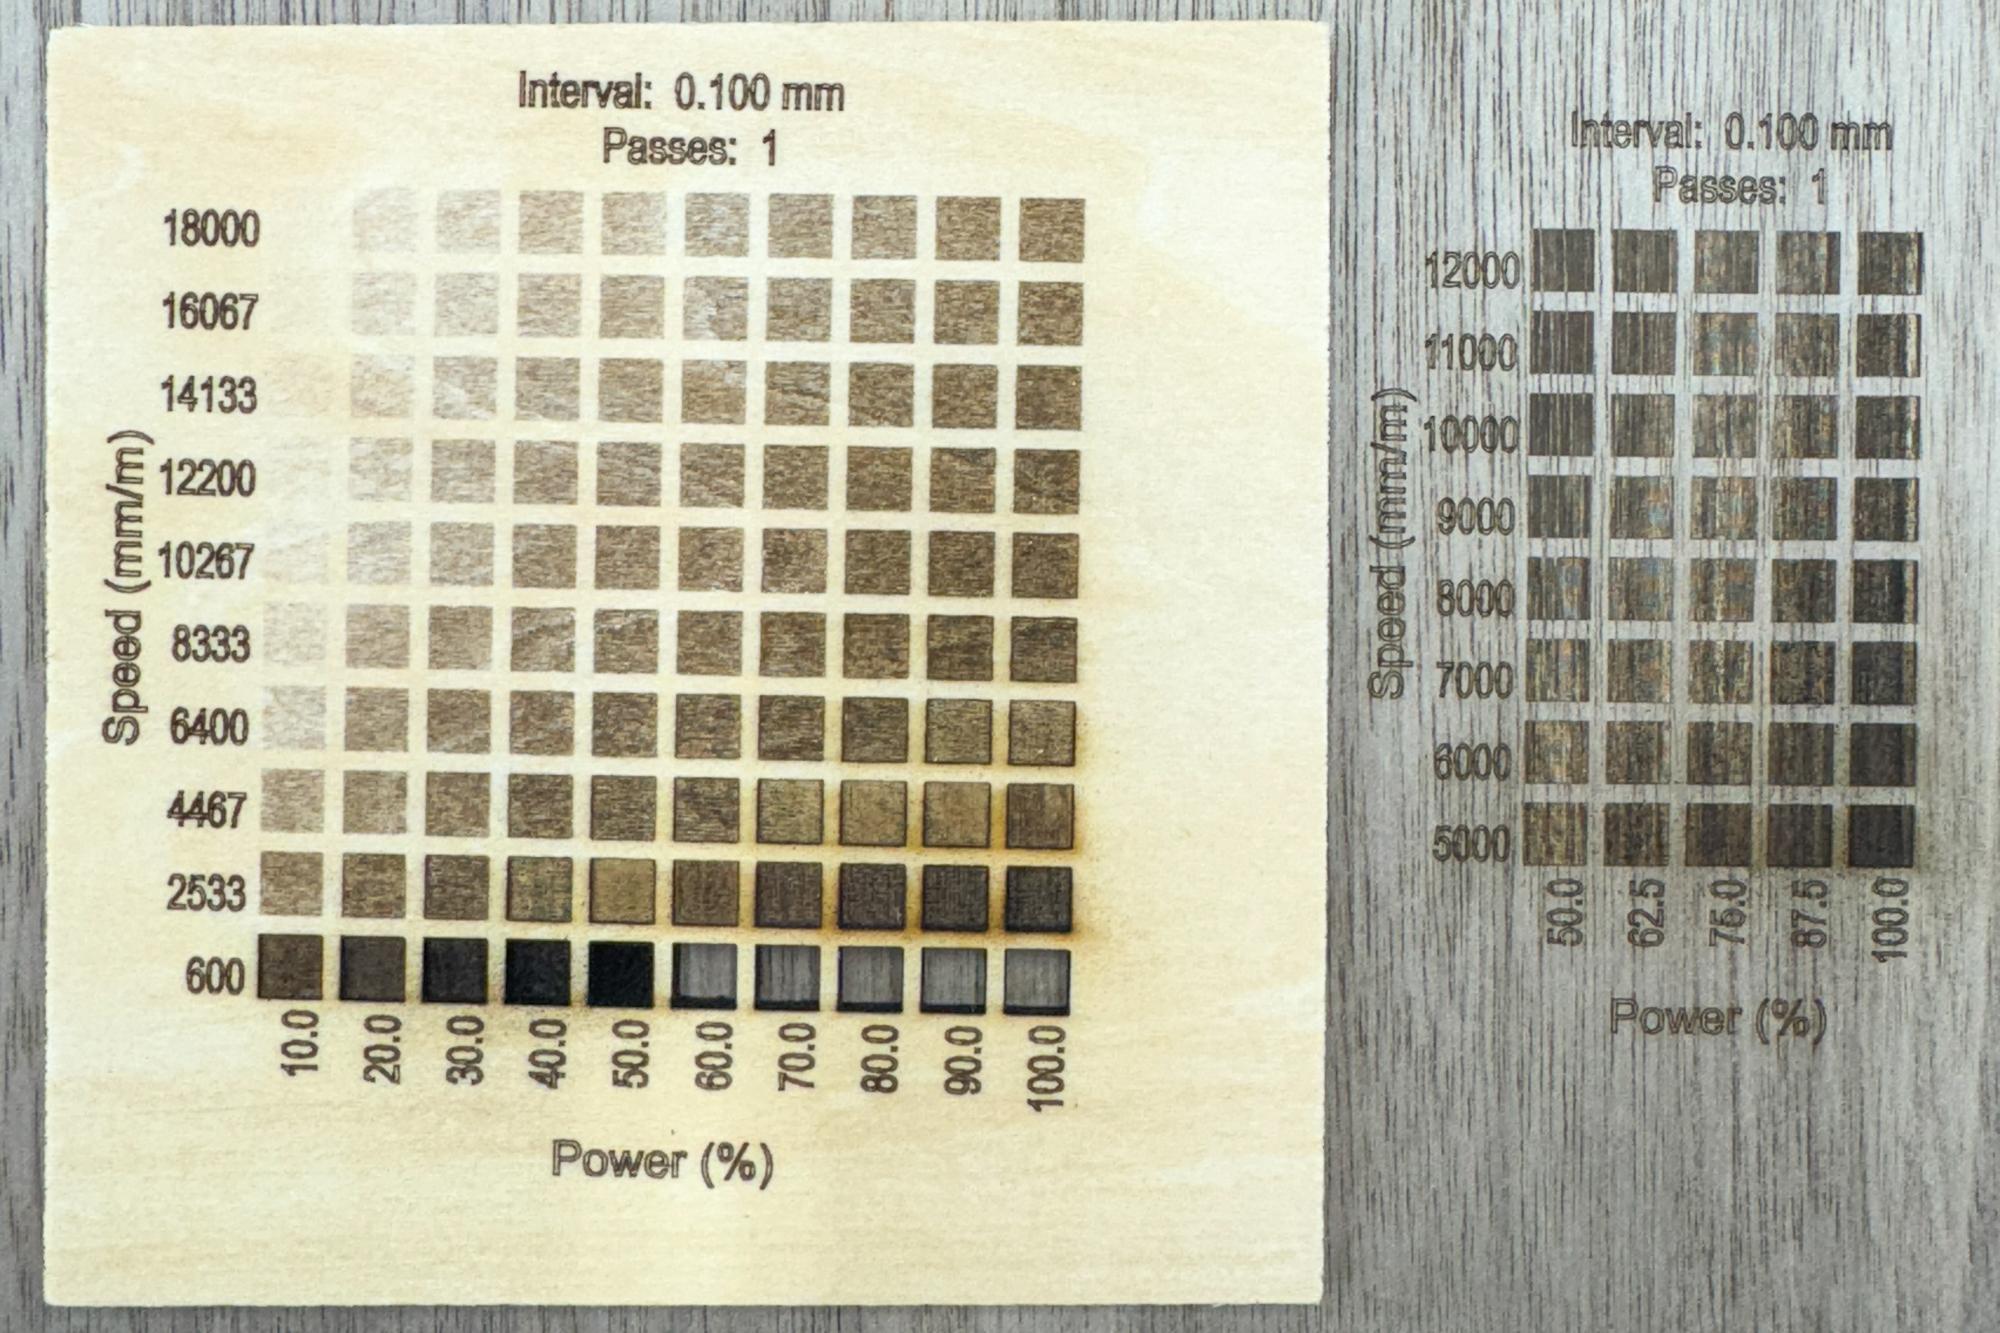
Before I start any project with a new laser or material, I run a test grid first. This will show me the best settings for cutting and engraving without sacrificing an expensive blank or sheet of plywood.
I started off testing the cut and engrave settings on a small piece of basswood that was included with the ACMER P3. Save these grids so you can refer back to them on future projects!
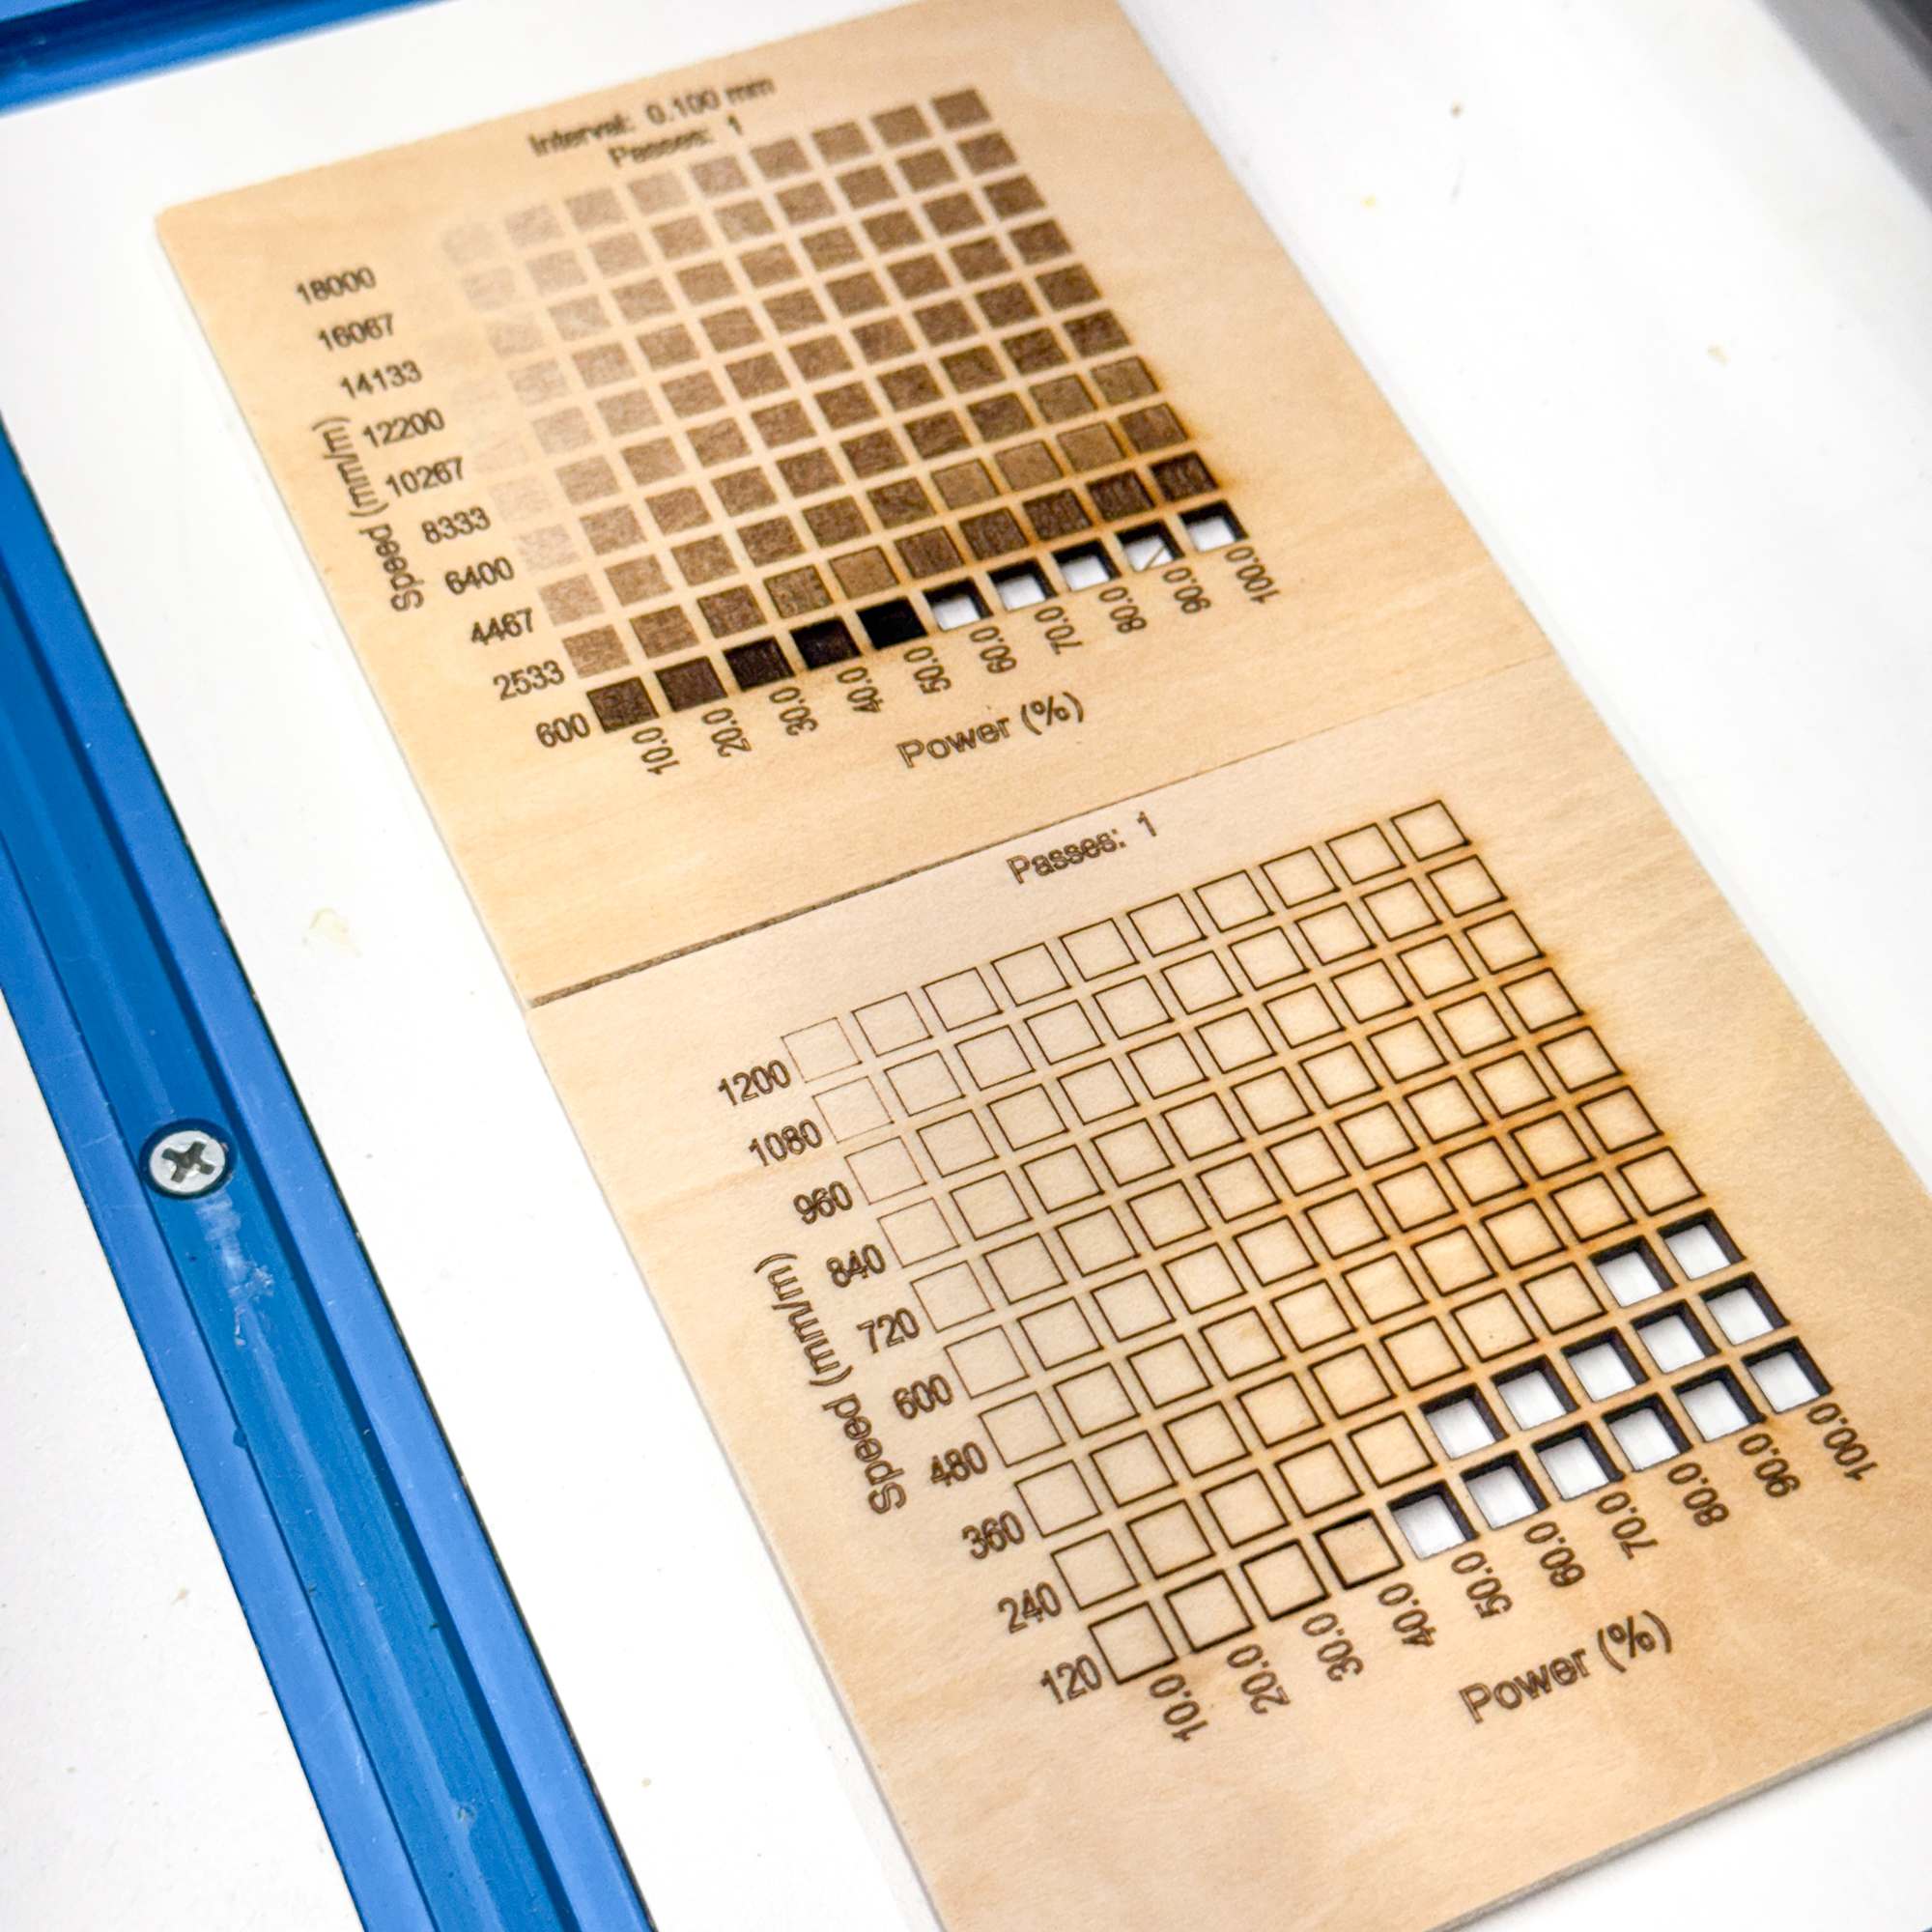
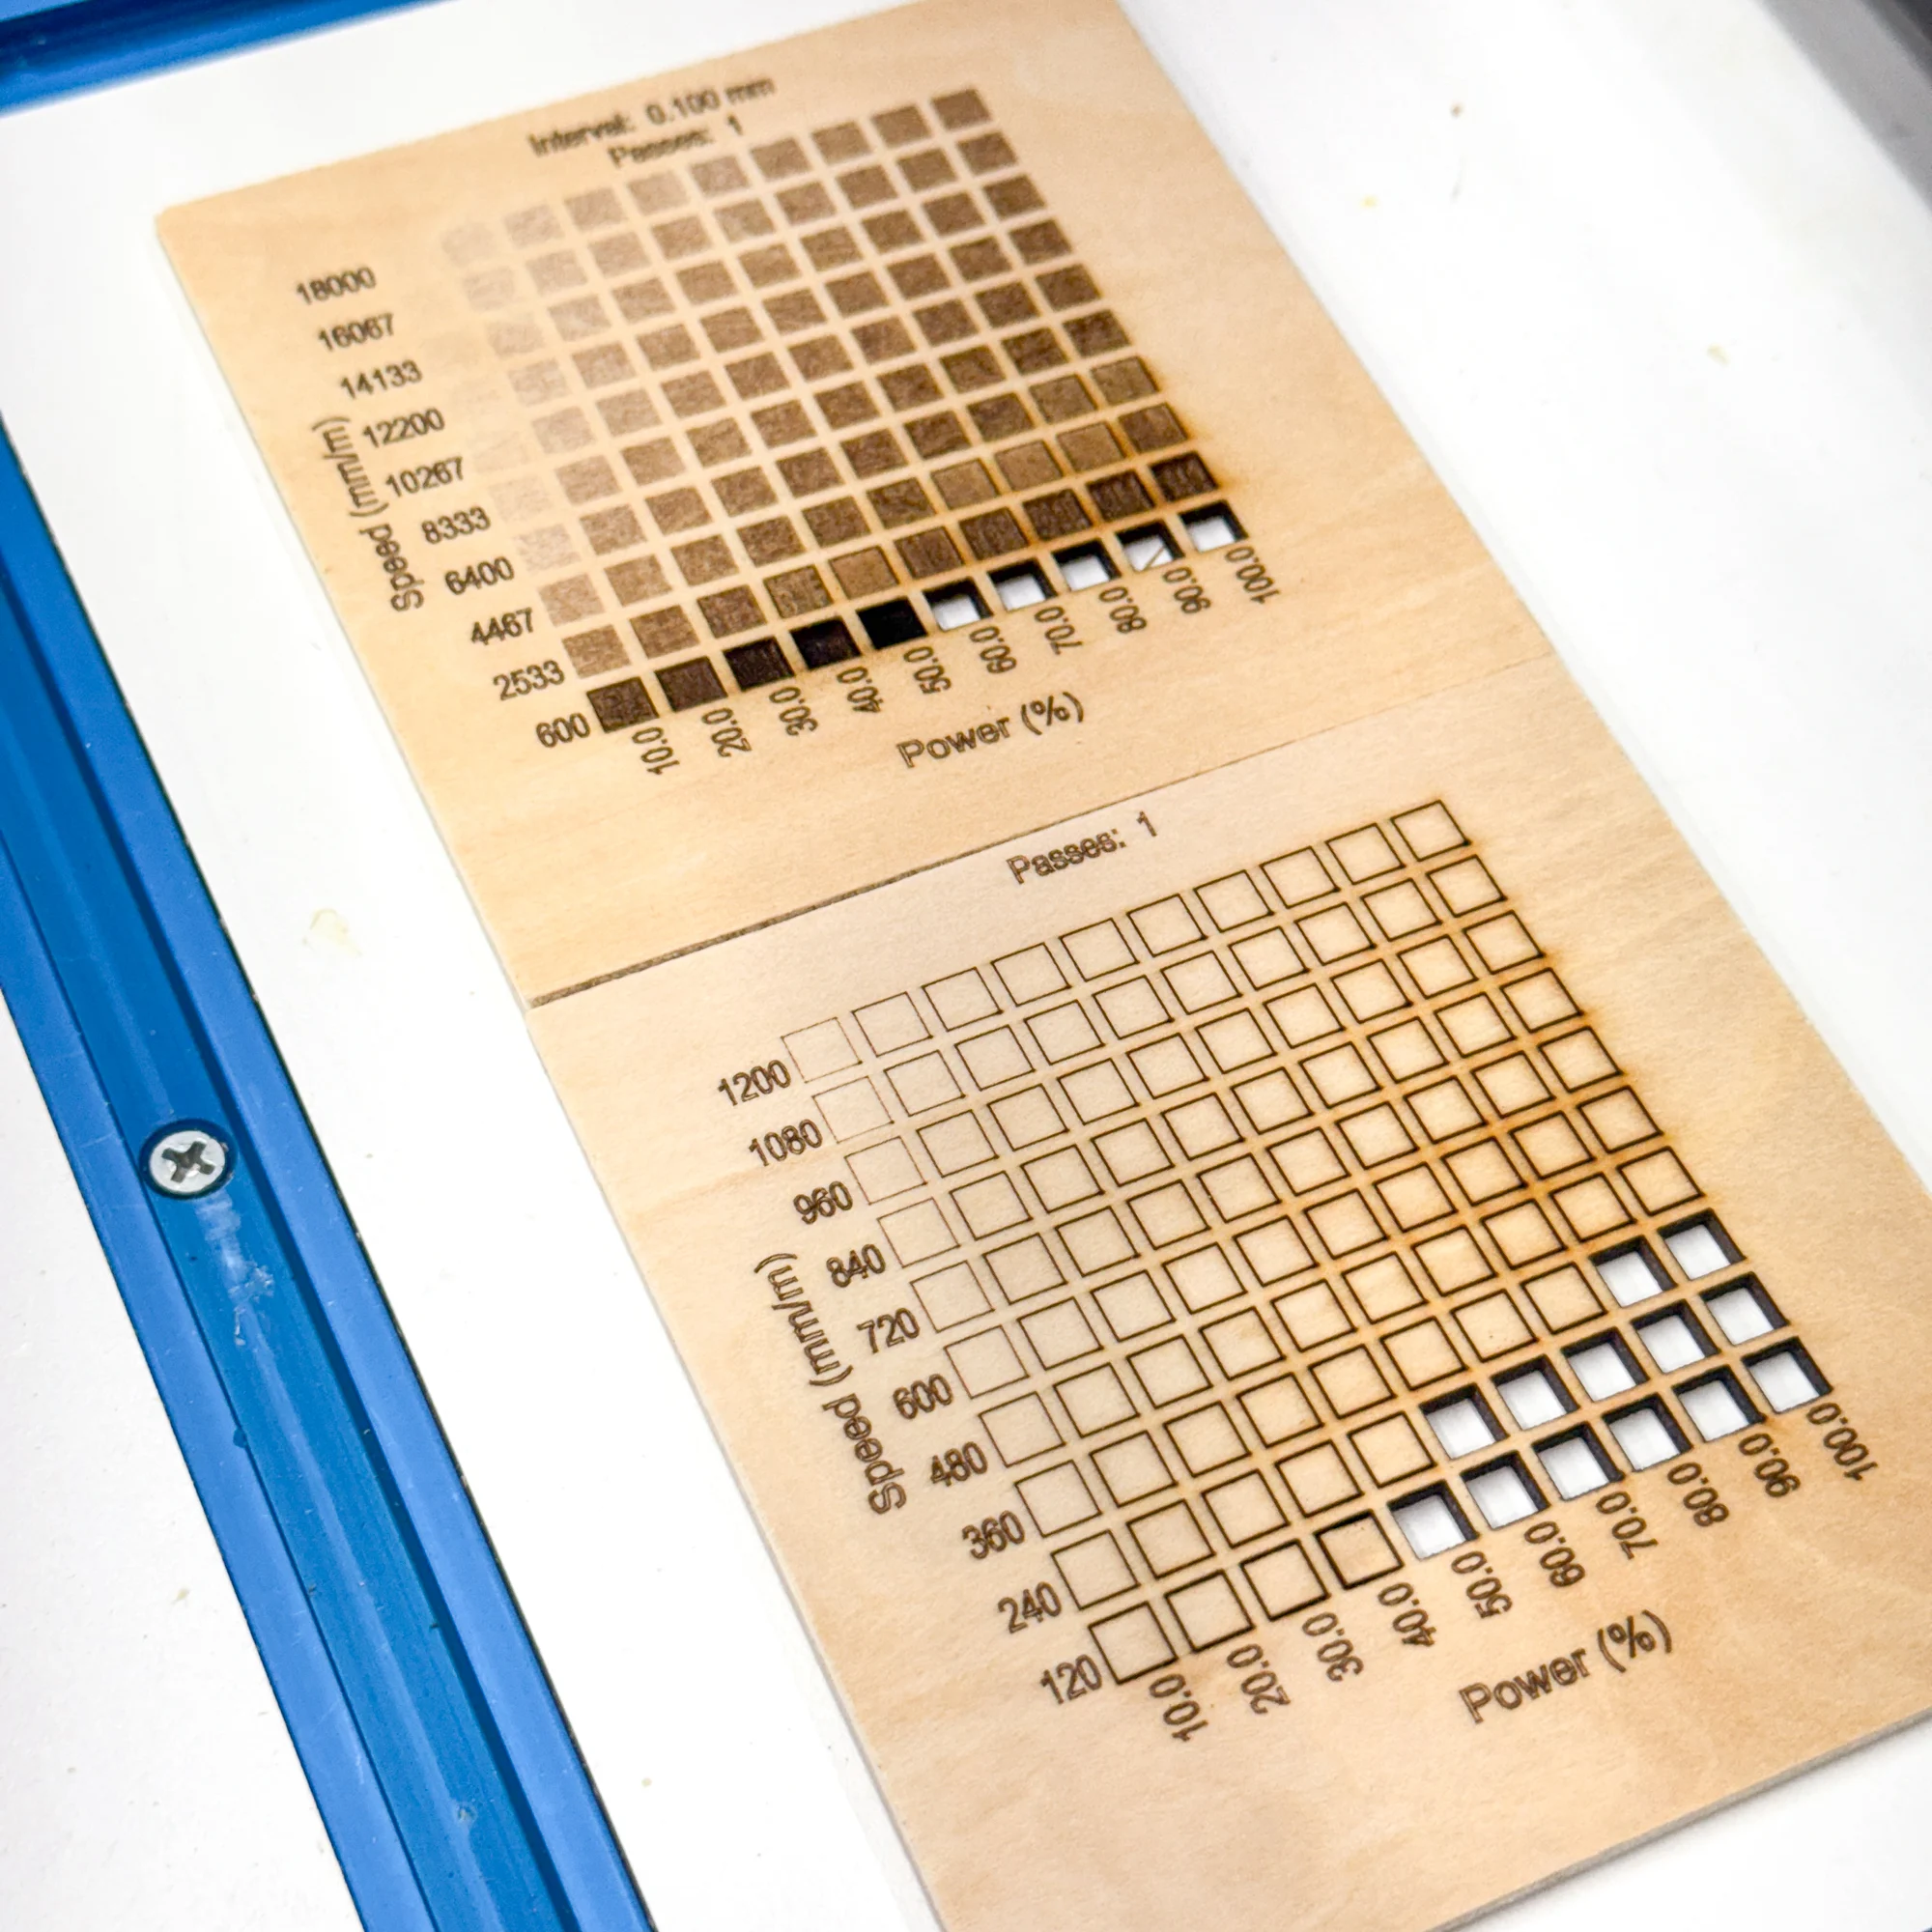
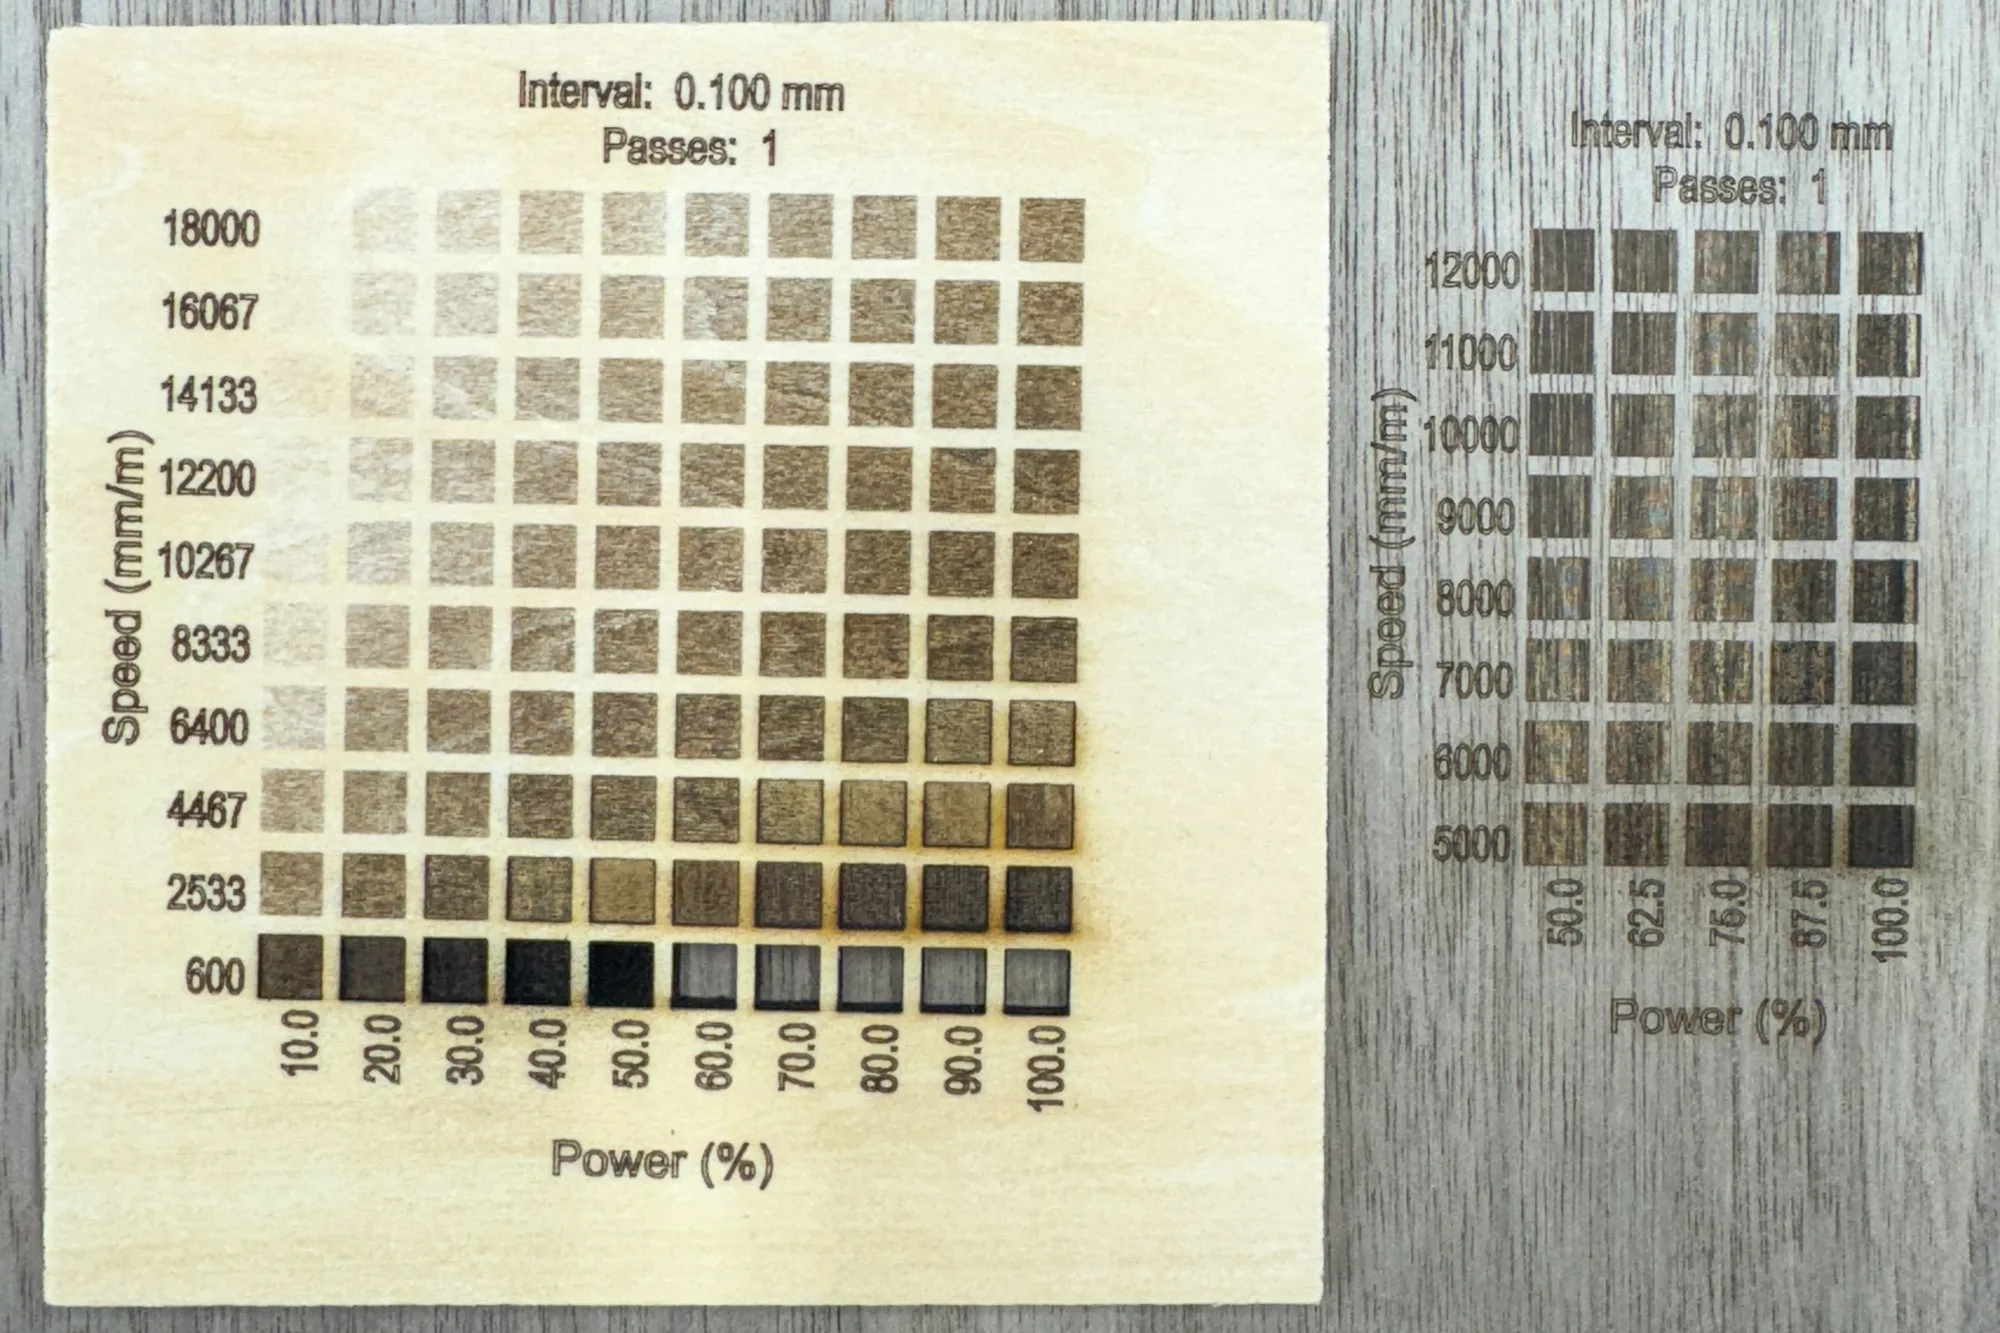
Using the basswood tests as a baseline, I could narrow down the engrave settings for the walnut plywood I planned to use for the jewelry box. Different wood species can have different results with the same settings, so running another test with a smaller range can help dial in the perfect result.
Side by side, you can see how the two tests performed. If I had chosen my preferred setting for basswood (10000 mm/s at 100% power) on this walnut plywood, it would have come out too light! I wanted a dark engraving with clean edges, so I chose 7000 mm/s at 100% power.
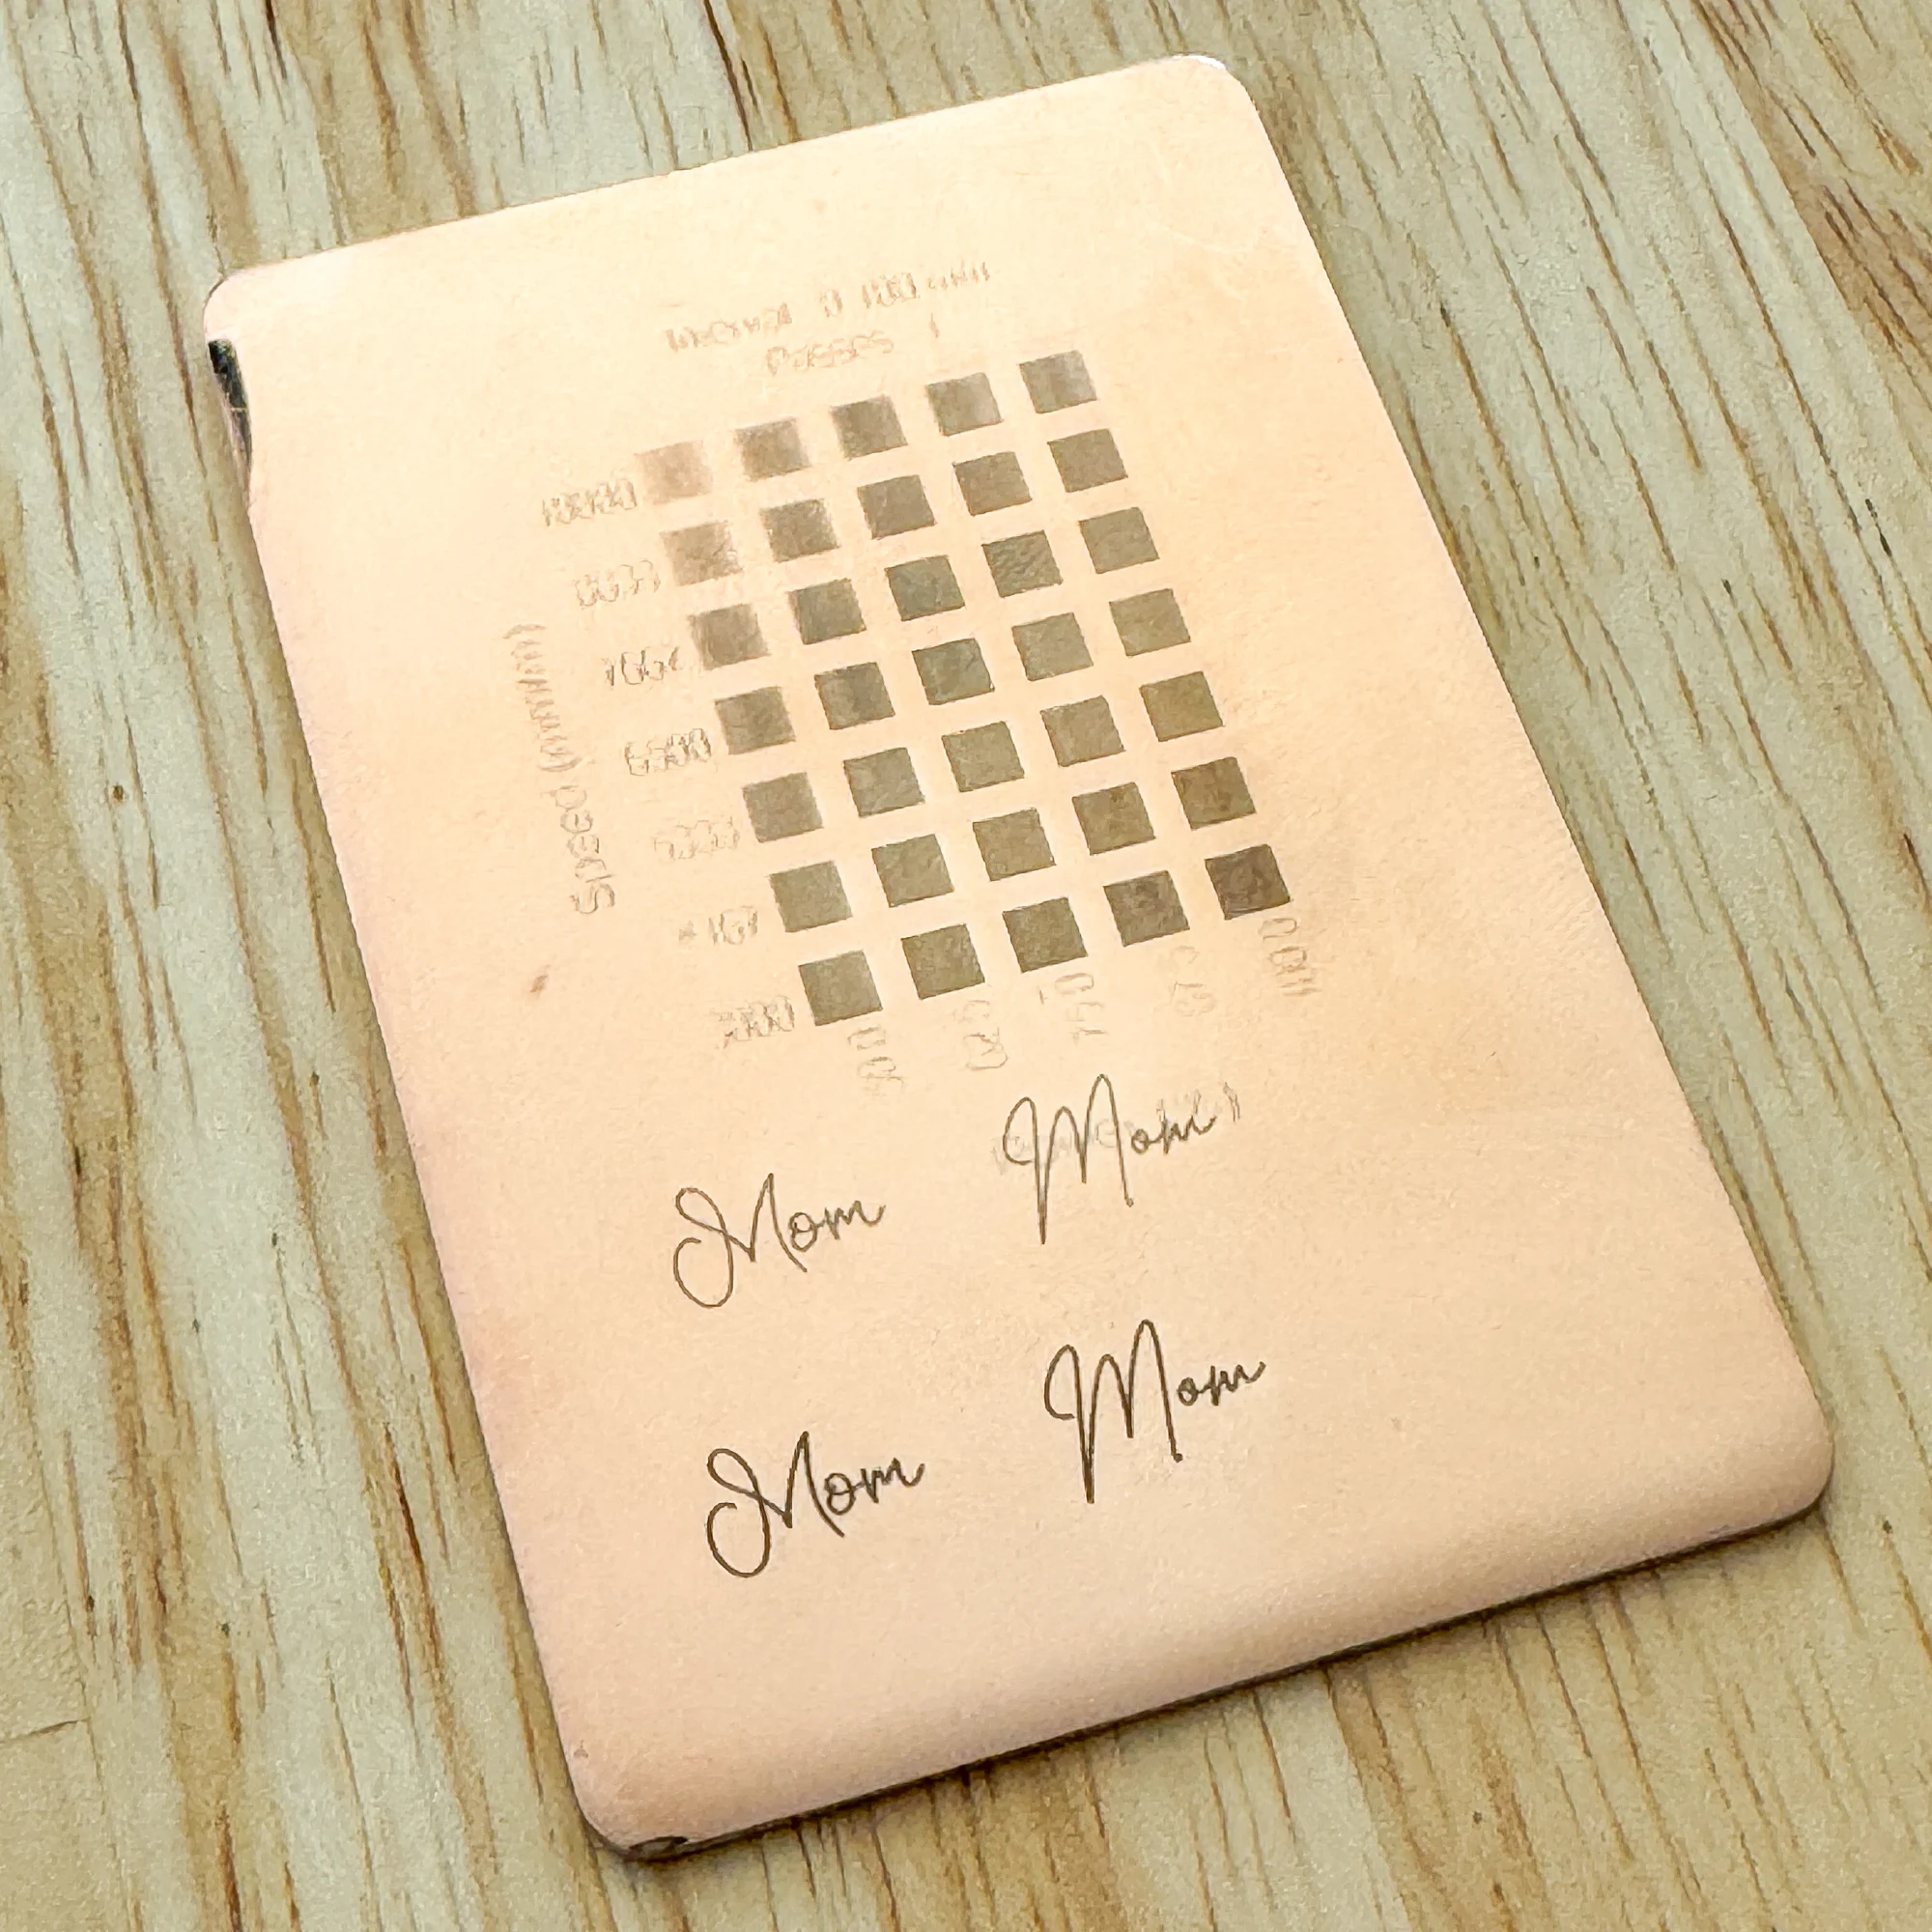
Next, I wanted to test the rose gold plated stainless steel of the butterfly necklace pendant. It's too tiny to put a grid on, so I also ordered a test card size of the same material so I could get the exact settings I needed.
ACMER suggests 10000 mm/s at 100% power as a starting point for the 2W IR module on stainless steel. I decided to start there and add several rows of slower speeds to see how the color changes.
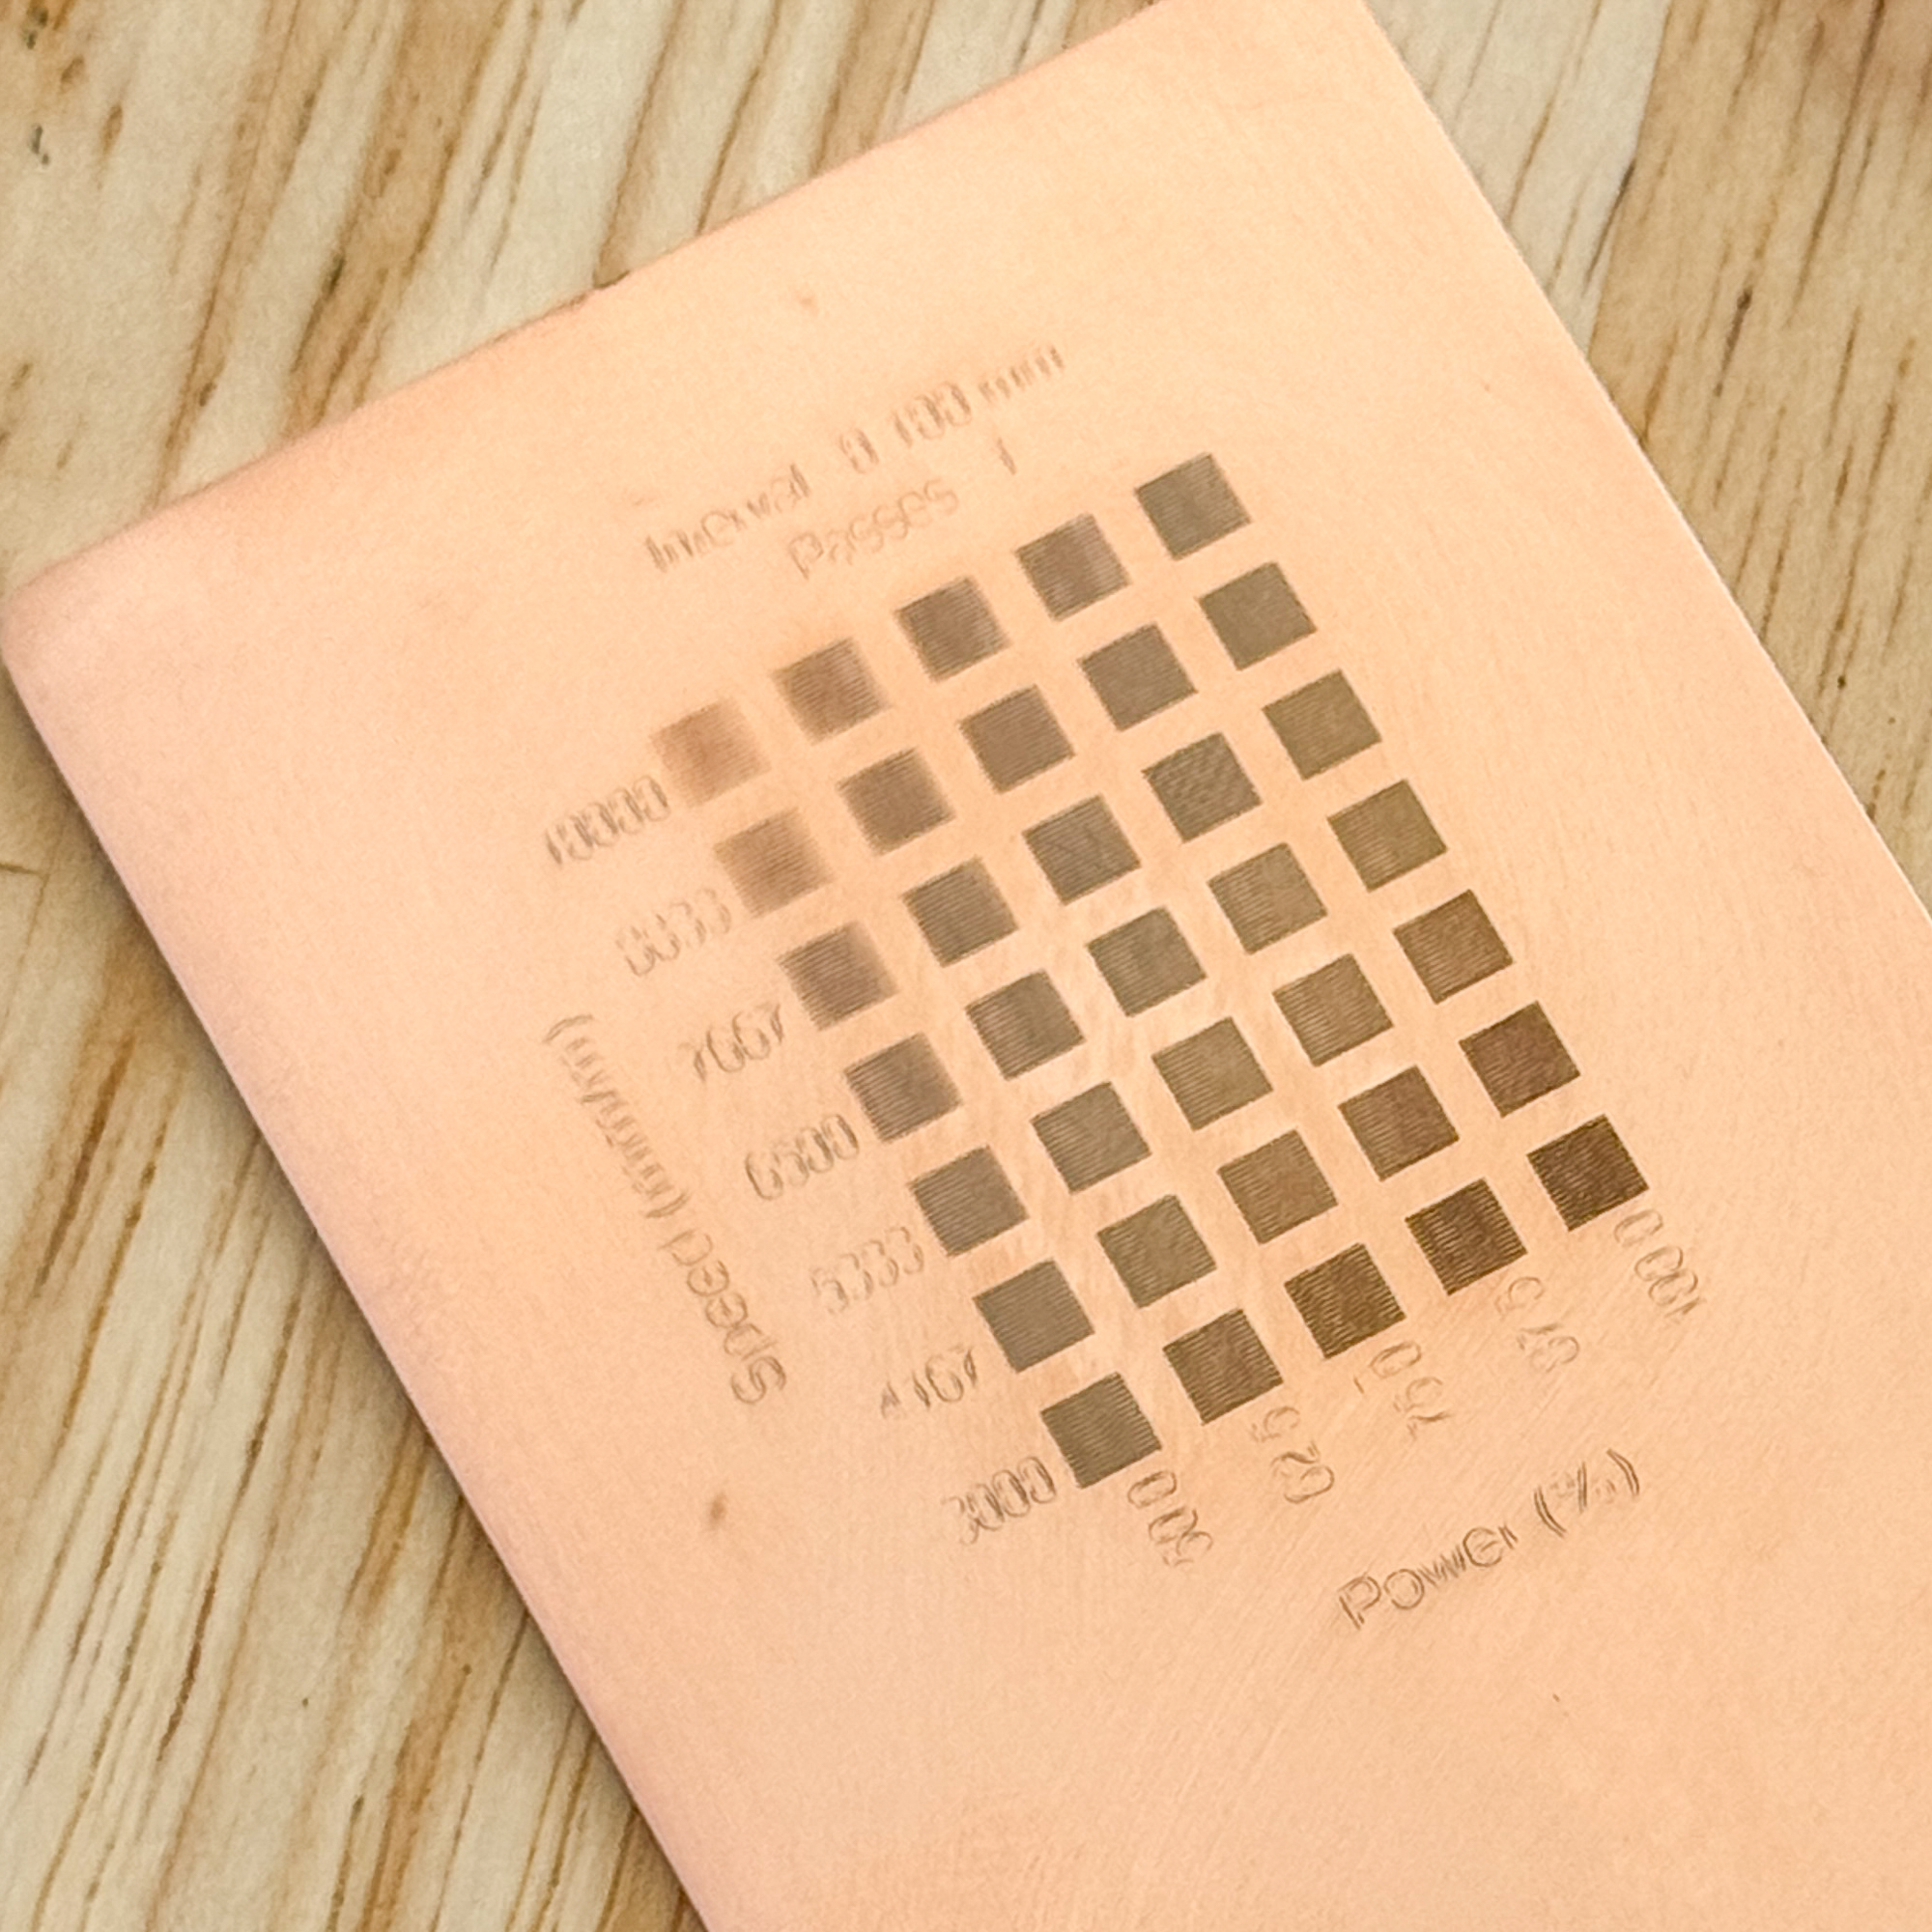

All of the 100% power settings turned out nice and crisp, and kept the surface of the metal smooth to the touch. I decided to go with 4000 mm/s at 100% power so the engraving would really pop.
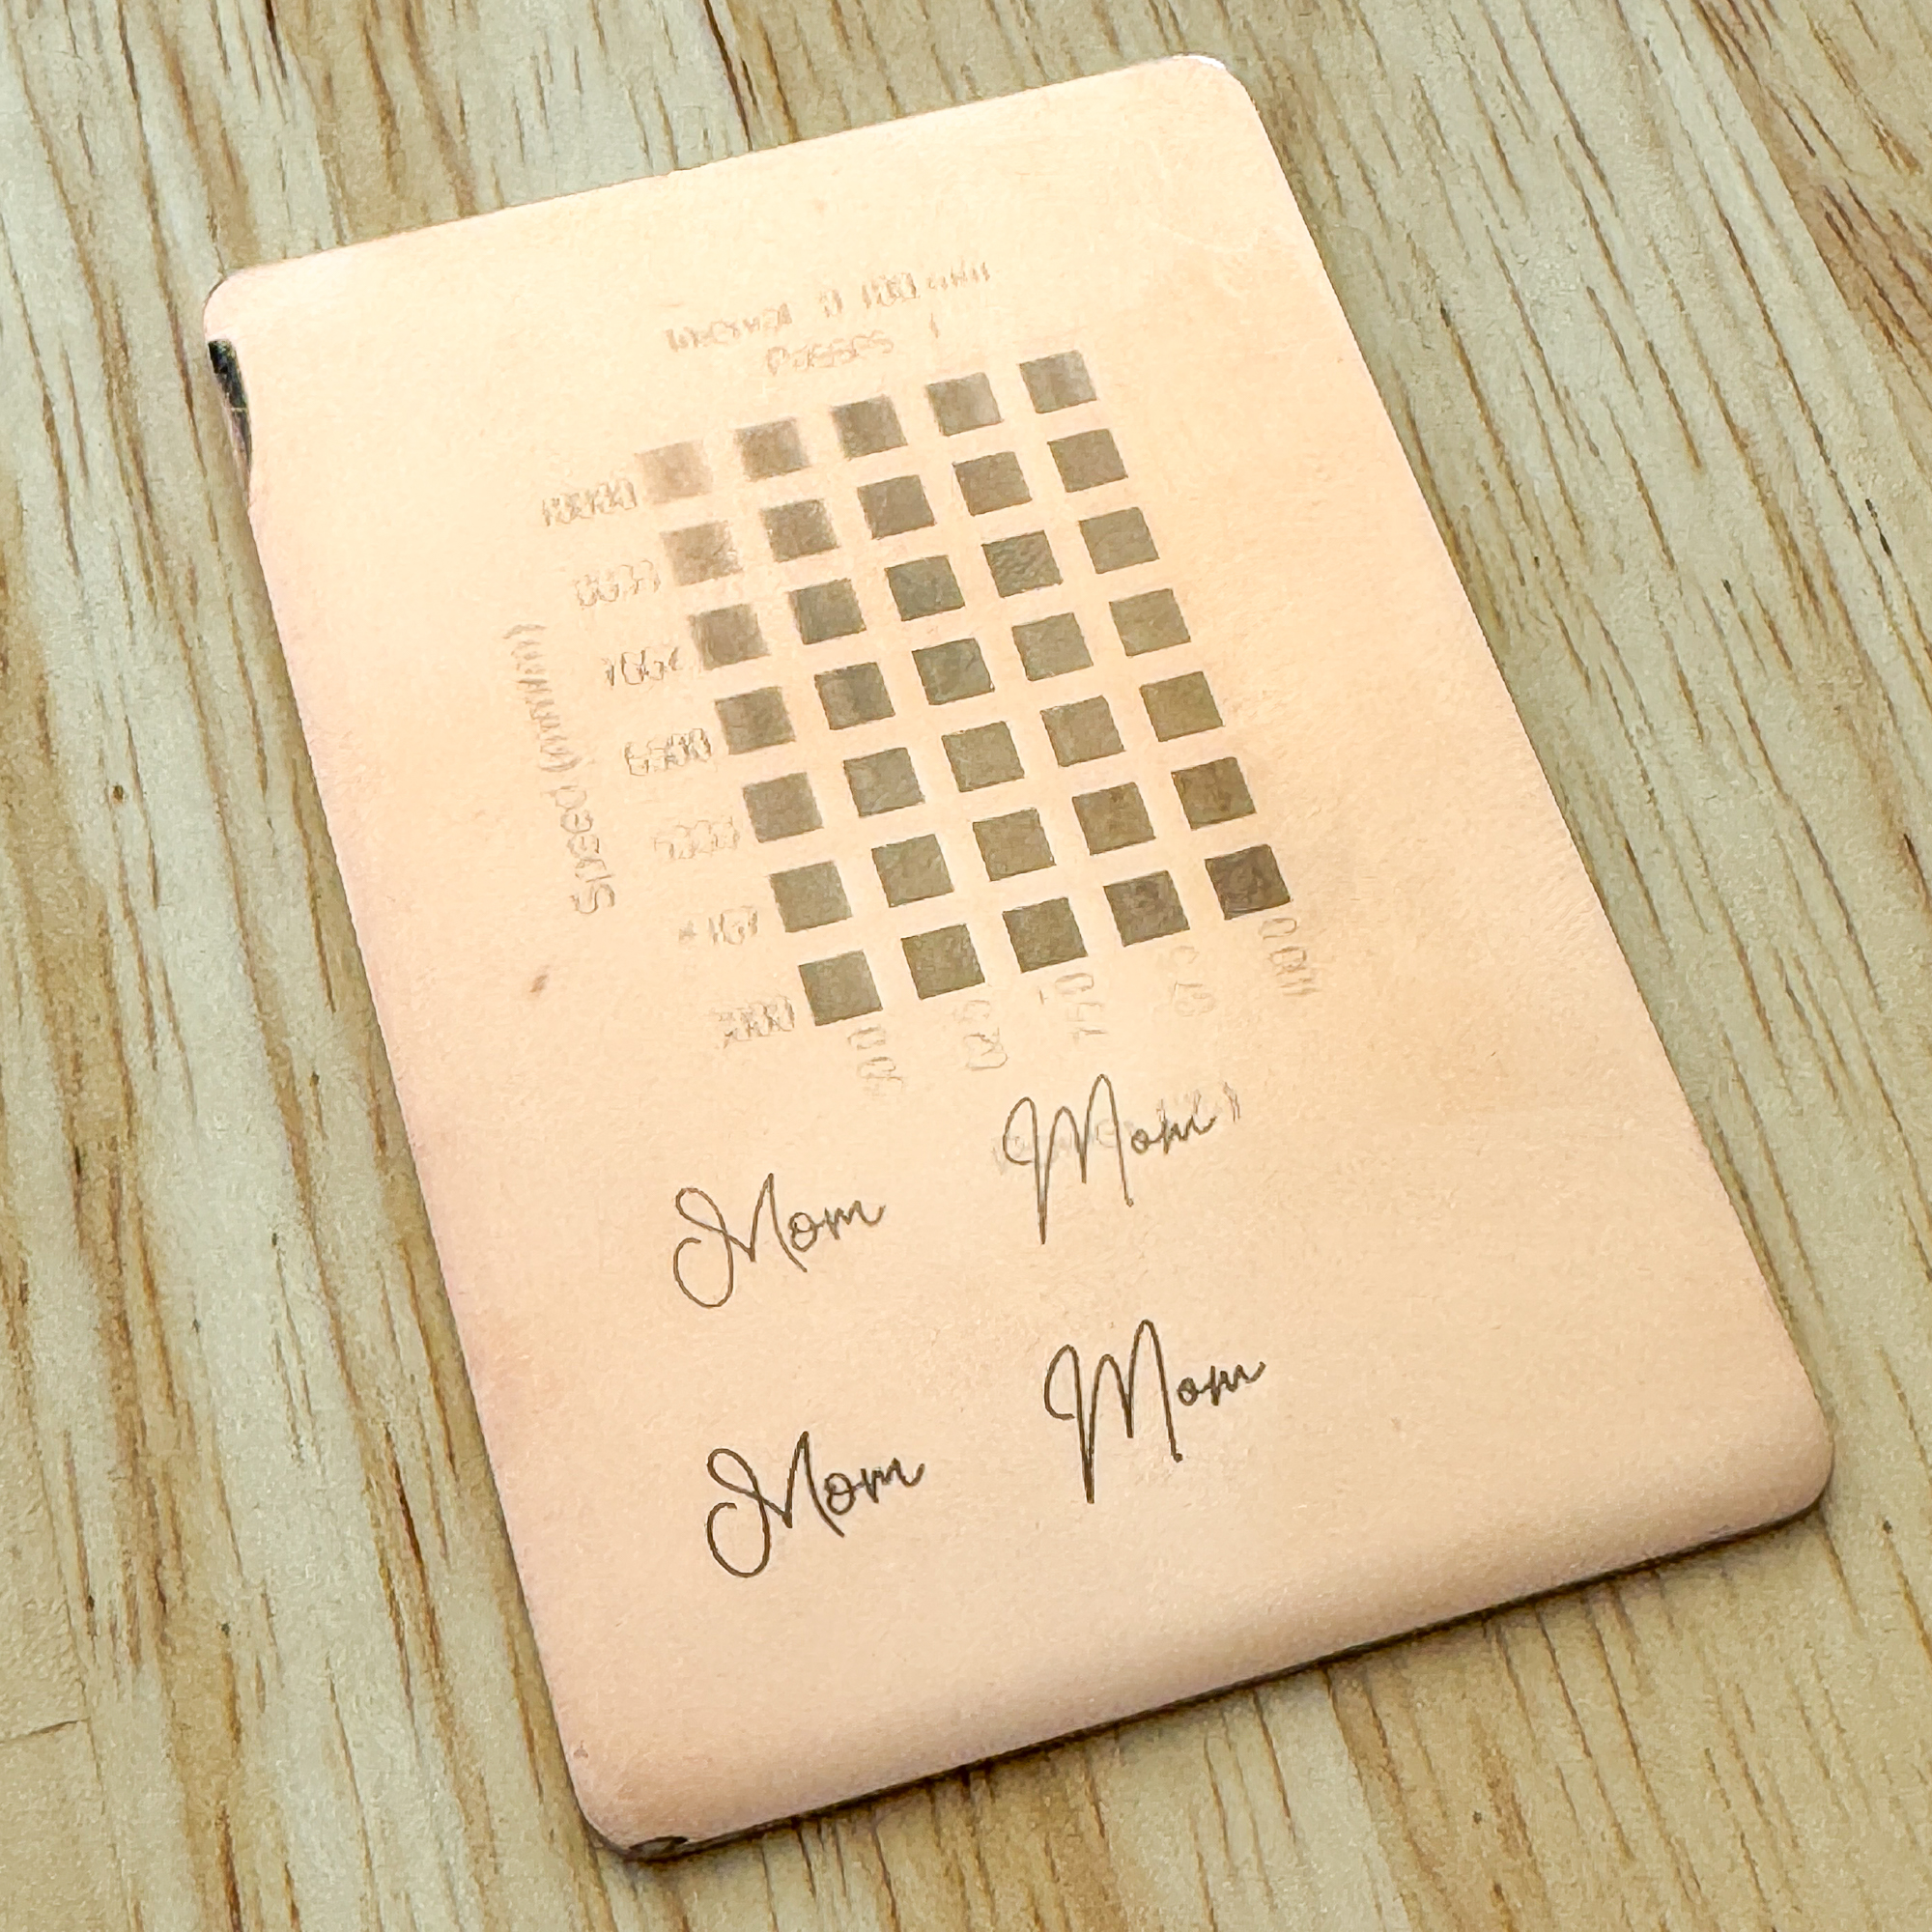
Since there was a little space left at the bottom of the test card, I also tried out a couple of fonts to see which one looked best when engraved in tiny print. Welcome Beach font is on the left and Brittany Signature is on the right. The bottom two were done with two passes in a crosshatch pattern, which gave the best results.
With everything tested out, now it's time to cut and engrave the real thing!
Making the jewelry box
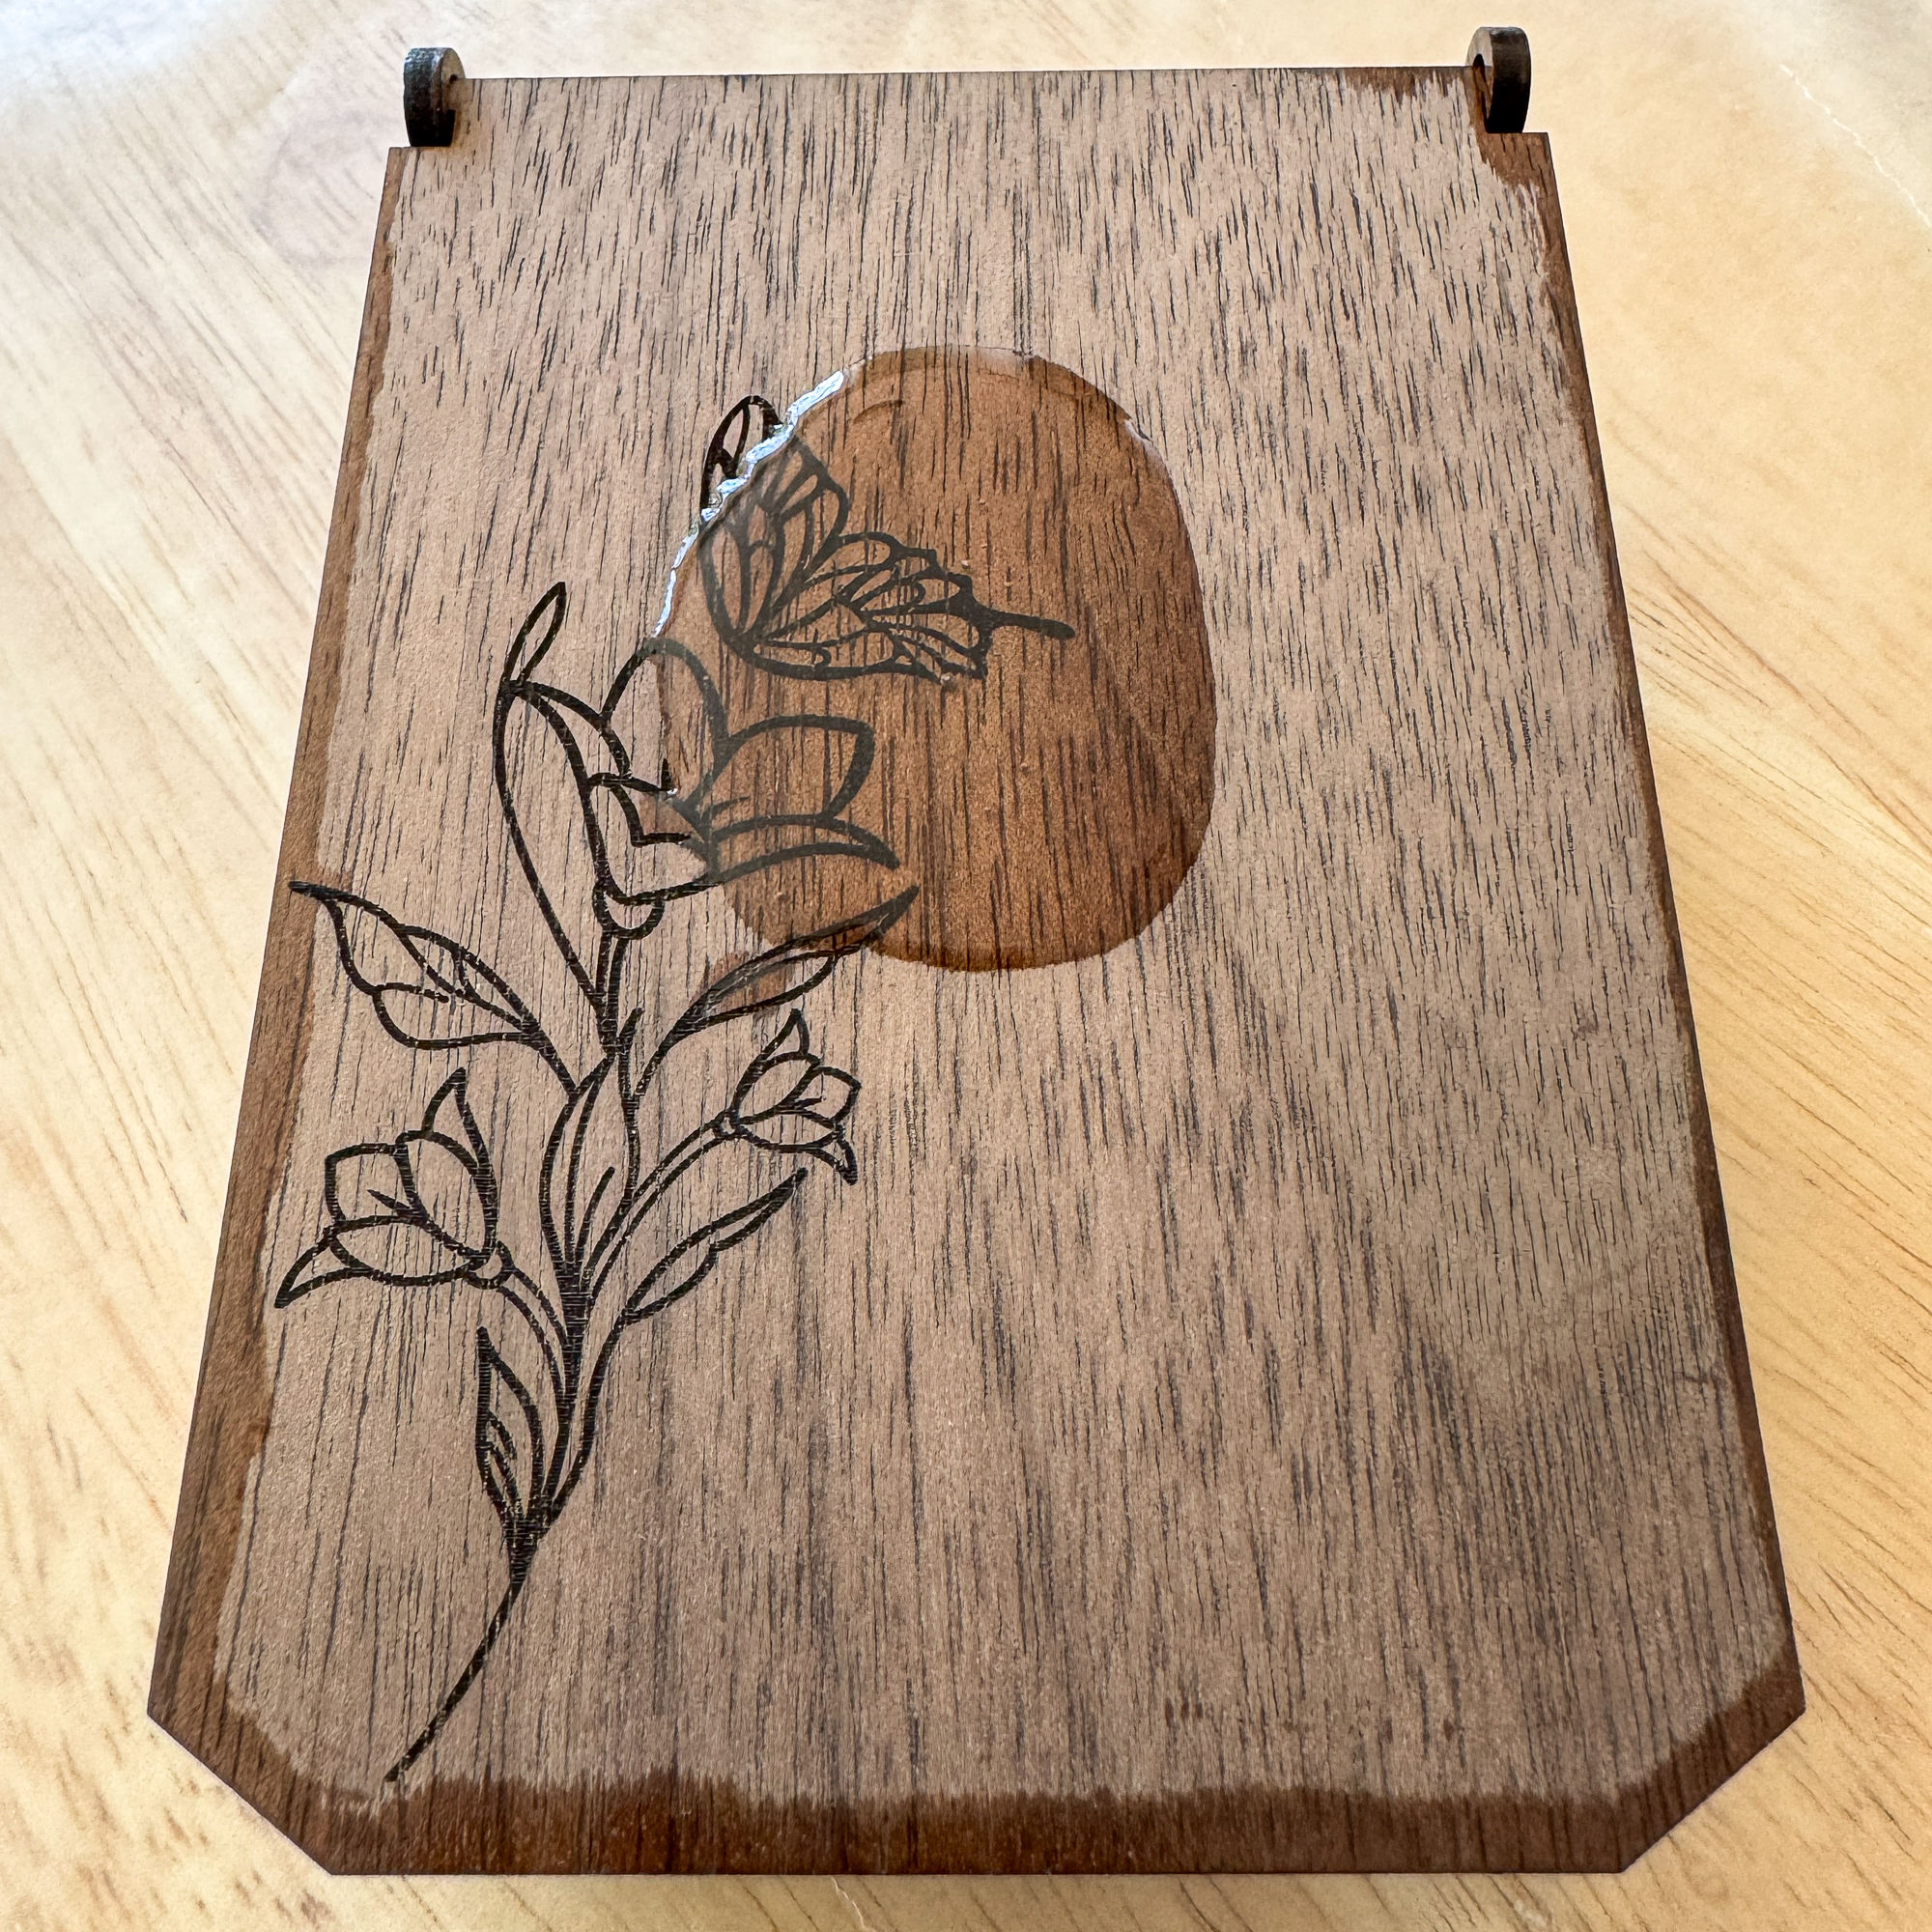
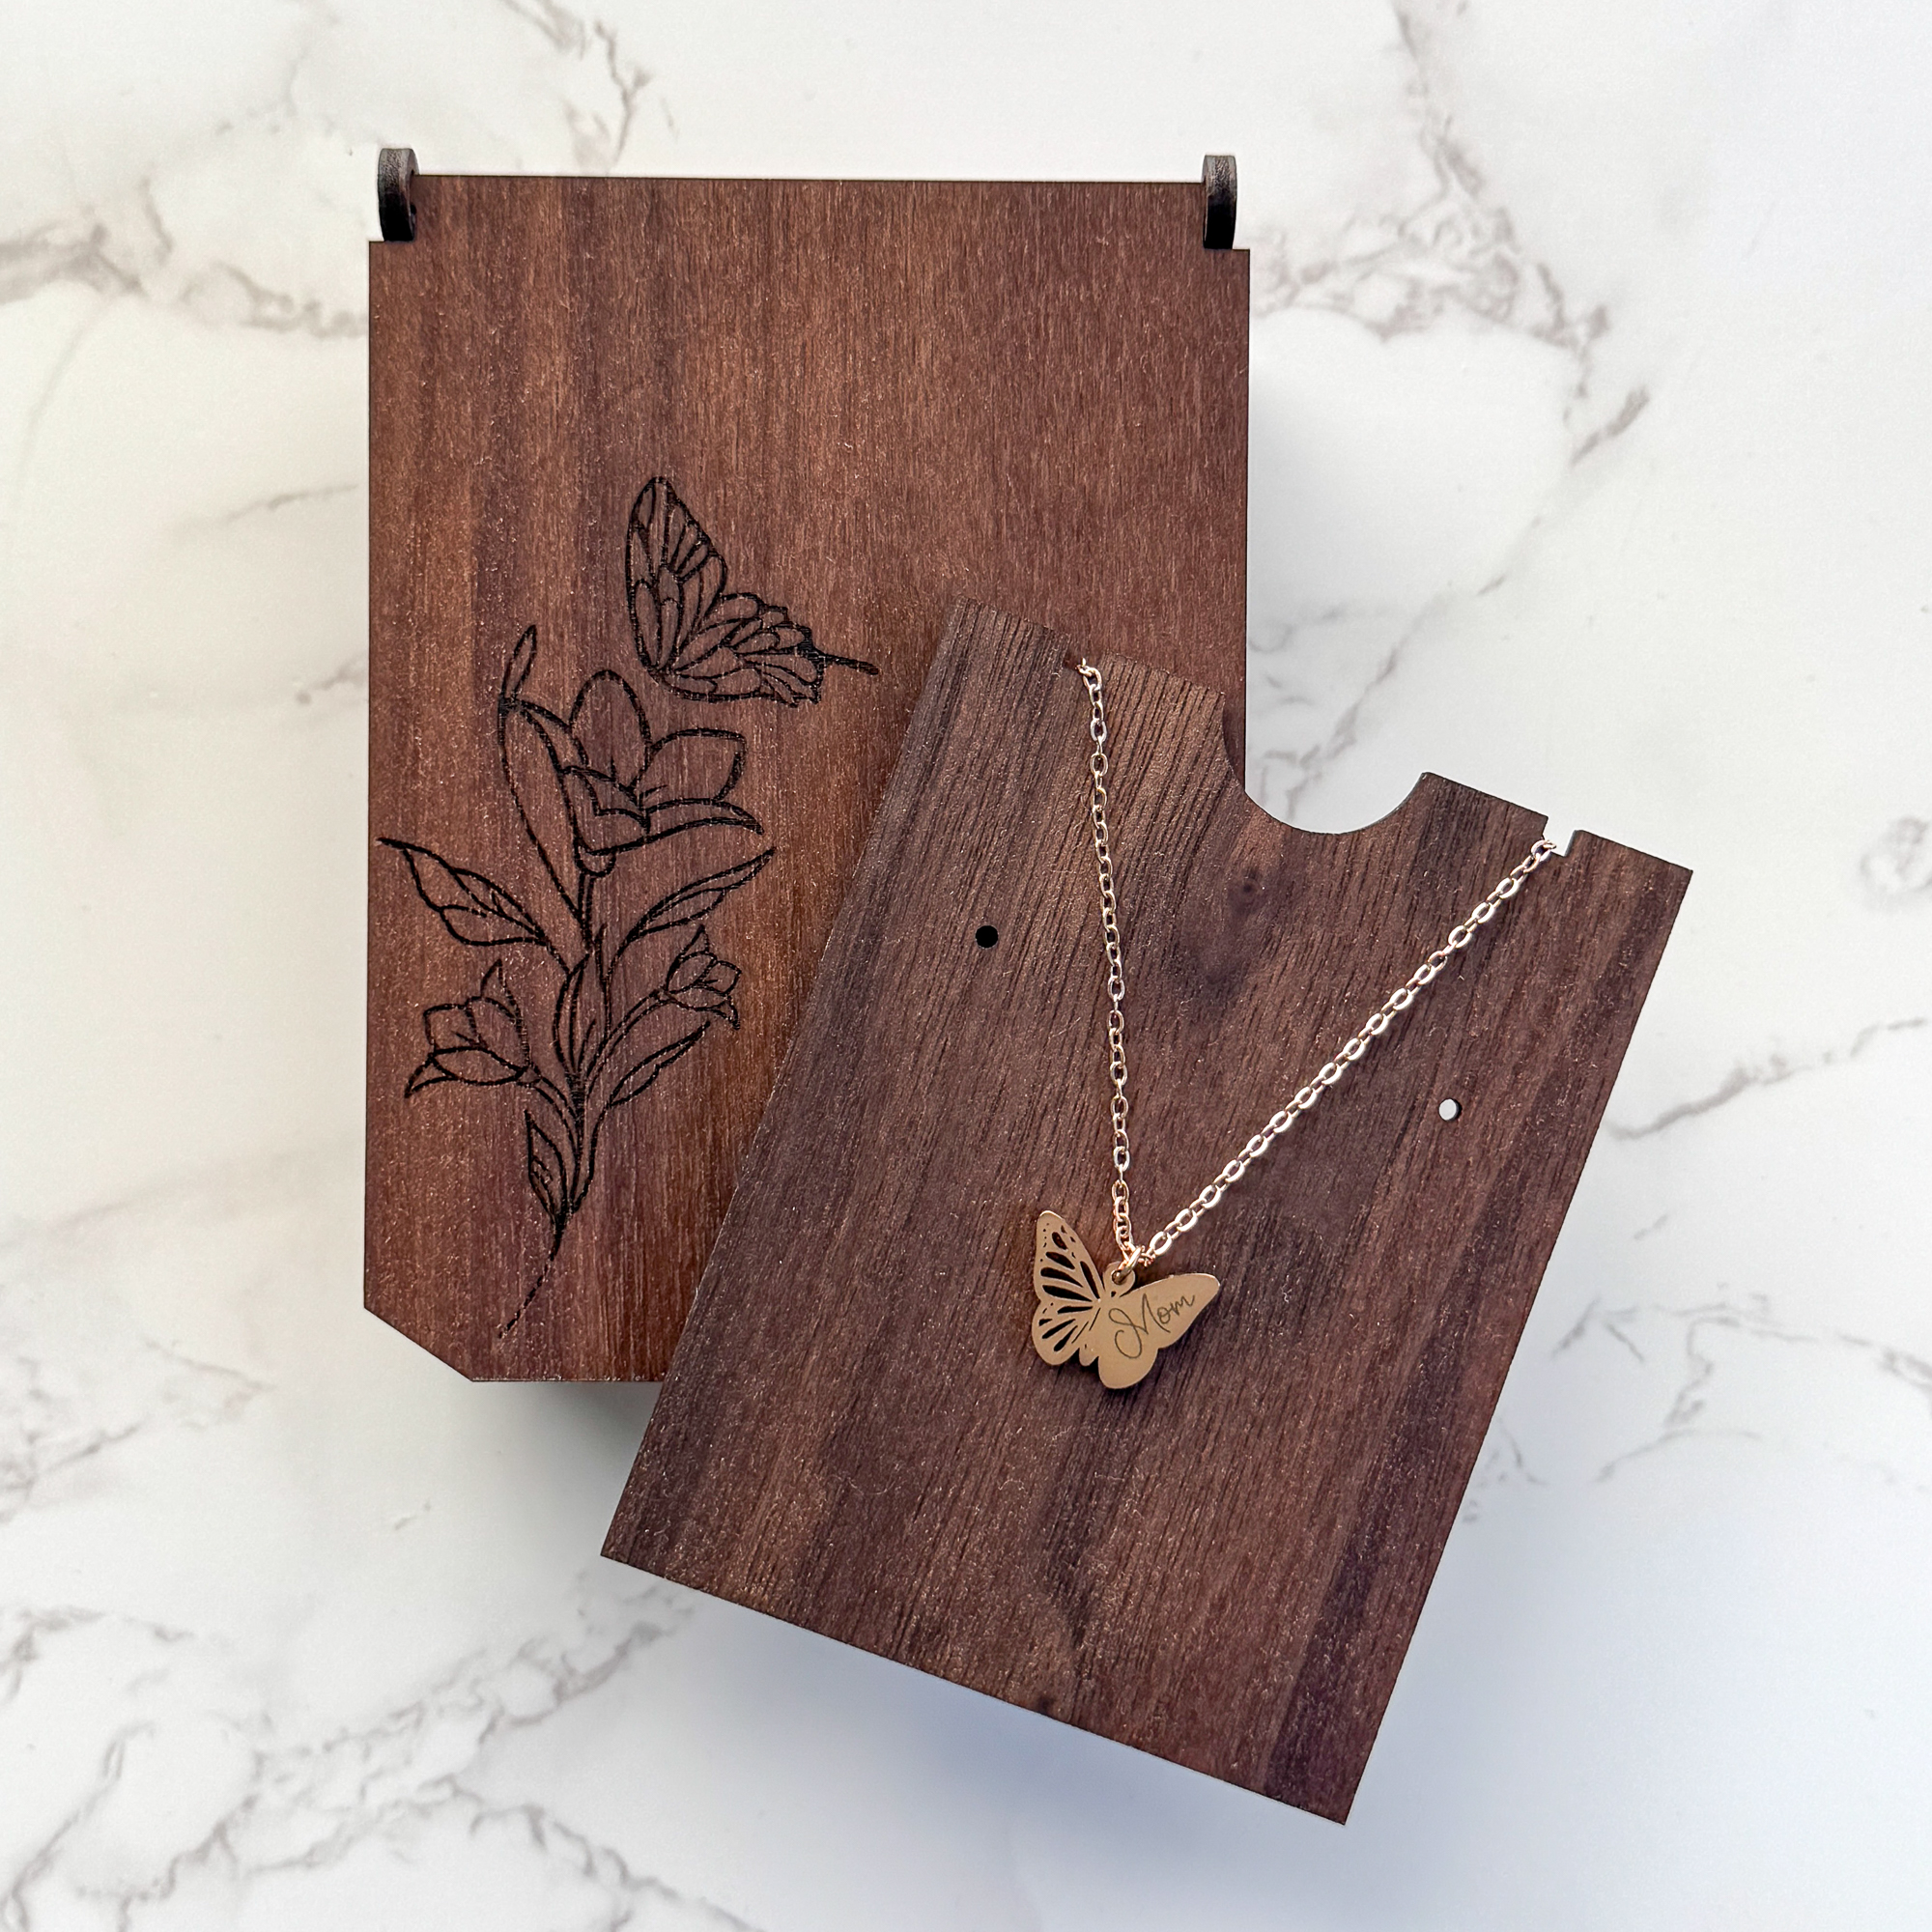
I found this simple jewelry gift box laser file on Etsy that was perfect for this project. It has several different options for the engraving, including one with a butterfly!
All I had to do was drop the file into Lightburn, adjust the cut and engrave settings to match the ones I liked in the tests, and let the ACMER P3 do its thing! It took just under 5 minutes from start to finish.
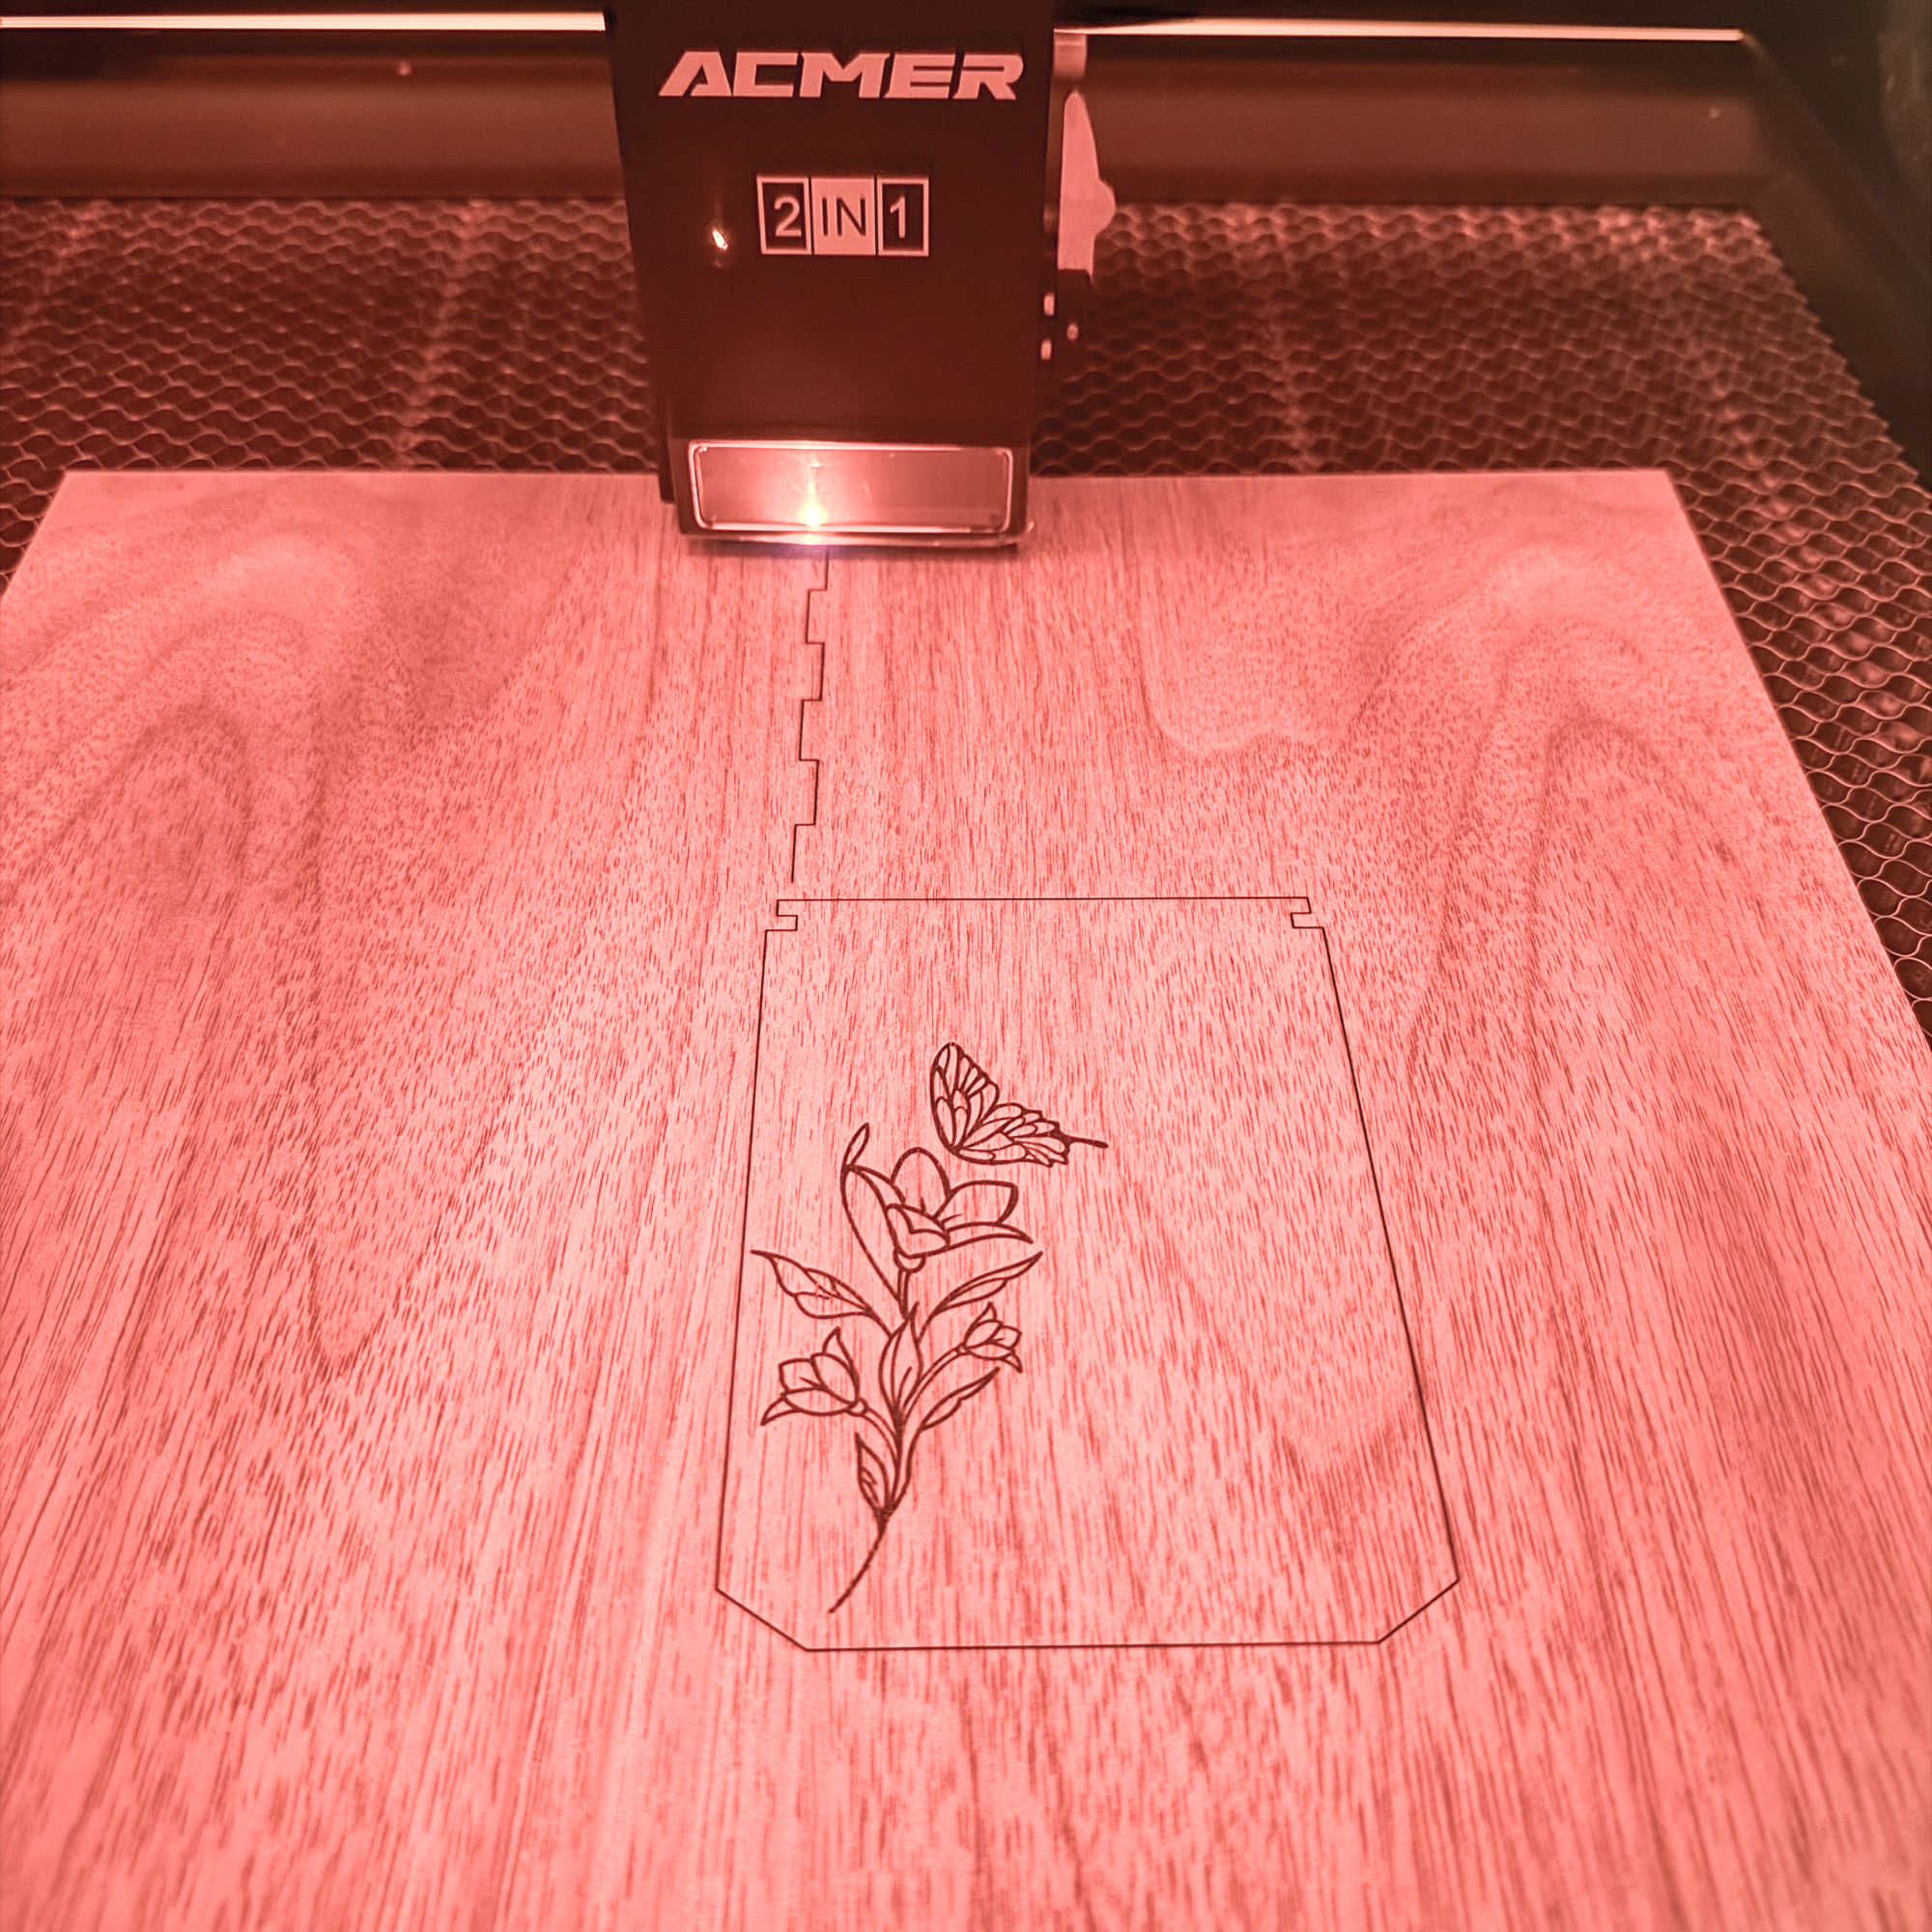
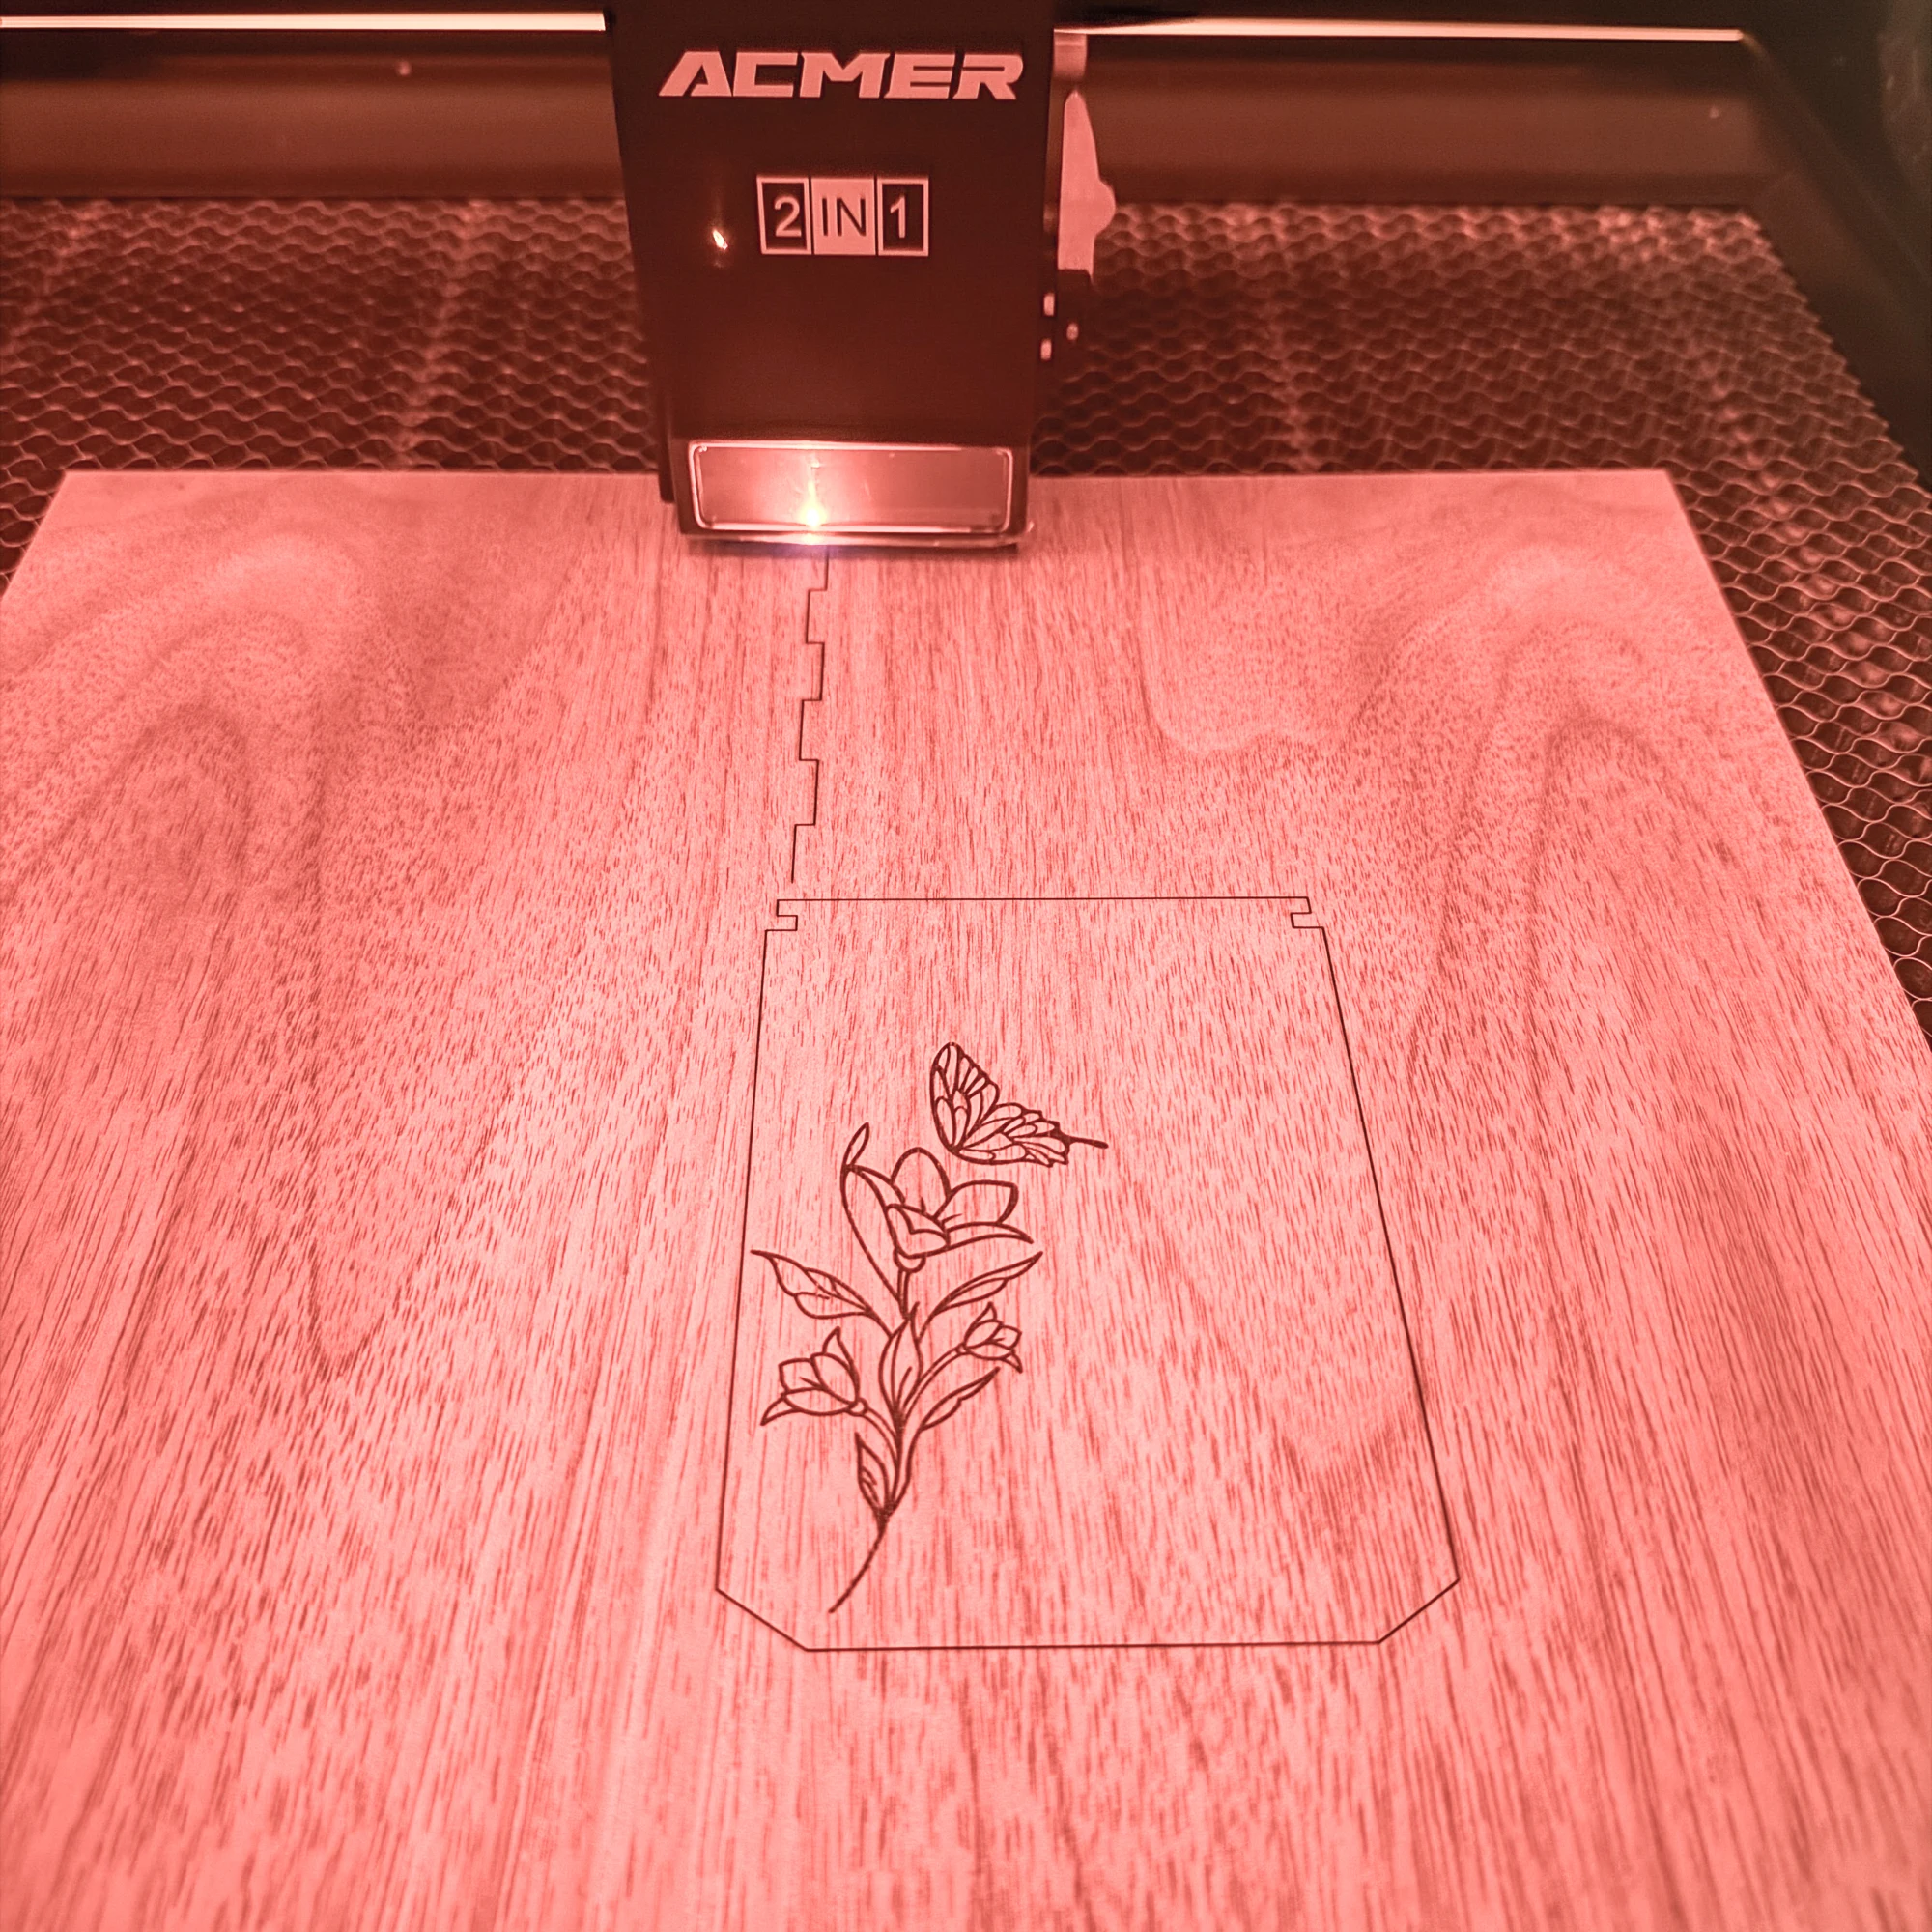
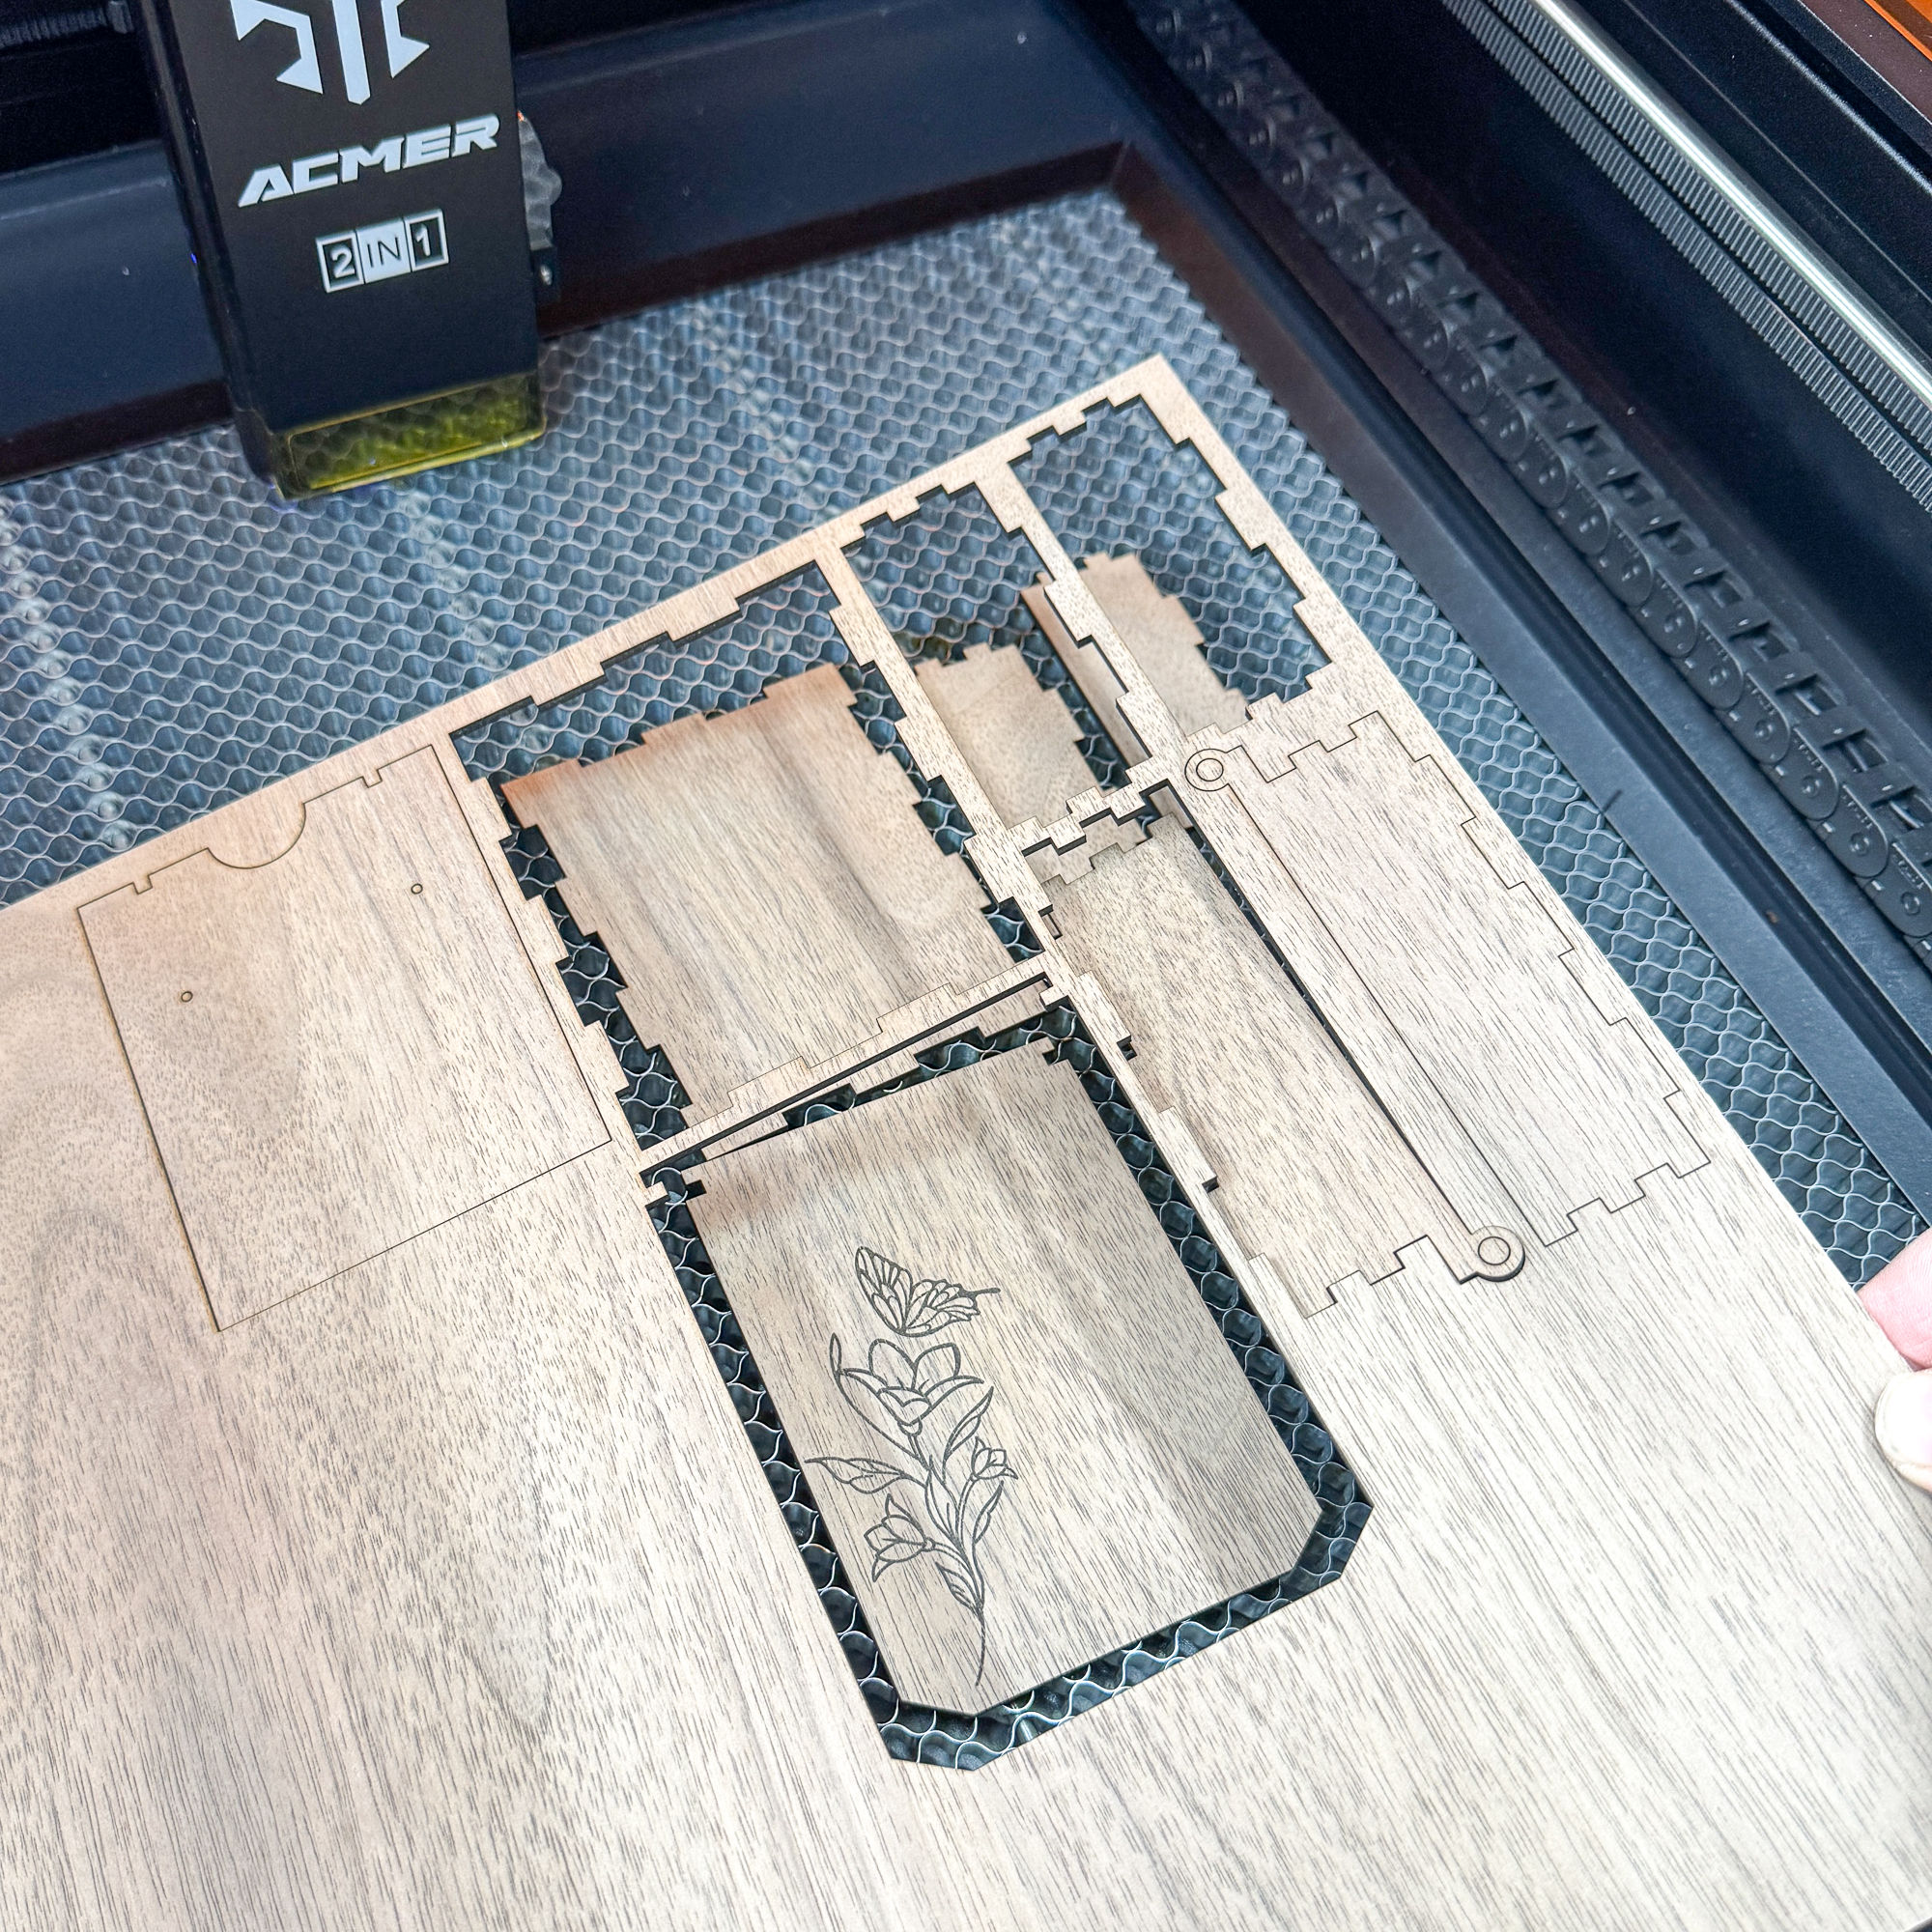
I was really impressed with how clean the cut turned out! There wasn't any char around the edges (yay, no sanding!) and the engraving was dark and crisp. The pieces were cut all the way through, so they fell out or popped out easily.

The box went together really quickly. I used these mini clamps to hold the corners together while I applied brown CA glue to the inside corners.
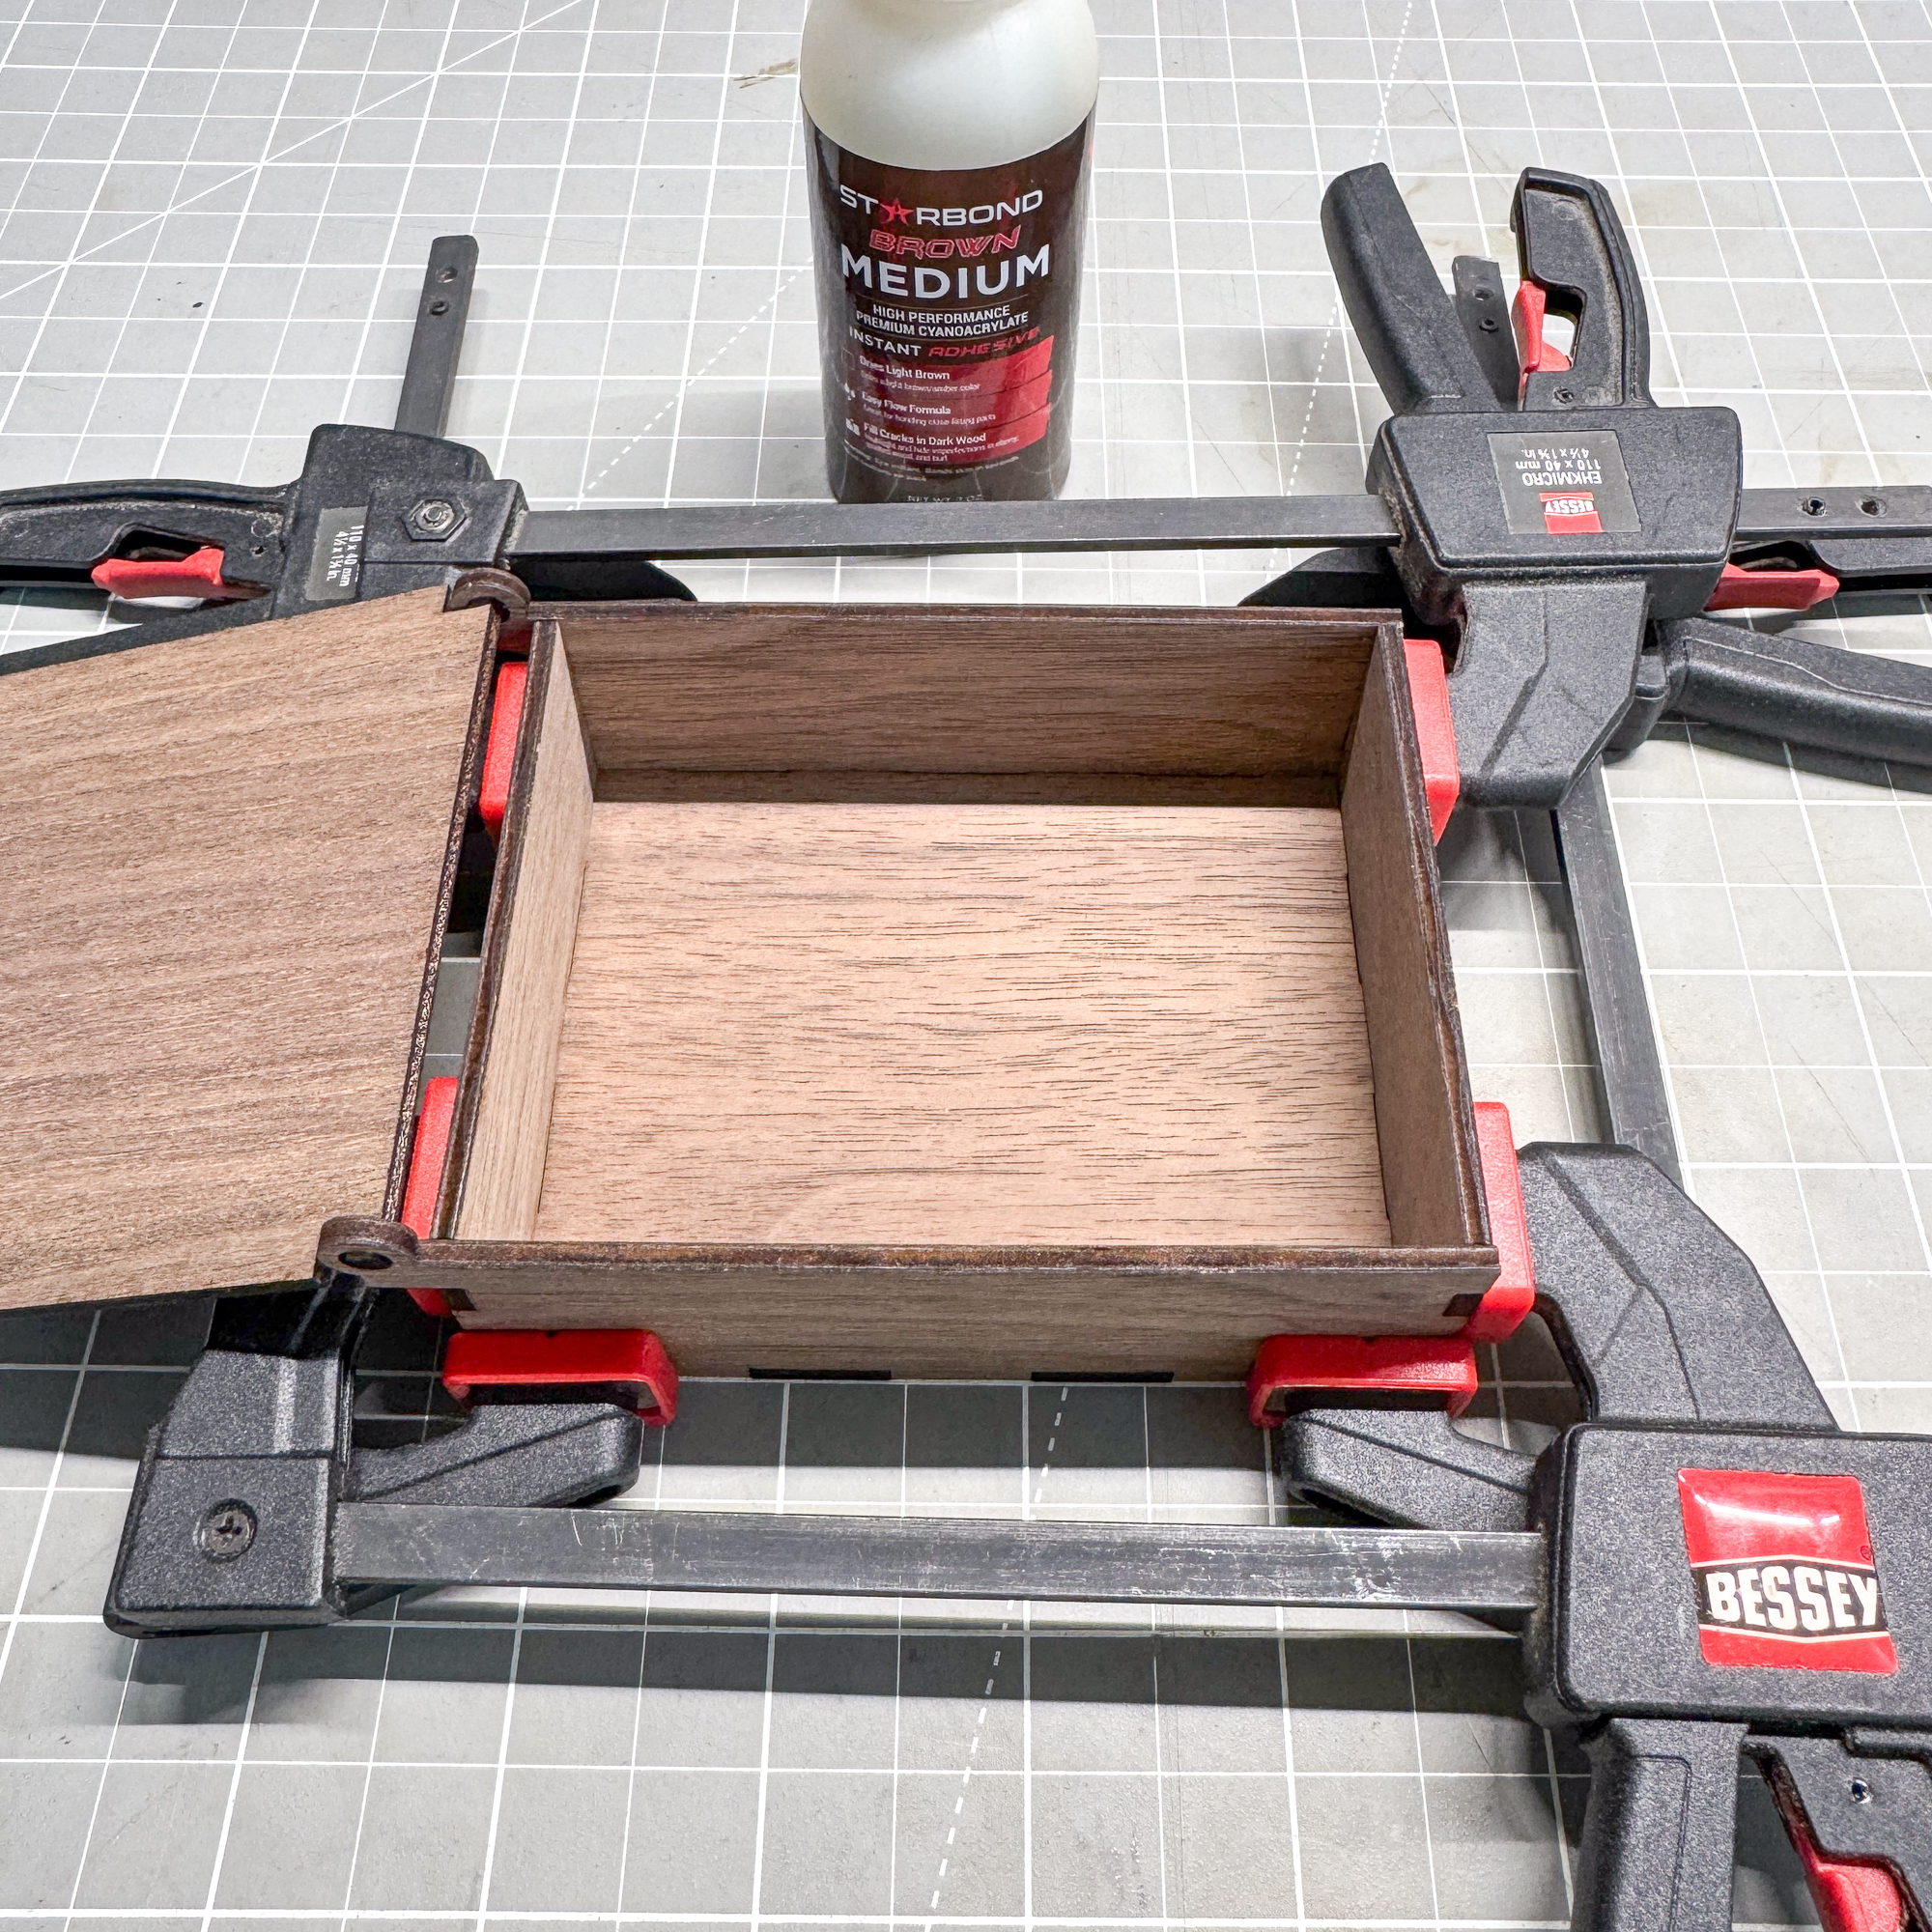

Once the glue dried, I applied a coat of mineral oil to the entire box to really make that walnut wood grain pop!

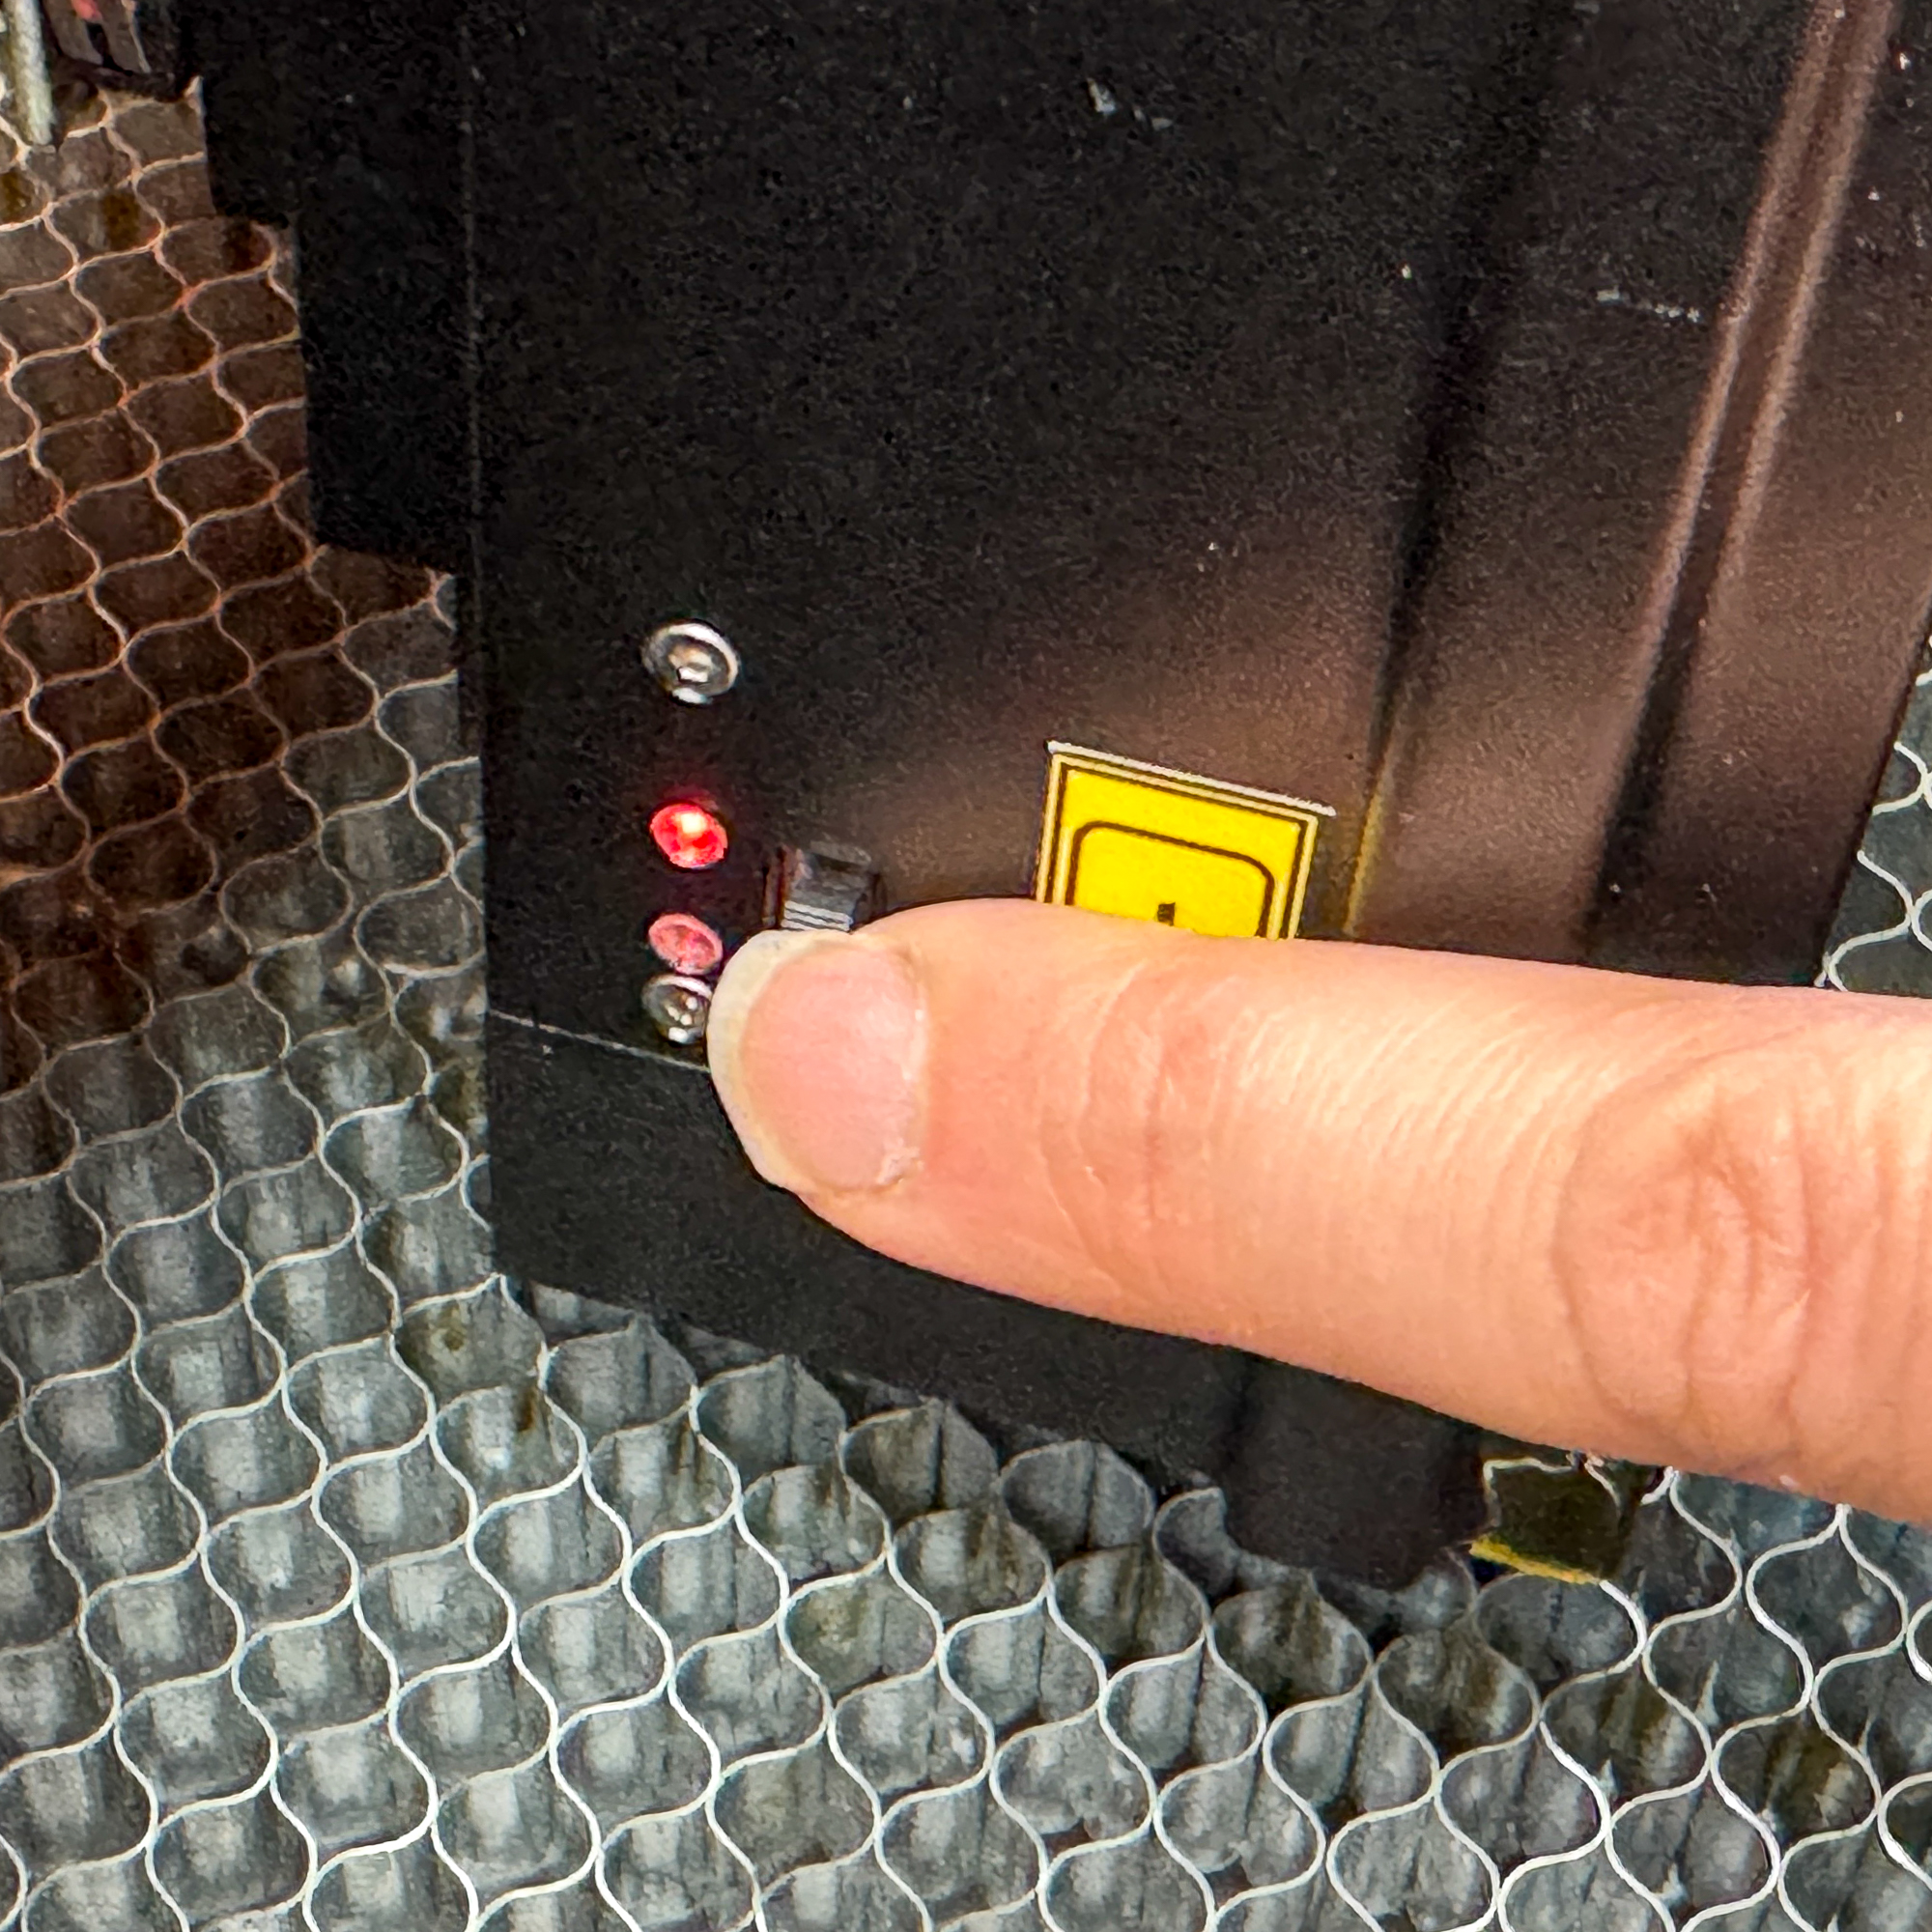
Now I need to make the jewelry to go inside it! Before you start this step, don't forget to flip the switch on the laser module from diode to IR! The light changes color so you know whether the blue diode laser or red IR laser is active.
Engraving the pendant
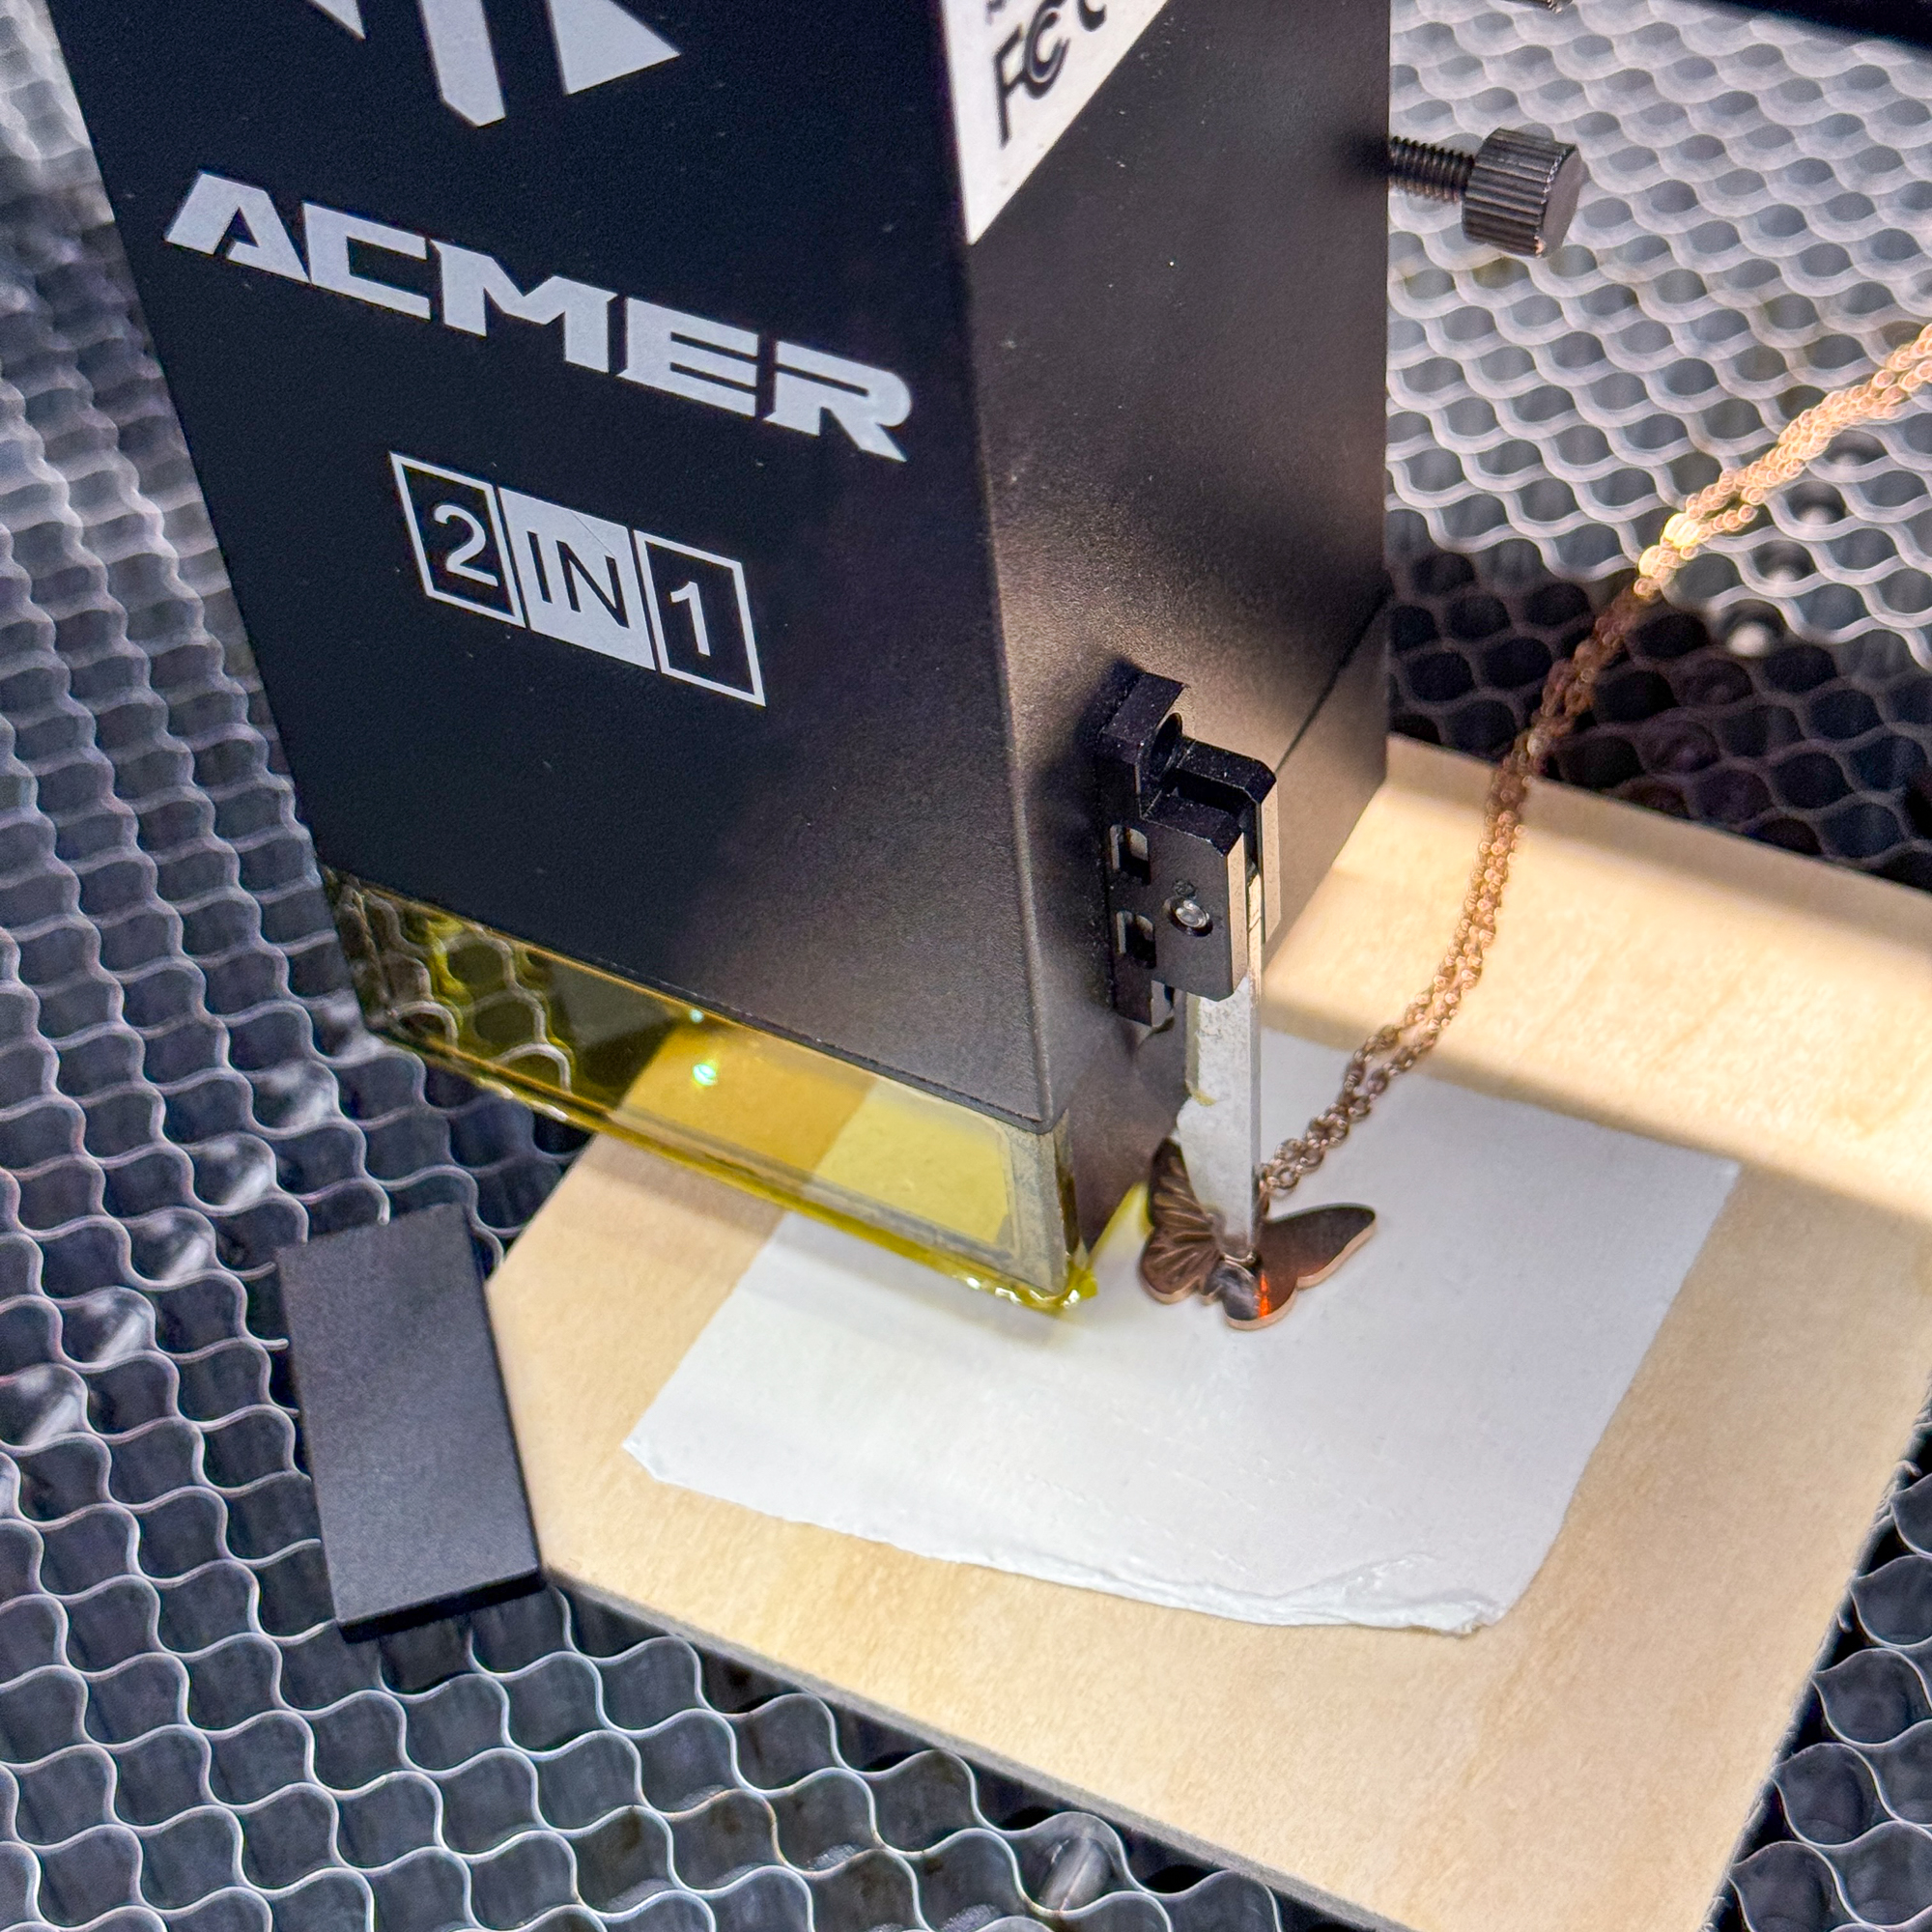
This part is a little nerve-wracking, because I only had one shot! It can be tricky to get the engraving in the right spot on this tiny little butterfly pendant, but the camera on the ACMER P3 makes it easy to get pinpoint precision.
I placed the pendant on a piece of plywood so it wouldn't fall through the honeycomb tray, then secured it with double sided tape so it wouldn't move accidentally. Then I adjusted the height of the laser module with the drop-down arm on the side.
Remember to move the laser module back to the home position so it's not blocking the view from the camera in the lid. Then zoom in close to get the placement of the letters just right. I found that the Welcome Beach font worked better on the butterfly wing.
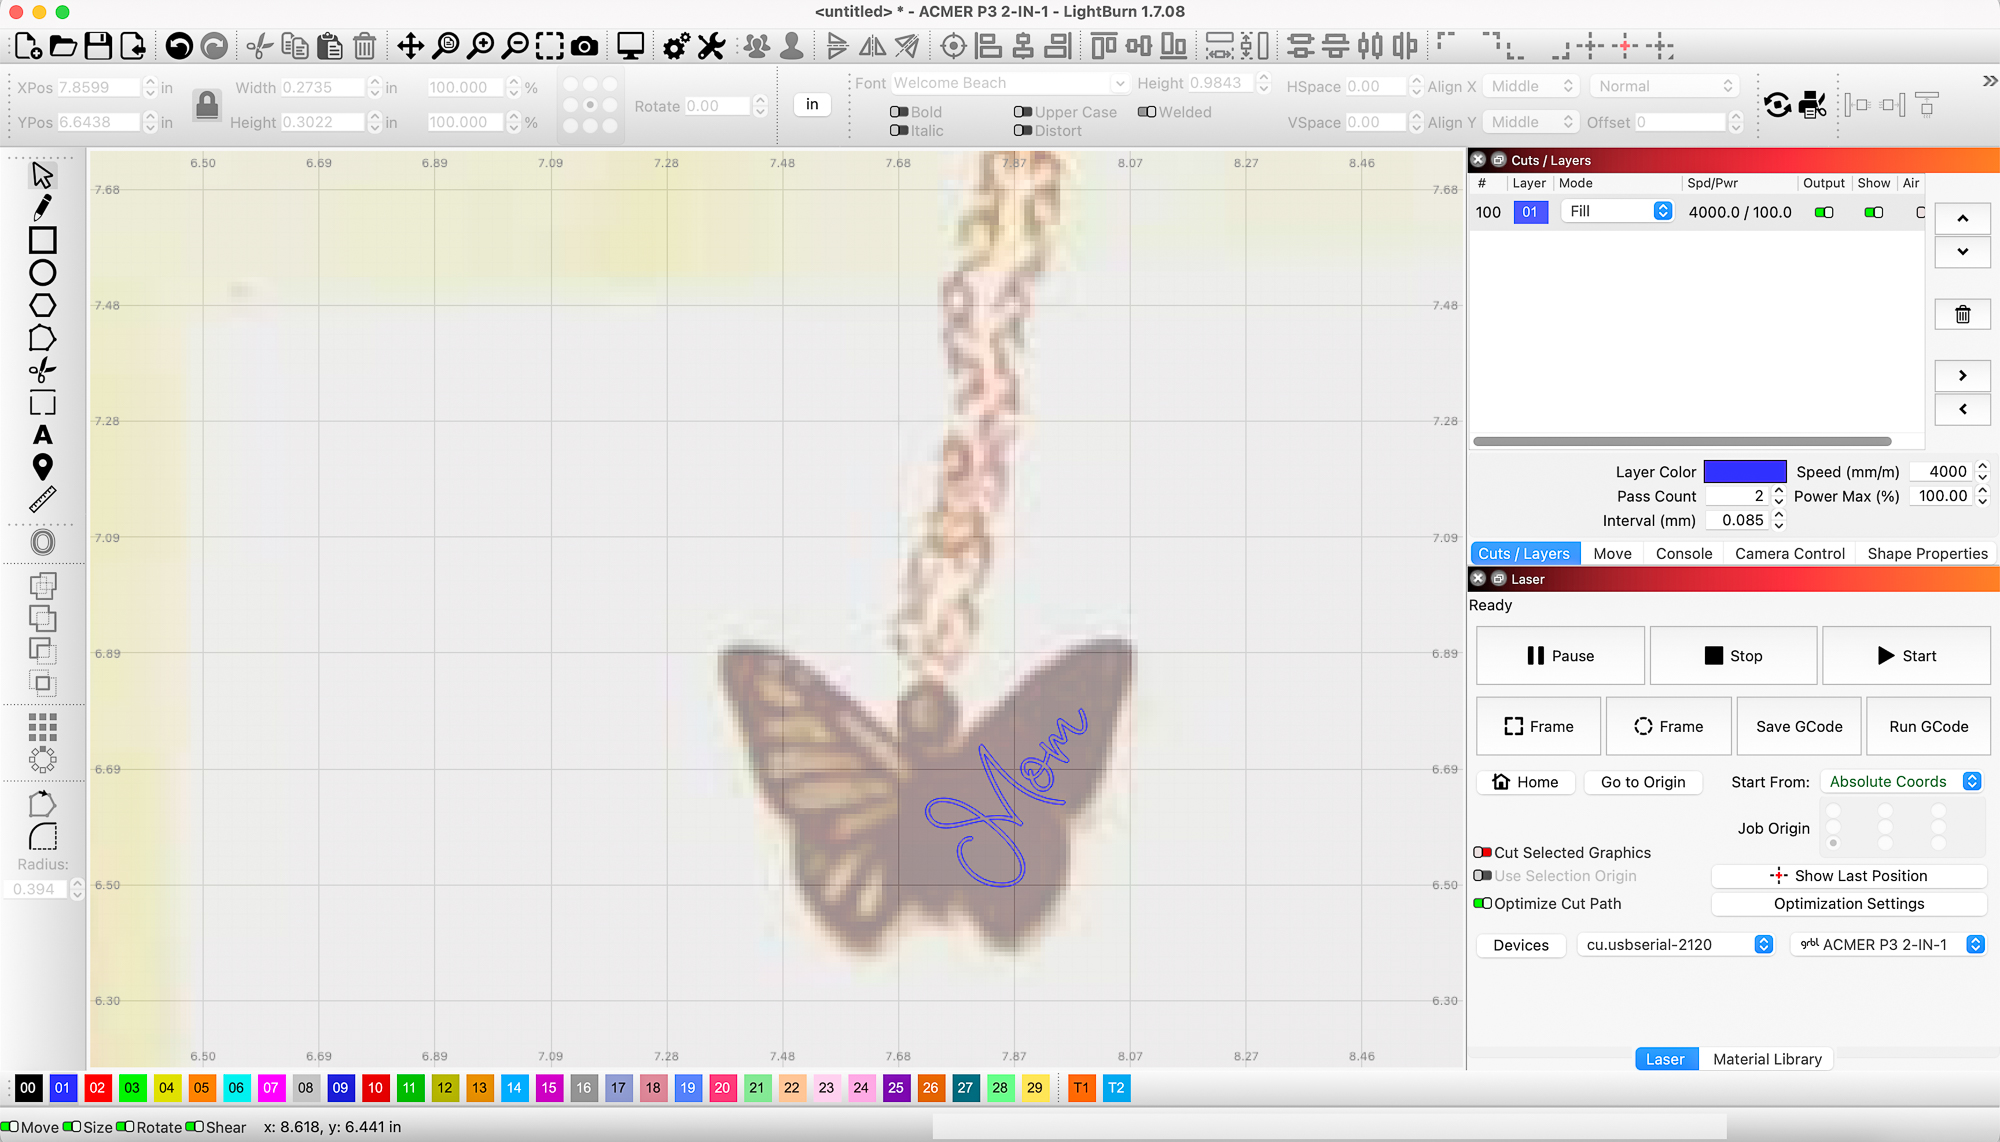
Once I got the engraving right where I wanted it, I took a deep breath and hit start. It only took a few seconds, and it turned out perfect!
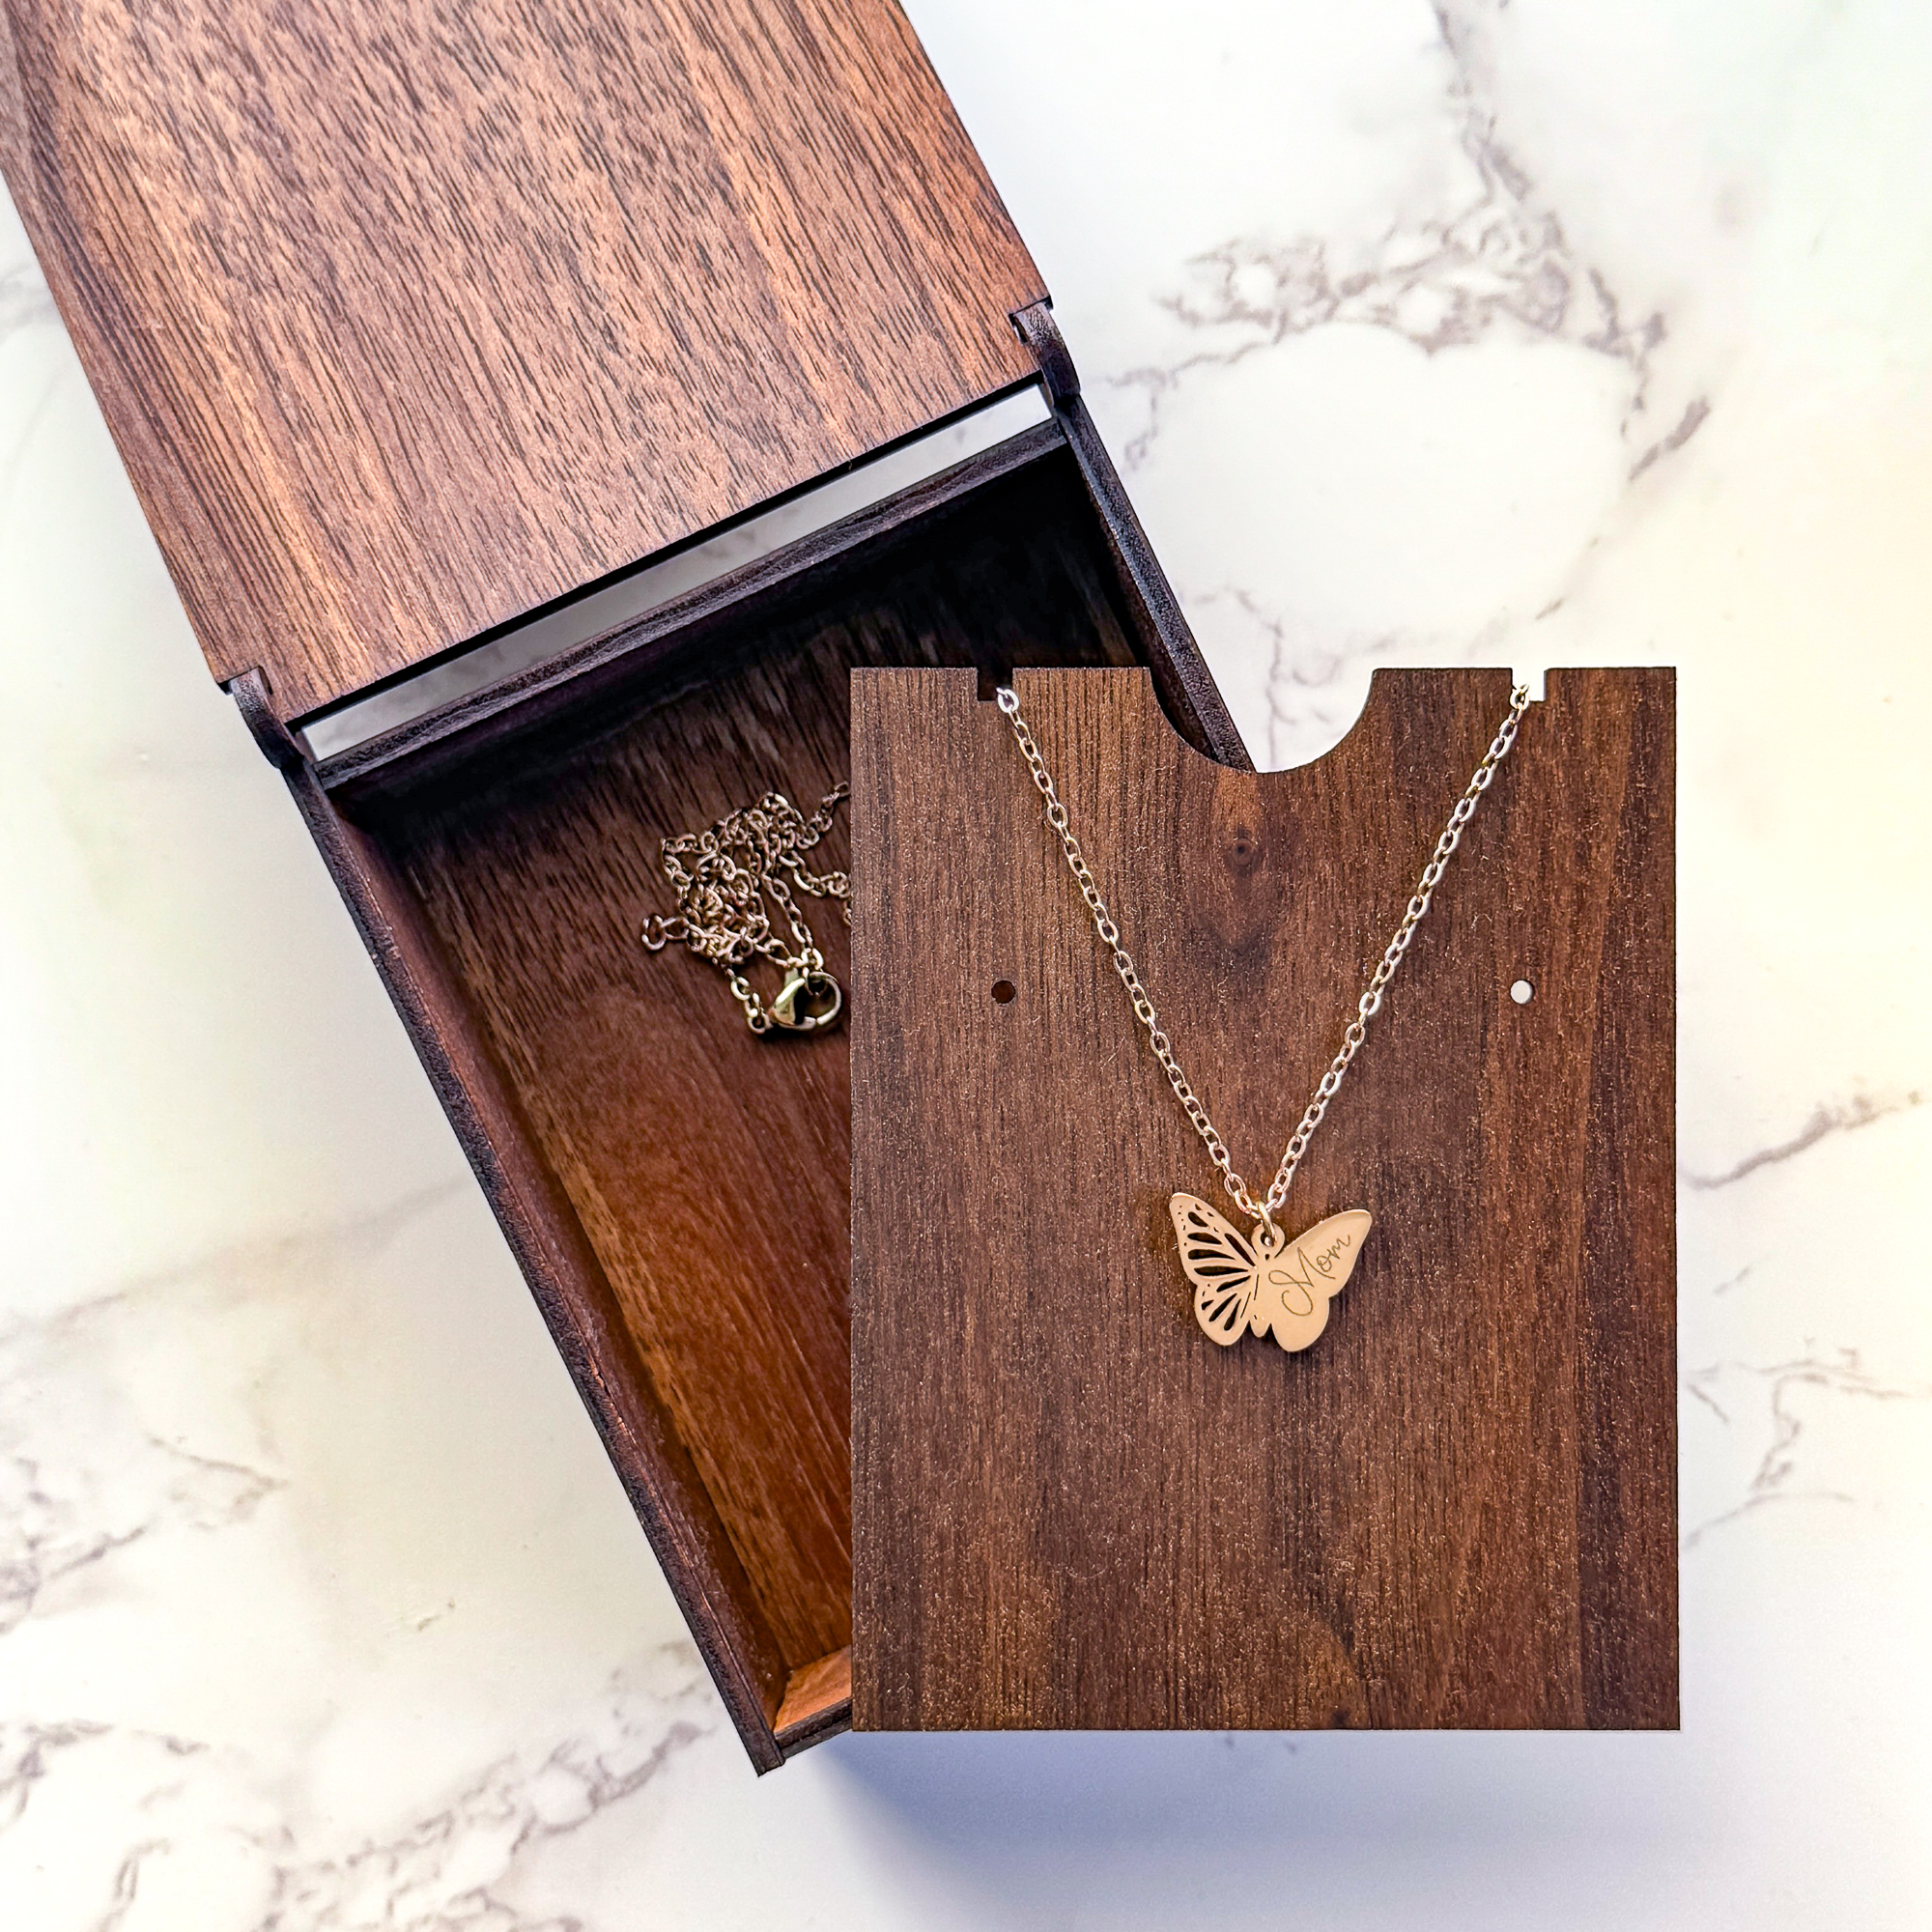
Putting the gift together
This turned out to be such a quick and easy Mother's Day gift that she's sure to love! The engraved walnut jewelry box paired with the beautiful rose gold butterfly pendant were just made to go together!

I have a butterfly earring laser file that I plan to cut out of acrylic with my CO2 laser that I'll add to complete the set (but I don't want to spoil the whole surprise by showing them here!)
Not only is this a great last minute gift idea, but it would also make a great product to sell online or at craft shows! It only takes a few minutes to make each piece, and the set would sell for much more than the items by themselves.
Where to buy the ACMER P3 laser
Thinking of taking the plunge into the laser world? The ACMER P3 is quite affordable, especially when you use my special coupon codes below!
Buy it directly from ACMER
Use the code WOODSEASON for 15% off!
Buy it on Amazon
Use the code 30CBE8I1 for 30% off!