

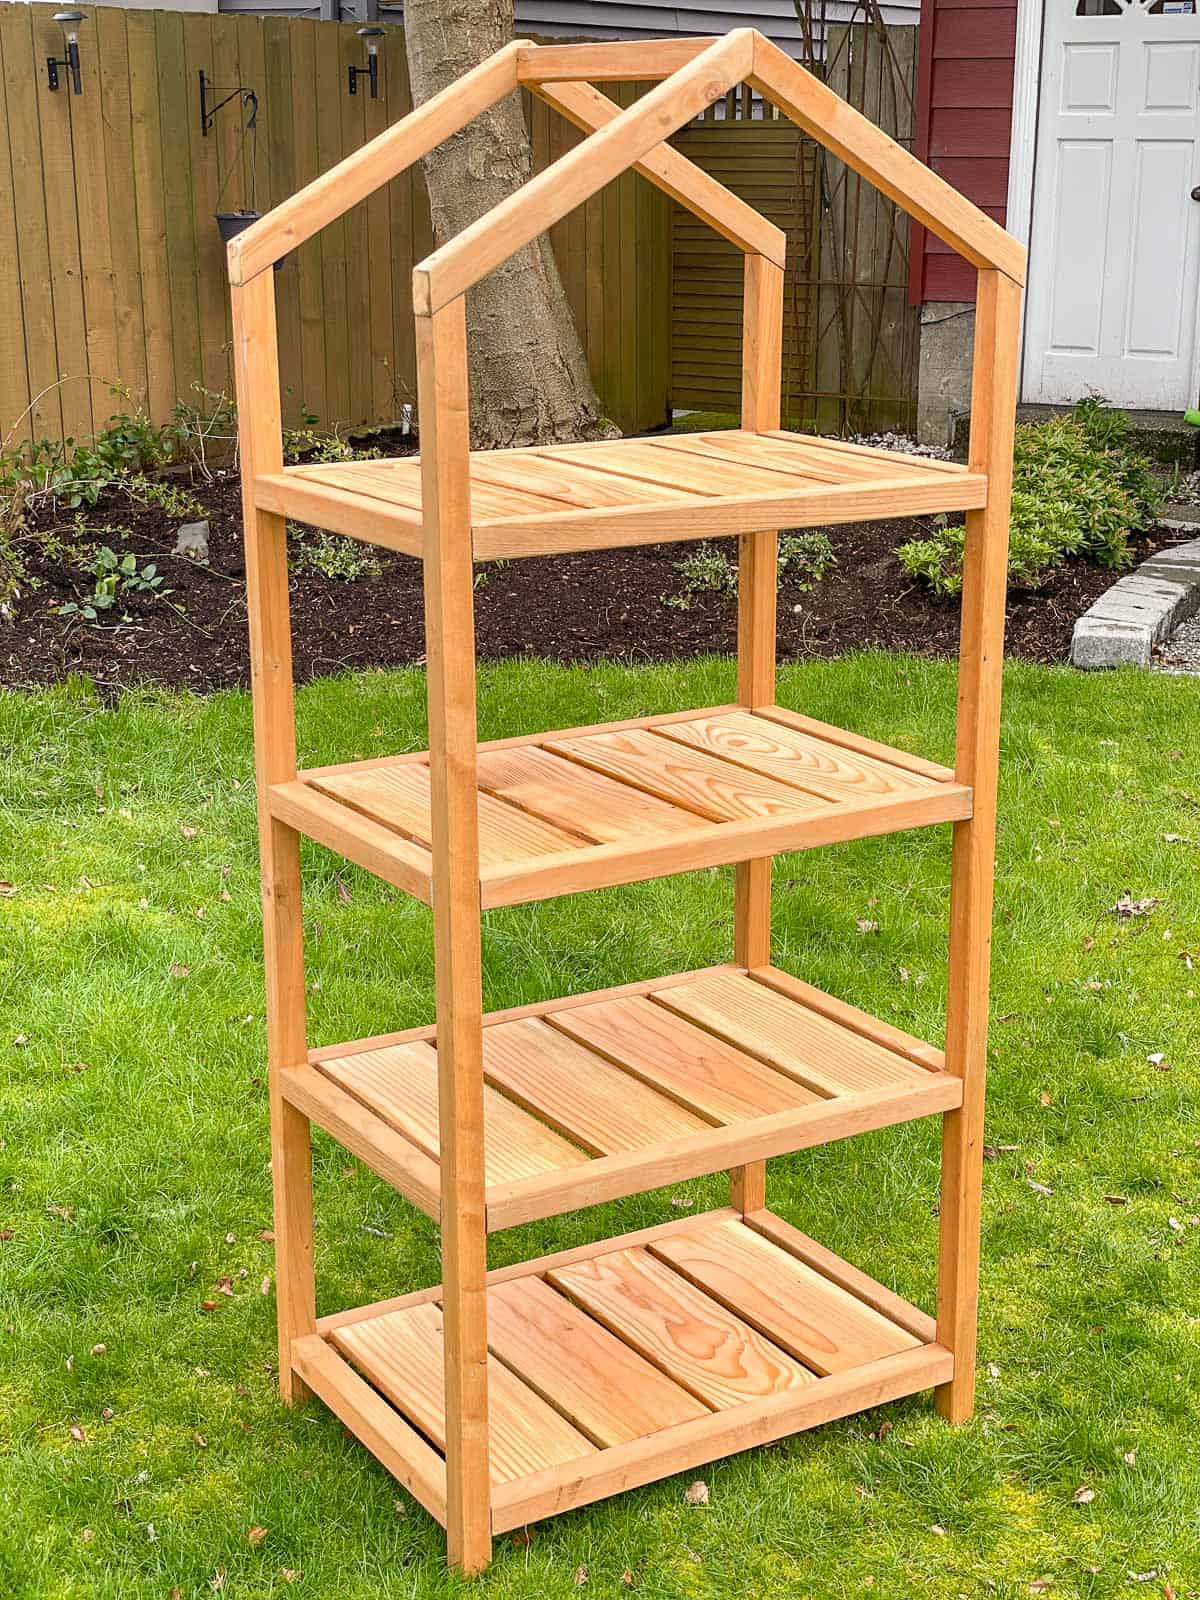
This DIY mini greenhouse is great for small outdoor spaces! It only takes up a few feet, and has removable shelf slats for taller plants.

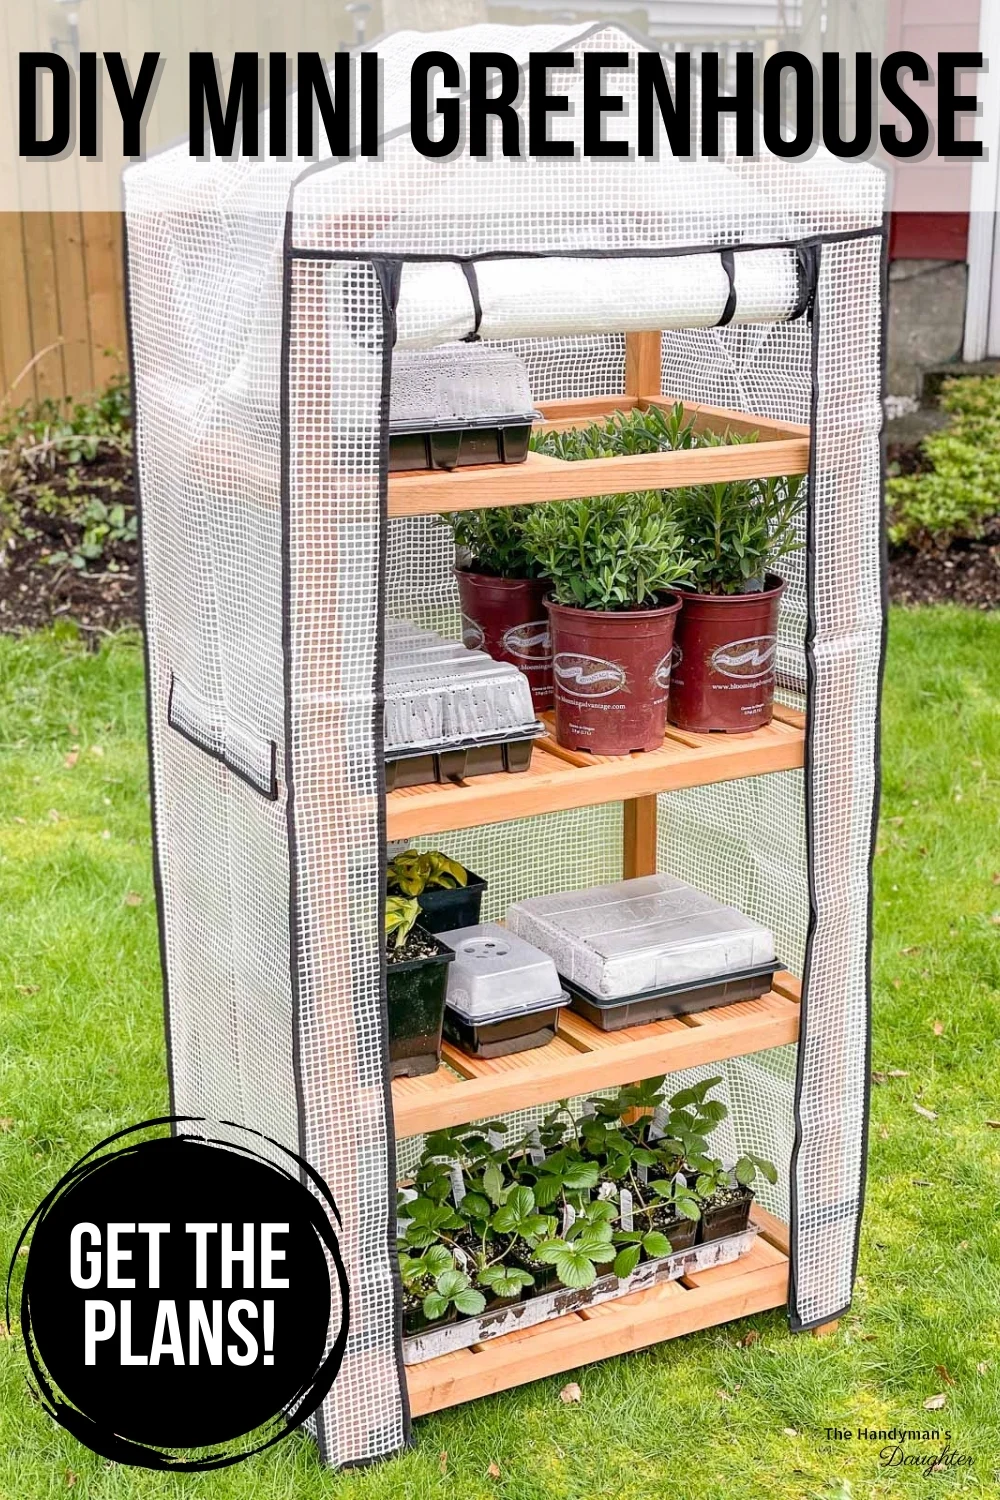
Our back deck is the sunniest spot around the entire house, but it only has a few deck railing planter boxes scattered around the edge. This spring, I'm on a mission to do more gardening in this small space by building this DIY greenhouse!
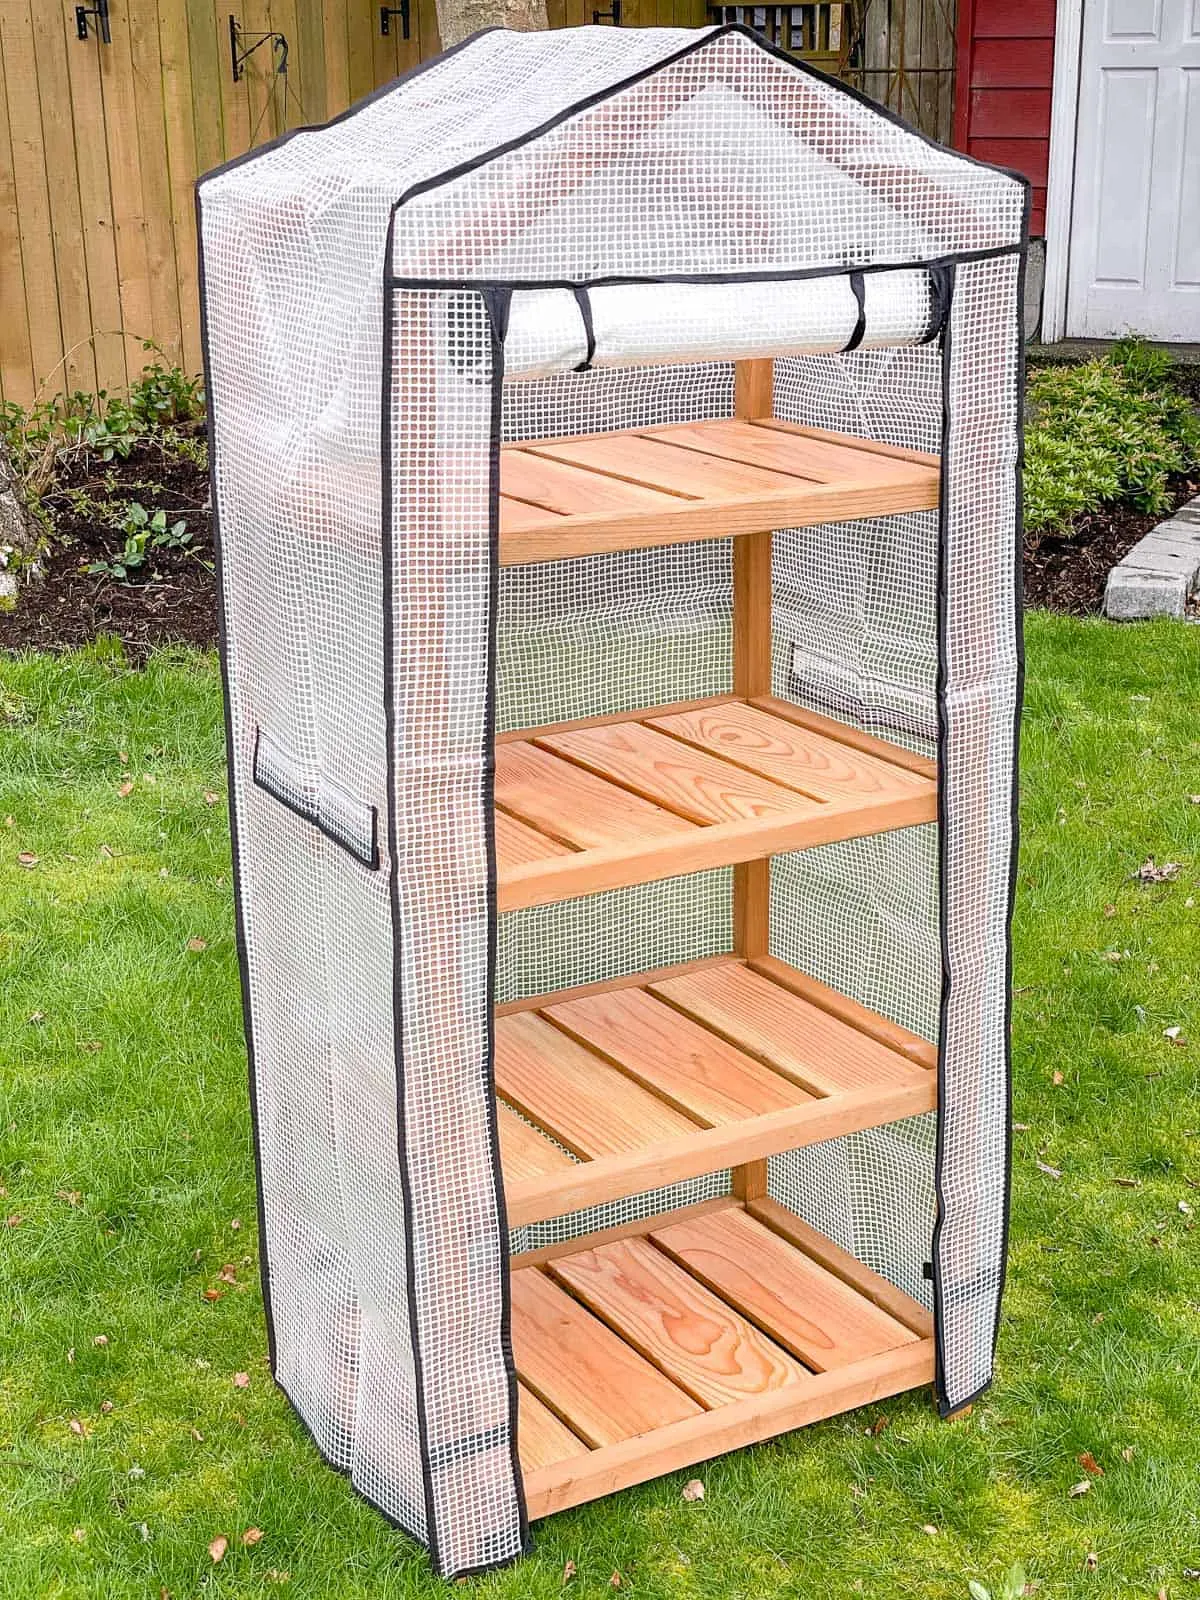
This small deck greenhouse is perfect for starting seeds, growing plants or displaying your favorite flowers. The clear plastic cover creates a warm environment by trapping the sun's heat in the winter, even in a cold climate! For year round use, remove the cover in the summer to prevent the plants from overheating.
If a plant grows too tall, just remove one or two of the slats above it so it can keep going! You can also add grow lights to the underside for those dreary spring days.

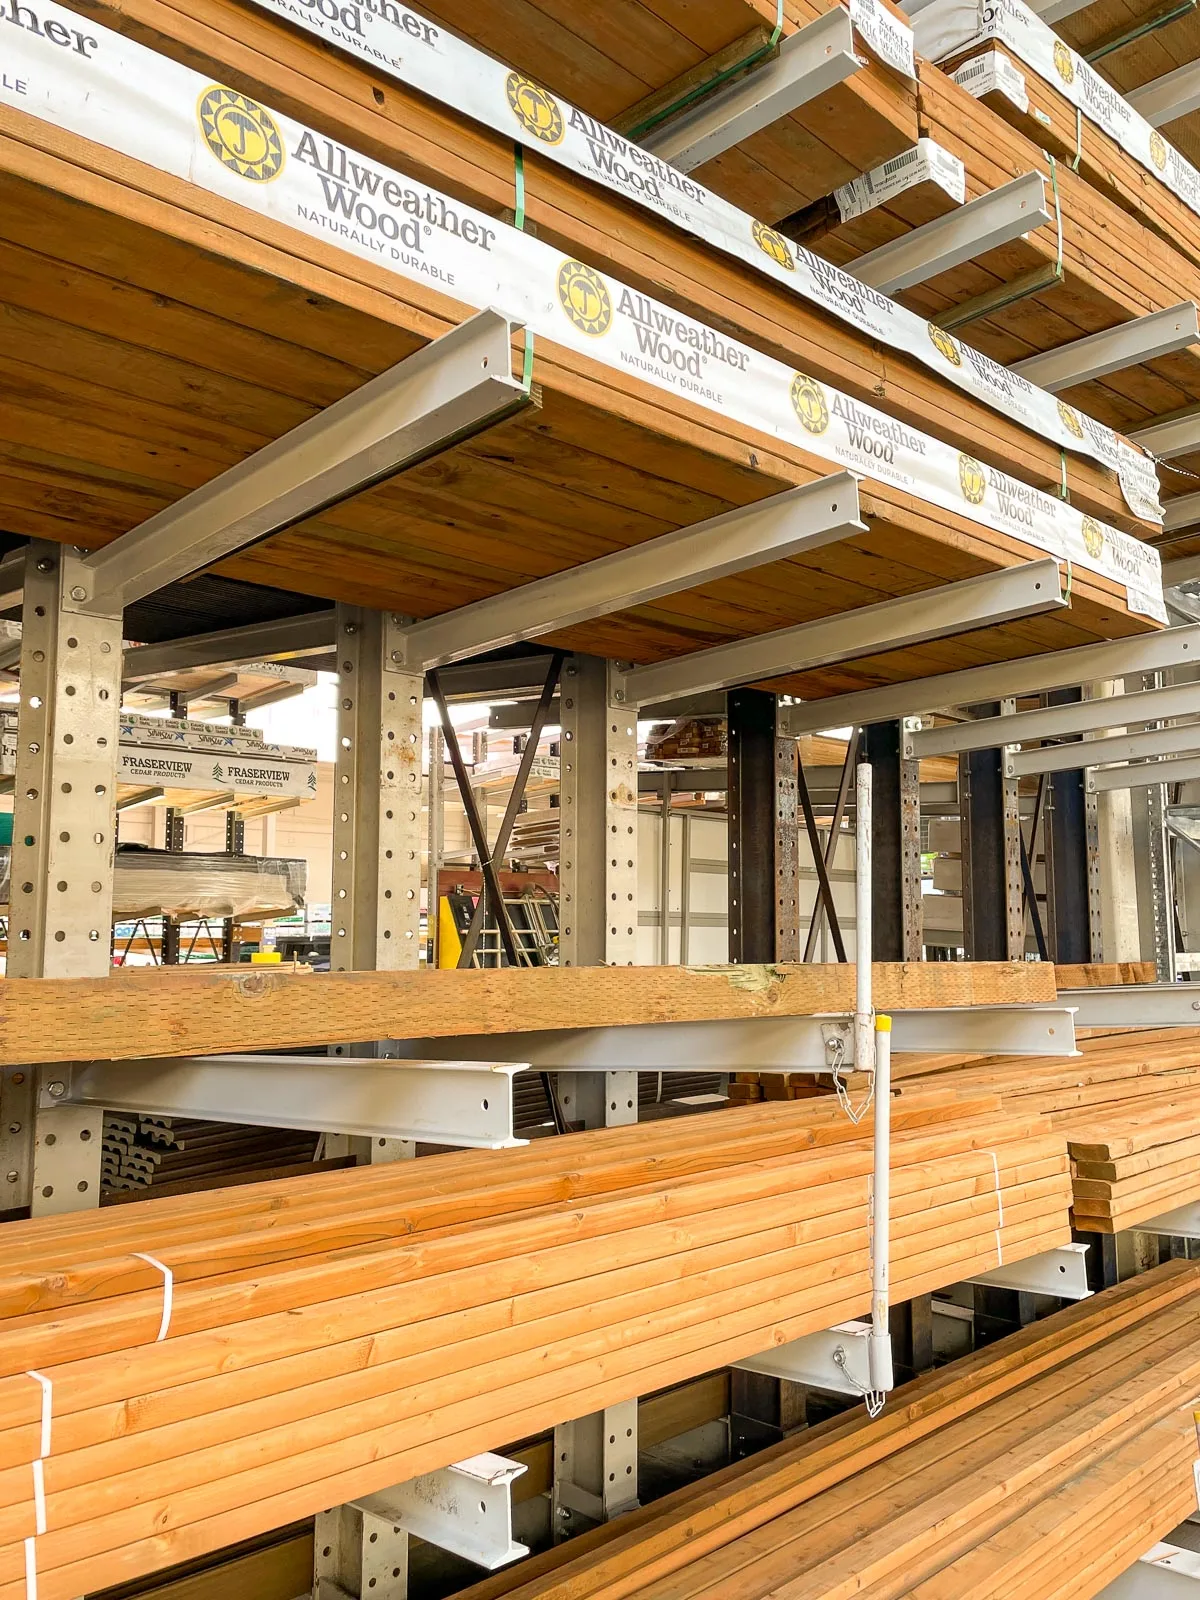
This post is sponsored by AllWeather Wood and contains affiliate links for your convenience. Purchases made through these links may earn me a small commission at no additional cost to you. You can read more about how this site earns money on my disclosures page.
The design for this mini greenhouse was inspired by this one from VegTrug, but you can make it yourself for half the price! You can find the cover I used here, or you can alter the plans slightly to fit this cheaper one instead.
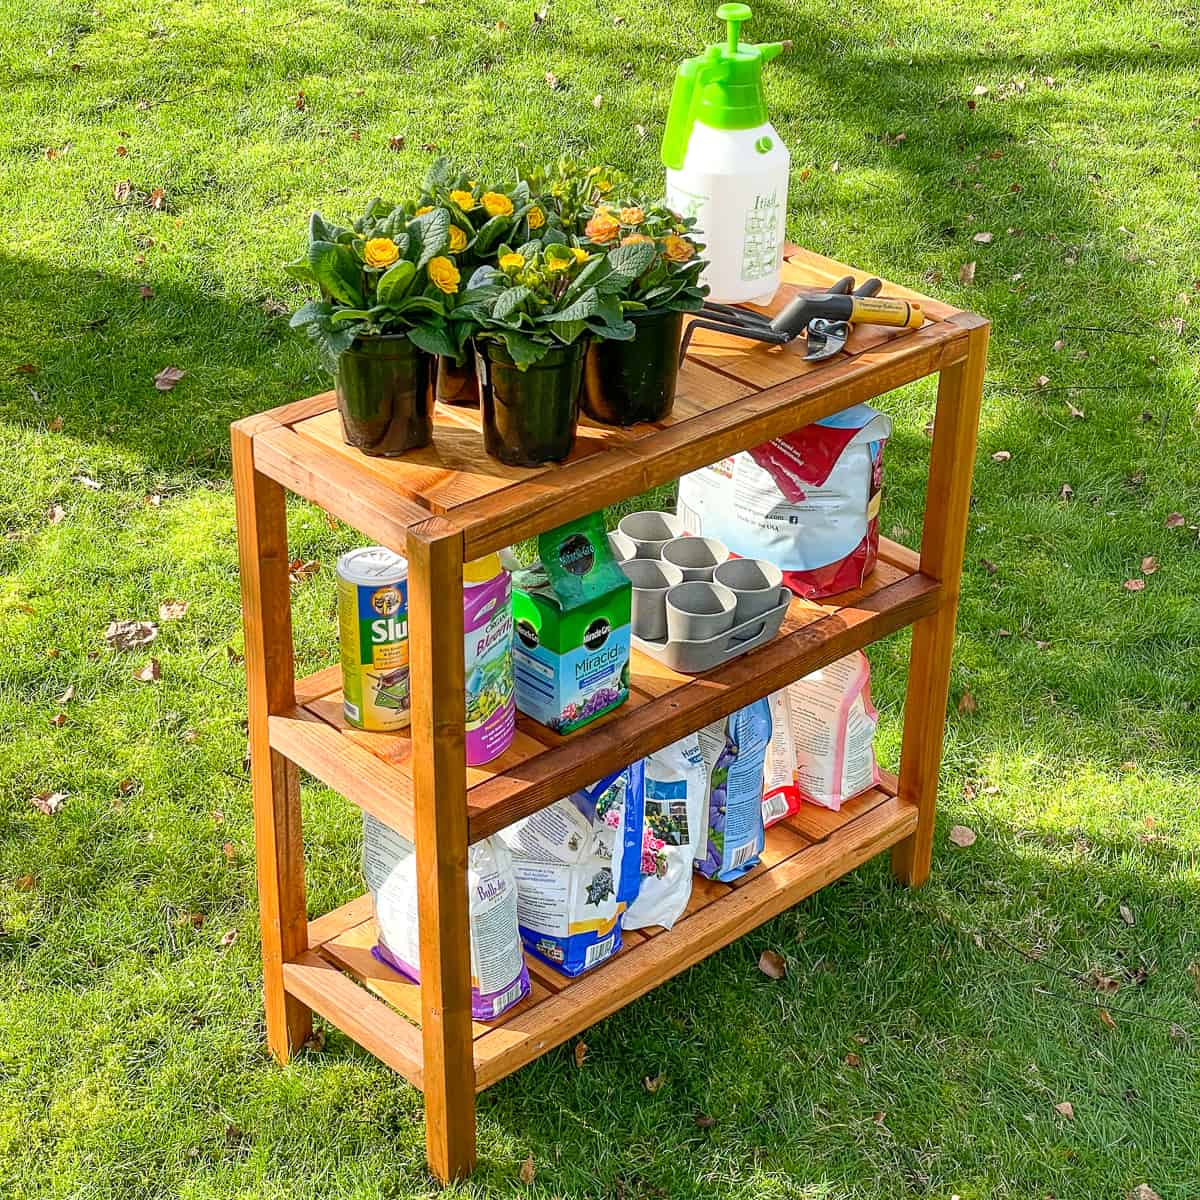
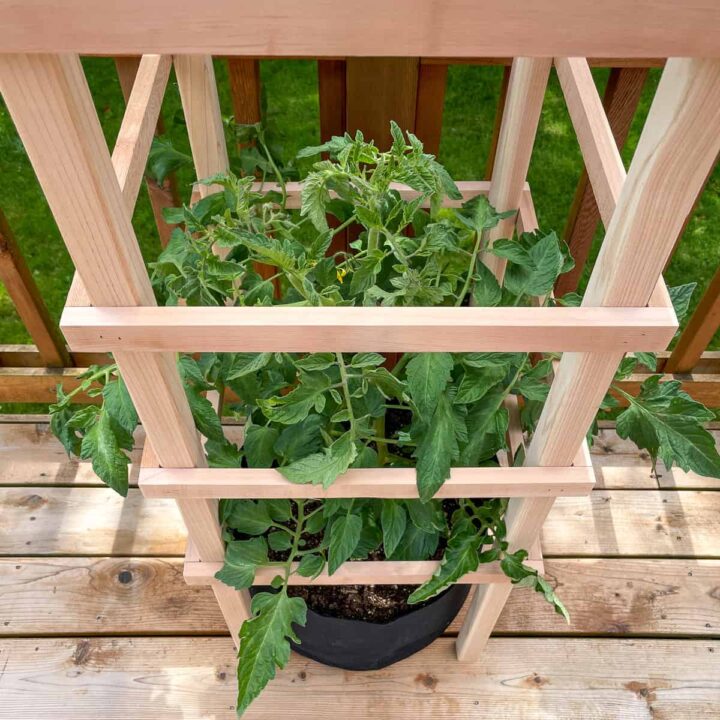
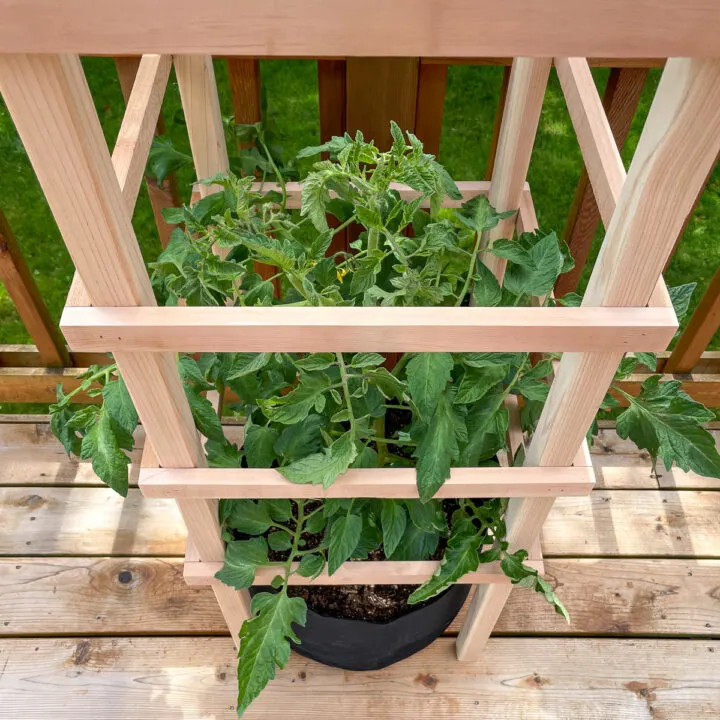
Want a smaller version without the angled top? Check out these DIY outdoor shelves! They're assembled the same way as the greenhouse, so you could make them both for a matching set!

I'm using pressure treated lumber from AllWeather Wood for this project, because it will hold up to the elements and repeated plant watering for years! It doesn't have the incision marks you find in other pressure treated lumber, so the beauty of the wood shows through. You can find their products at Lowe's and other lumber yards here.

Let's get building! Watch the video below to get a quick overview of the steps, then continue reading below for all the details.
Materials needed for mini greenhouse
- Seven pressure treated 2x2 boards
- Five pressure treated 1x6 fence pickets
- Long garden stakes (optional)
- These are a great alternative if you don't have a table saw or don't feel comfortable using a circular saw to cut the cleats!
- Pocket hole jig
- 2 ½" exterior pocket hole screws
- Brad nailer and 1 ¼" brad nails
- You could also use 1 ¼" exterior screws.
- Exterior wood glue
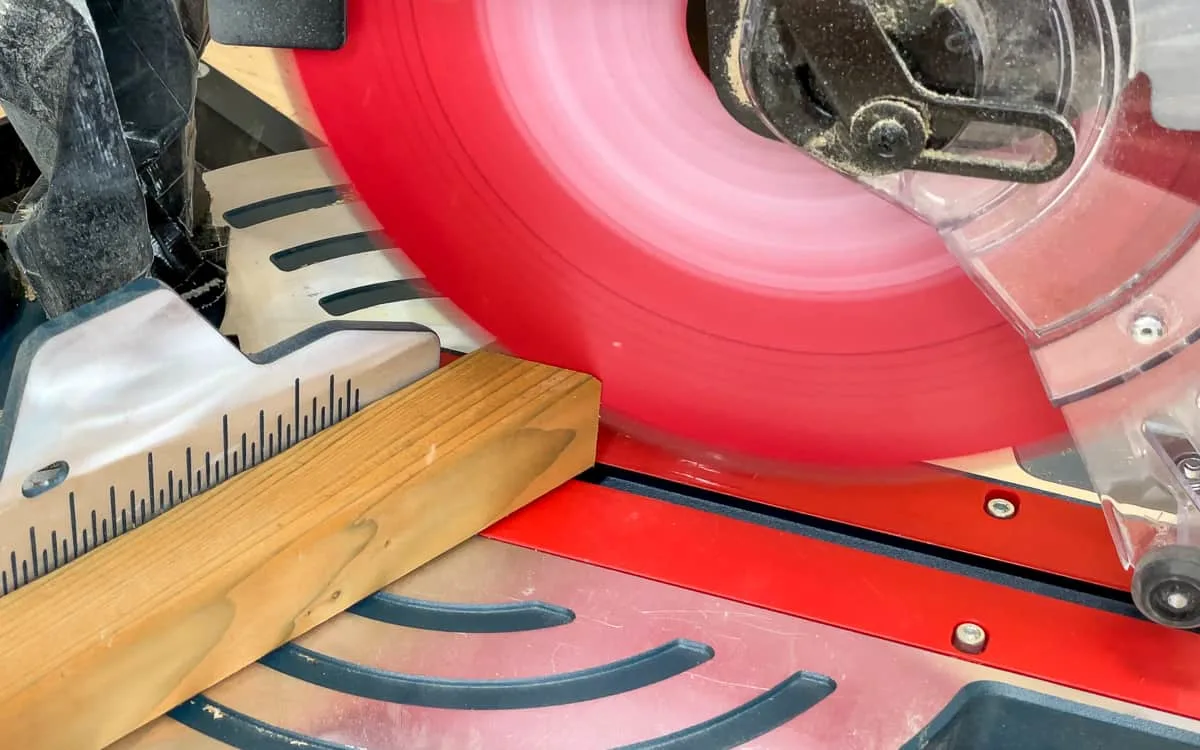
- Circular saw, miter saw or miter box
- Clamps
- Square
- Measuring tape
- Cordless drill
- Exterior paint or stain (optional)
- Greenhouse cover
How to make a mini greenhouse
Before you begin, don't forget to download the DIY greenhouse plans! It features a cut diagram and cut list, and step-by-step instructions with 3D models of each step in the build.
Cut the frame pieces
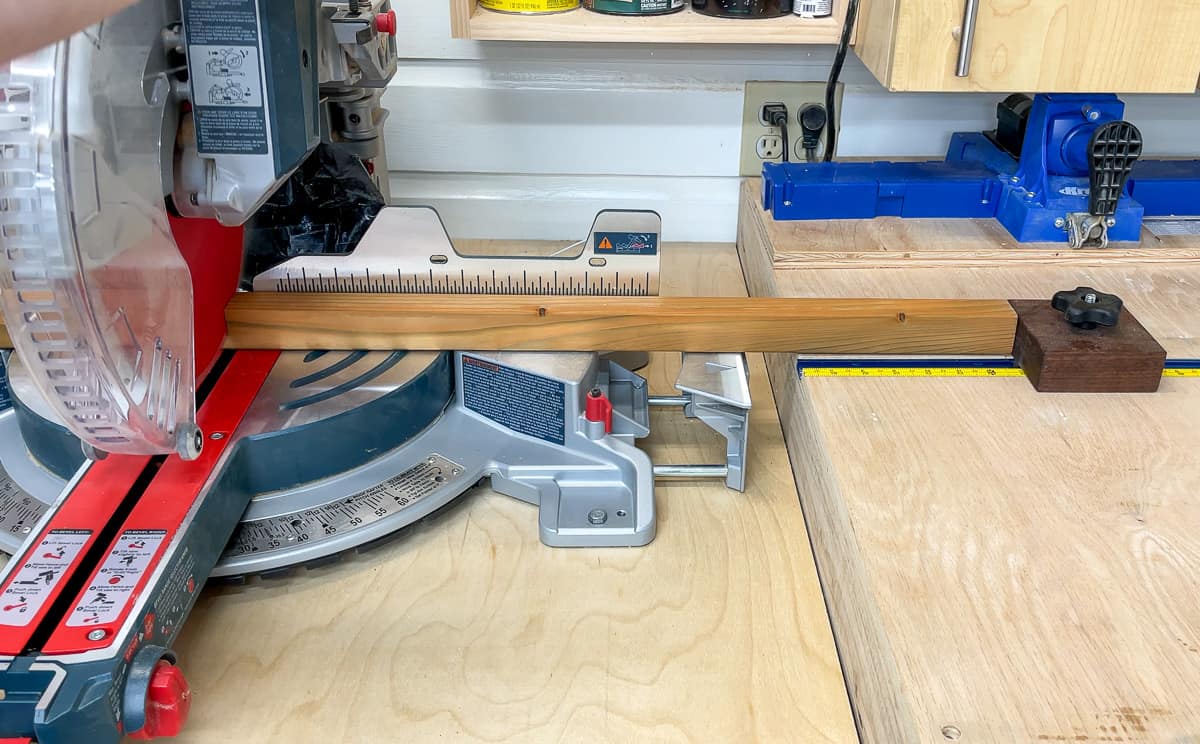
There are a LOT of repetitive cuts, so save yourself the time and effort of measuring out each piece by using a stop block on your miter saw. I just slid the block on my miter saw station to the required length and started cranking out the parts!

The long vertical pieces need to be cut at an angle on one end to form the roof of the greenhouse. Don't forget this step, or you'll have to cut them by hand once the frame is assembled!

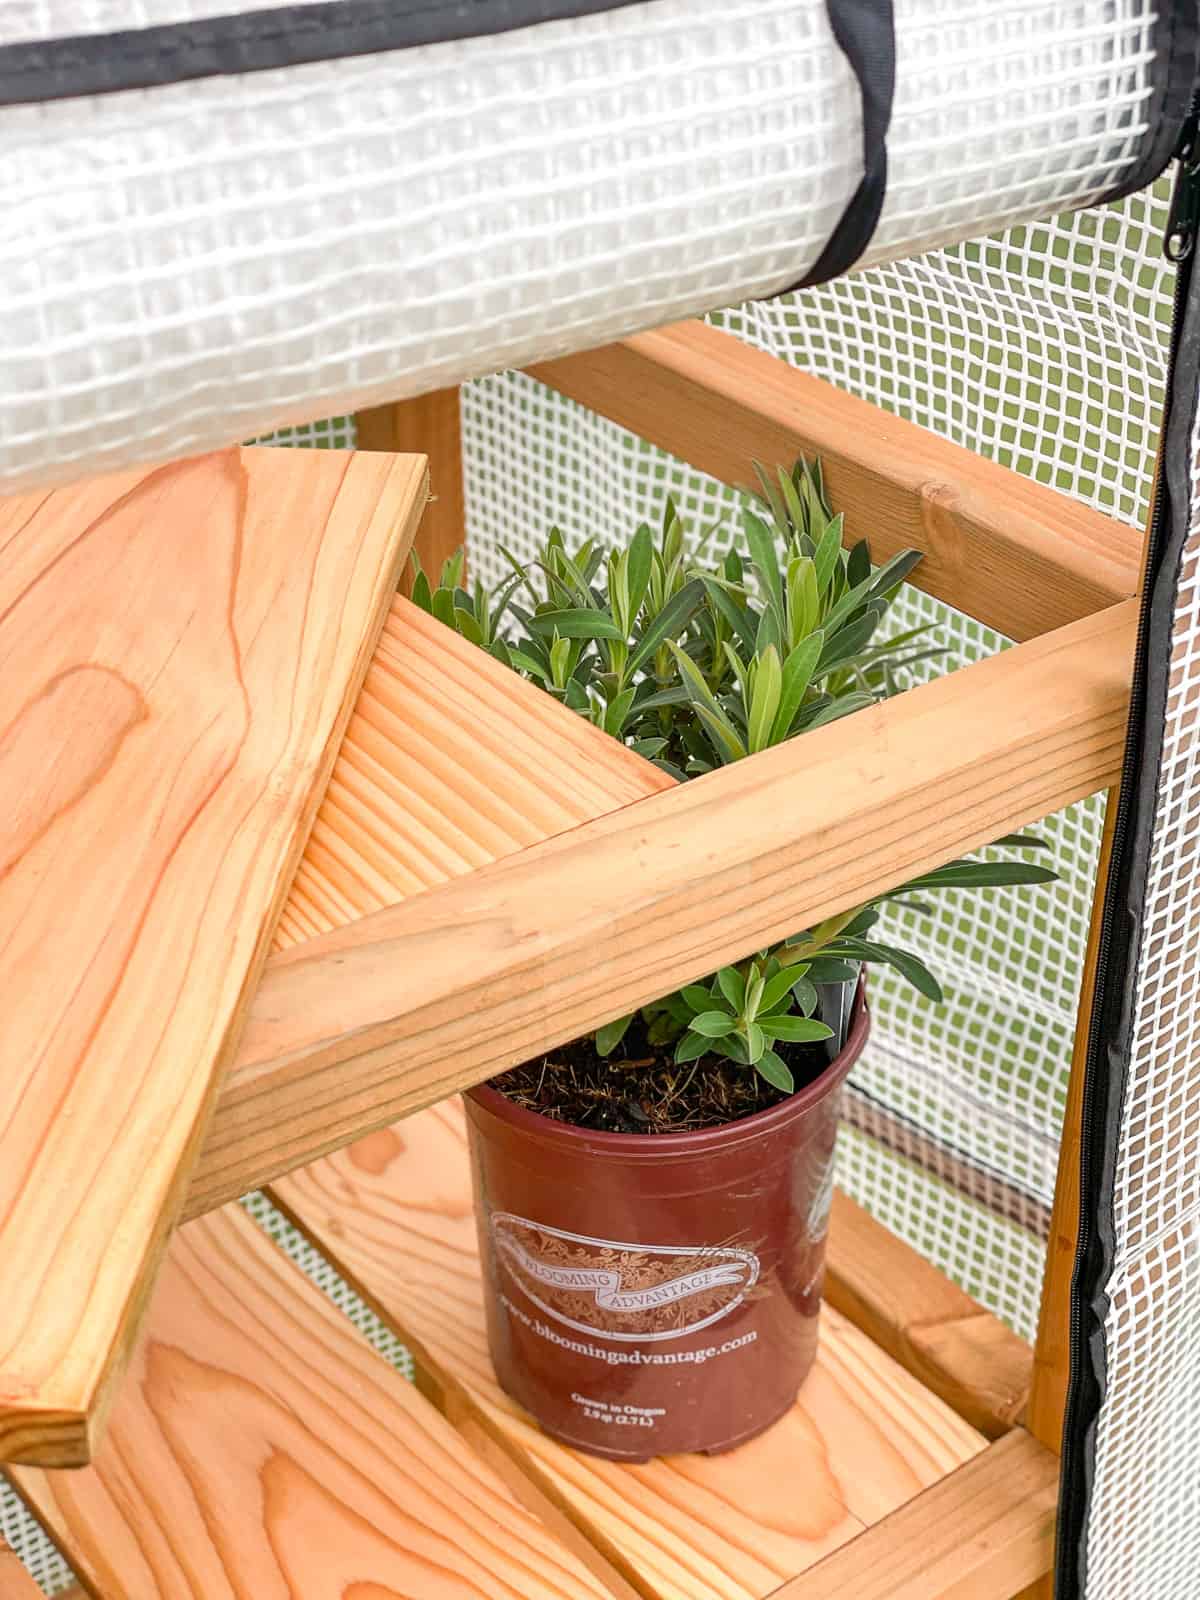
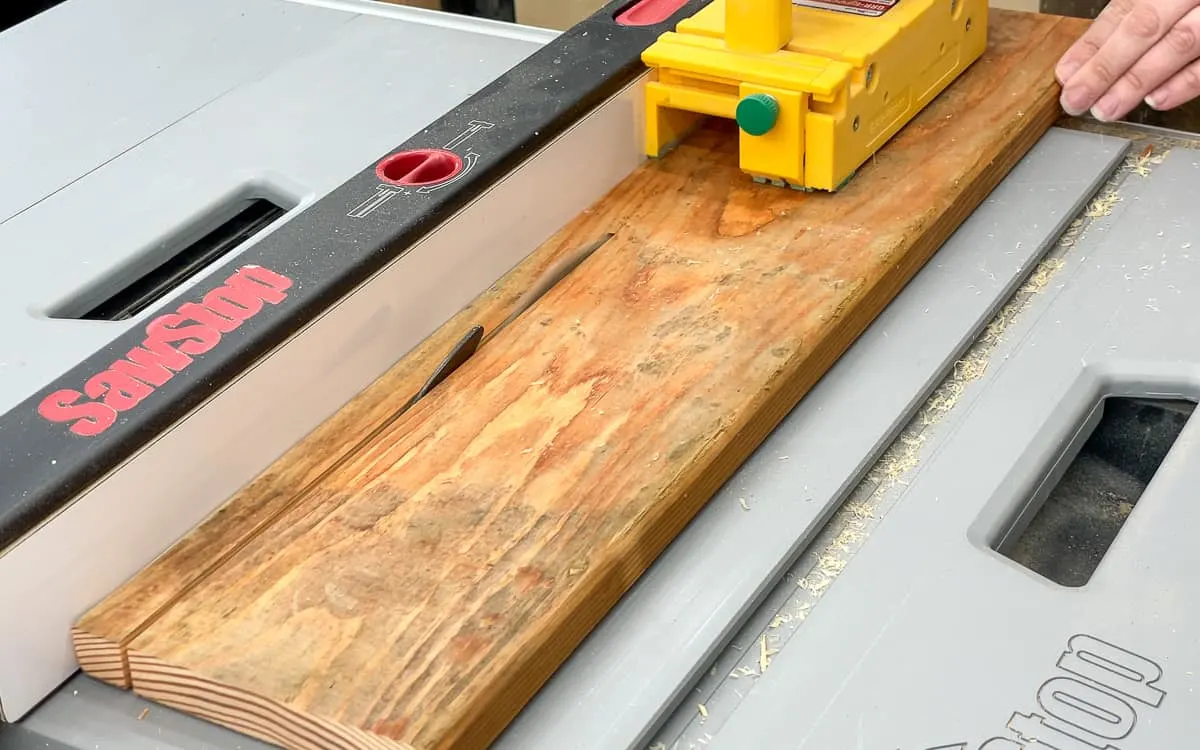
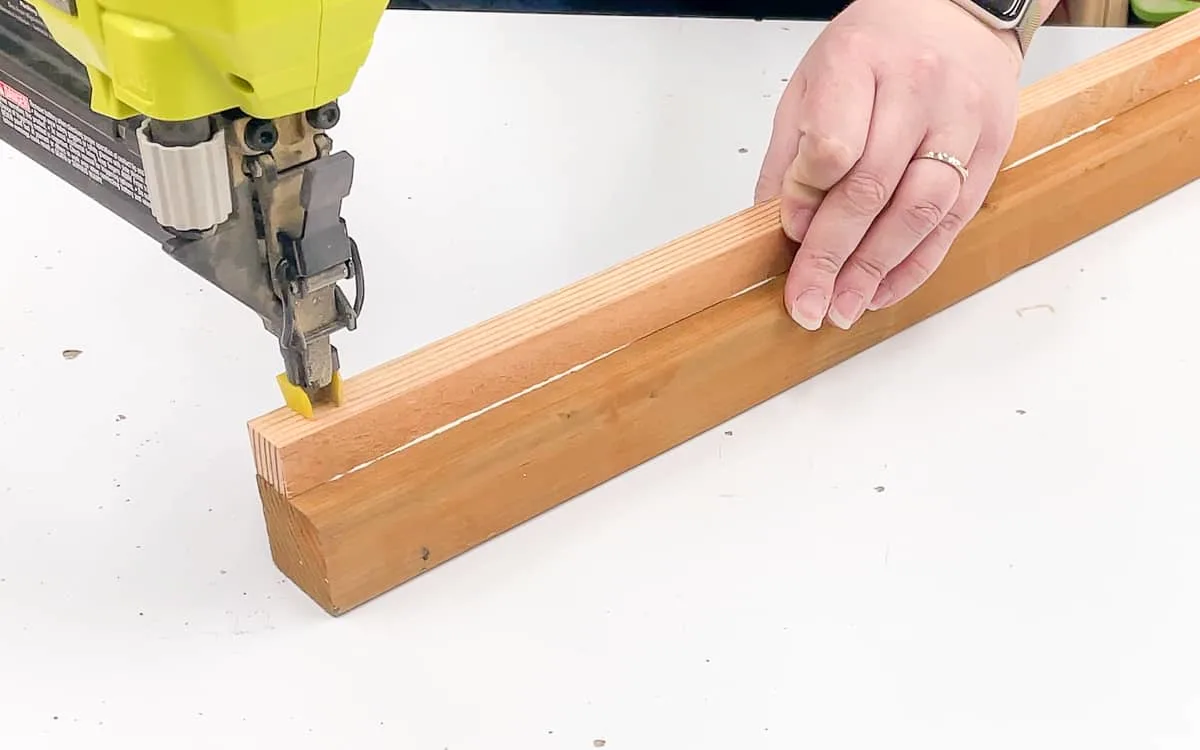
Make the shelf cleats
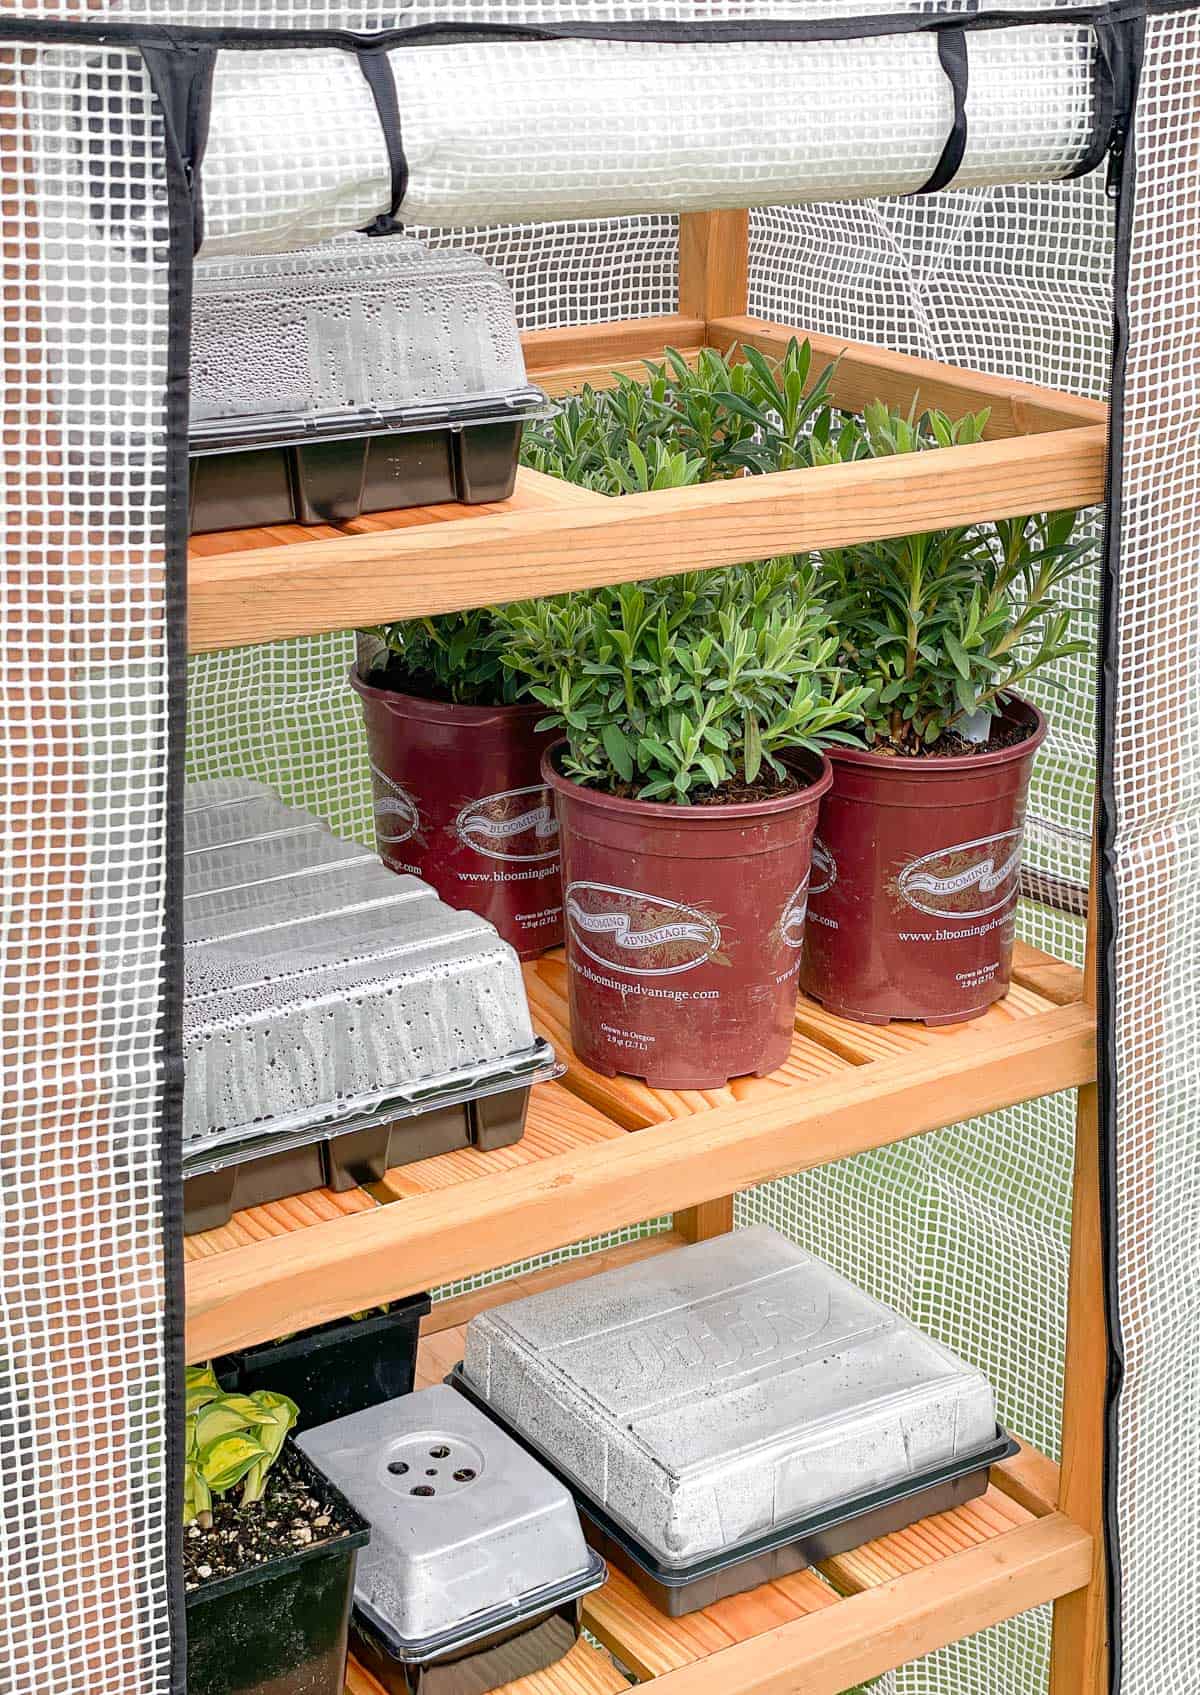
The shelf slats rest on small strips of wood called cleats, which are attached to the front and back pieces. This allows you to remove the slats as your plants grow, or shift them over as needed.
I cut one of the fence pickets down into ¾" x ¾" strips at the table saw. You could also use these garden stakes with the same dimensions if you don't have a table saw or don't feel comfortable doing this with a circular saw.

Drill two pocket holes in both ends of all the front and back pieces.
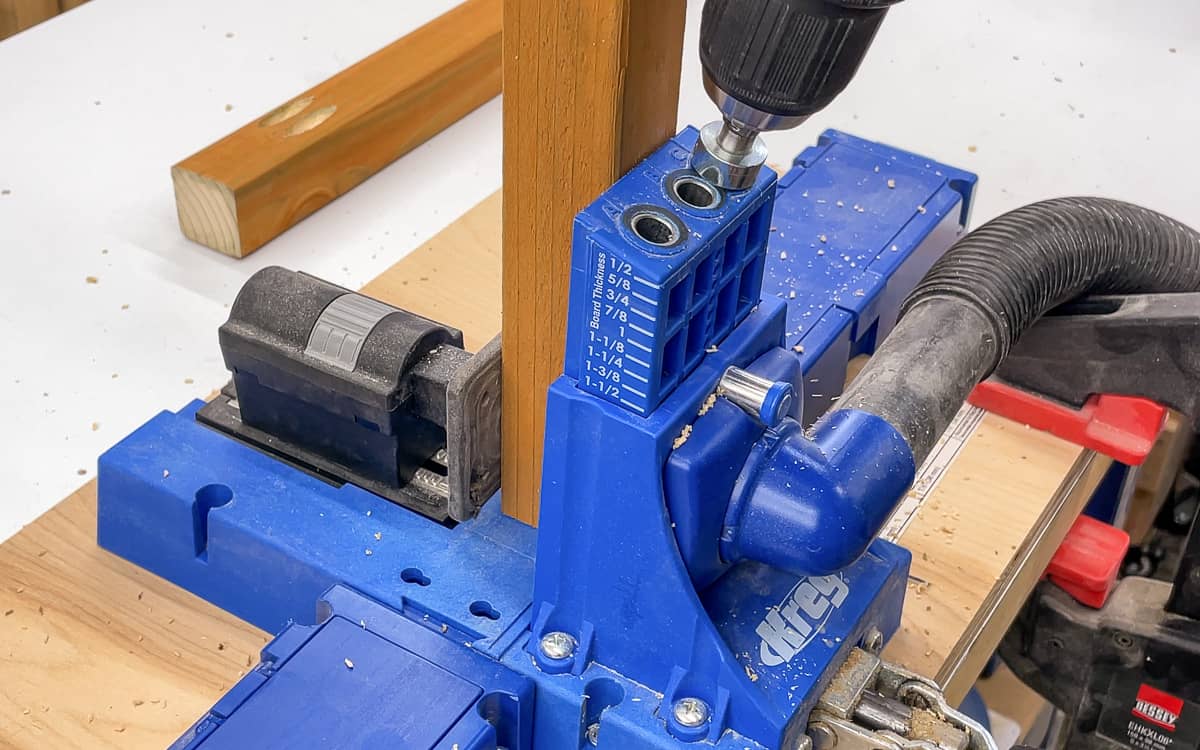

Apply wood glue along one edge of the cleat, and align it with the bottom edge of each frame piece. The pocket holes should be facing down (they're facing towards me in the photo below), and you can attach the cleat to either adjacent side.
Use a brad nailer and 1 ¼" brad nails, or a drill with 1 ¼" exterior wood screws, to attach the cleat to the side. Repeat this process for all the front and back pieces.

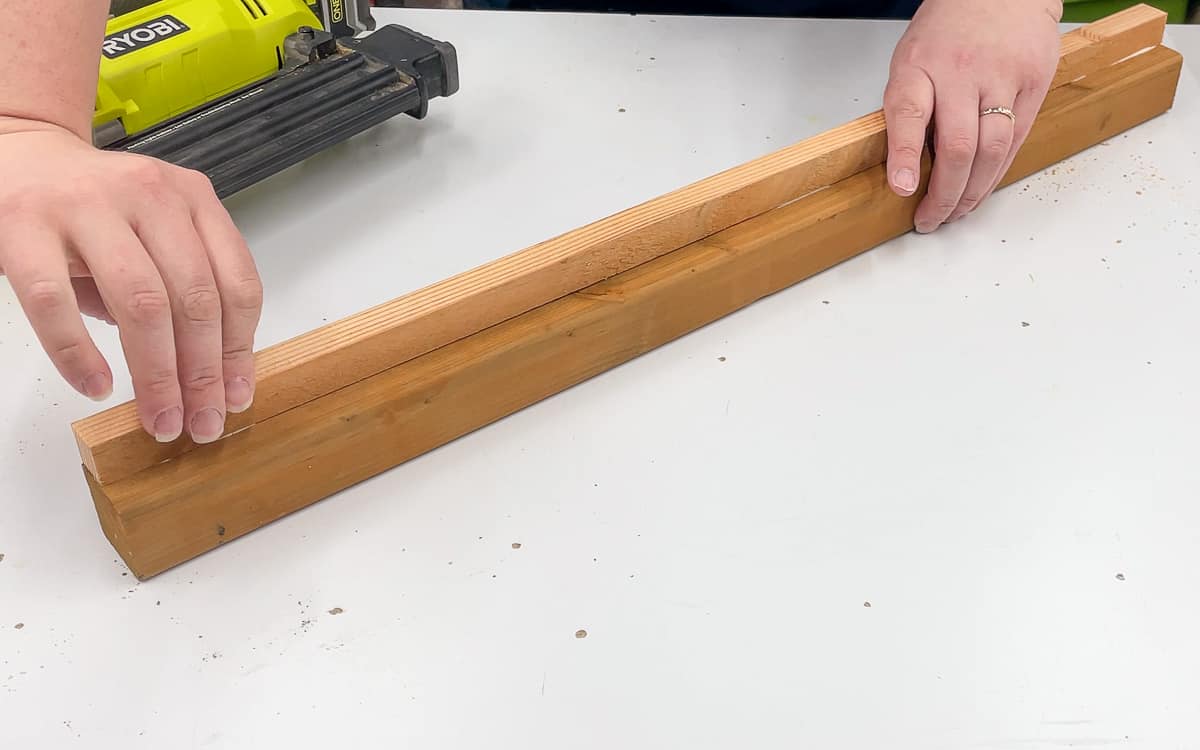
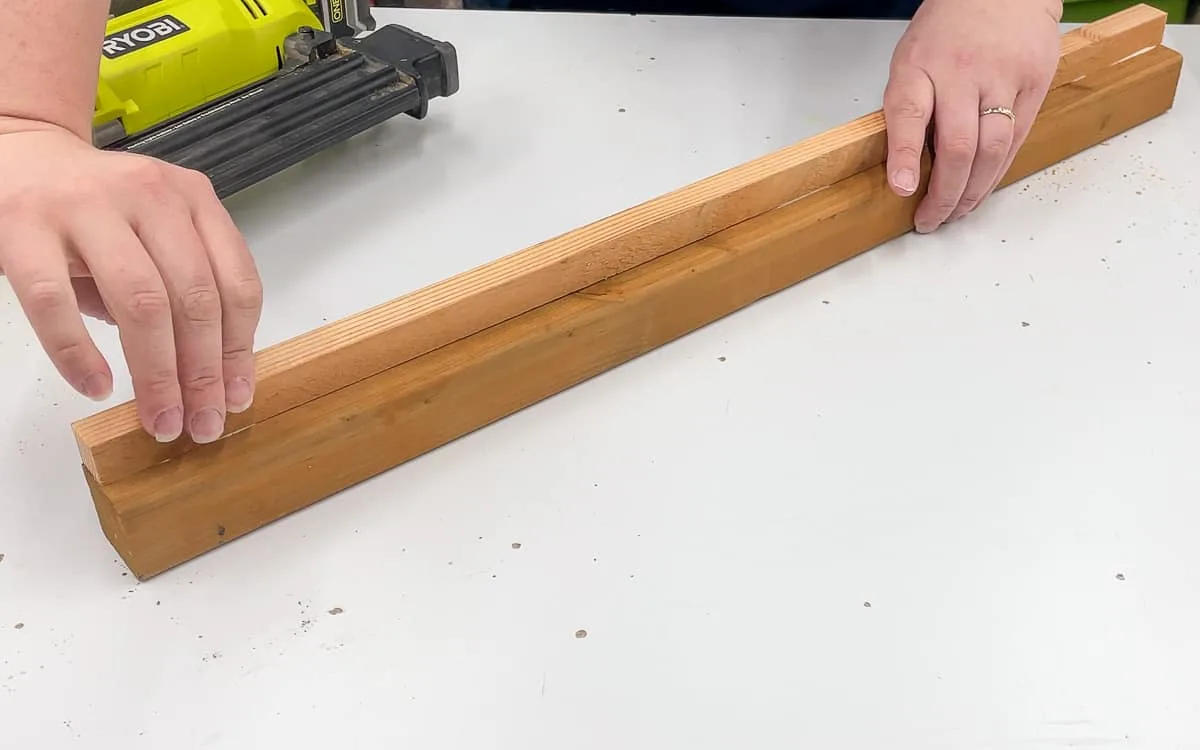
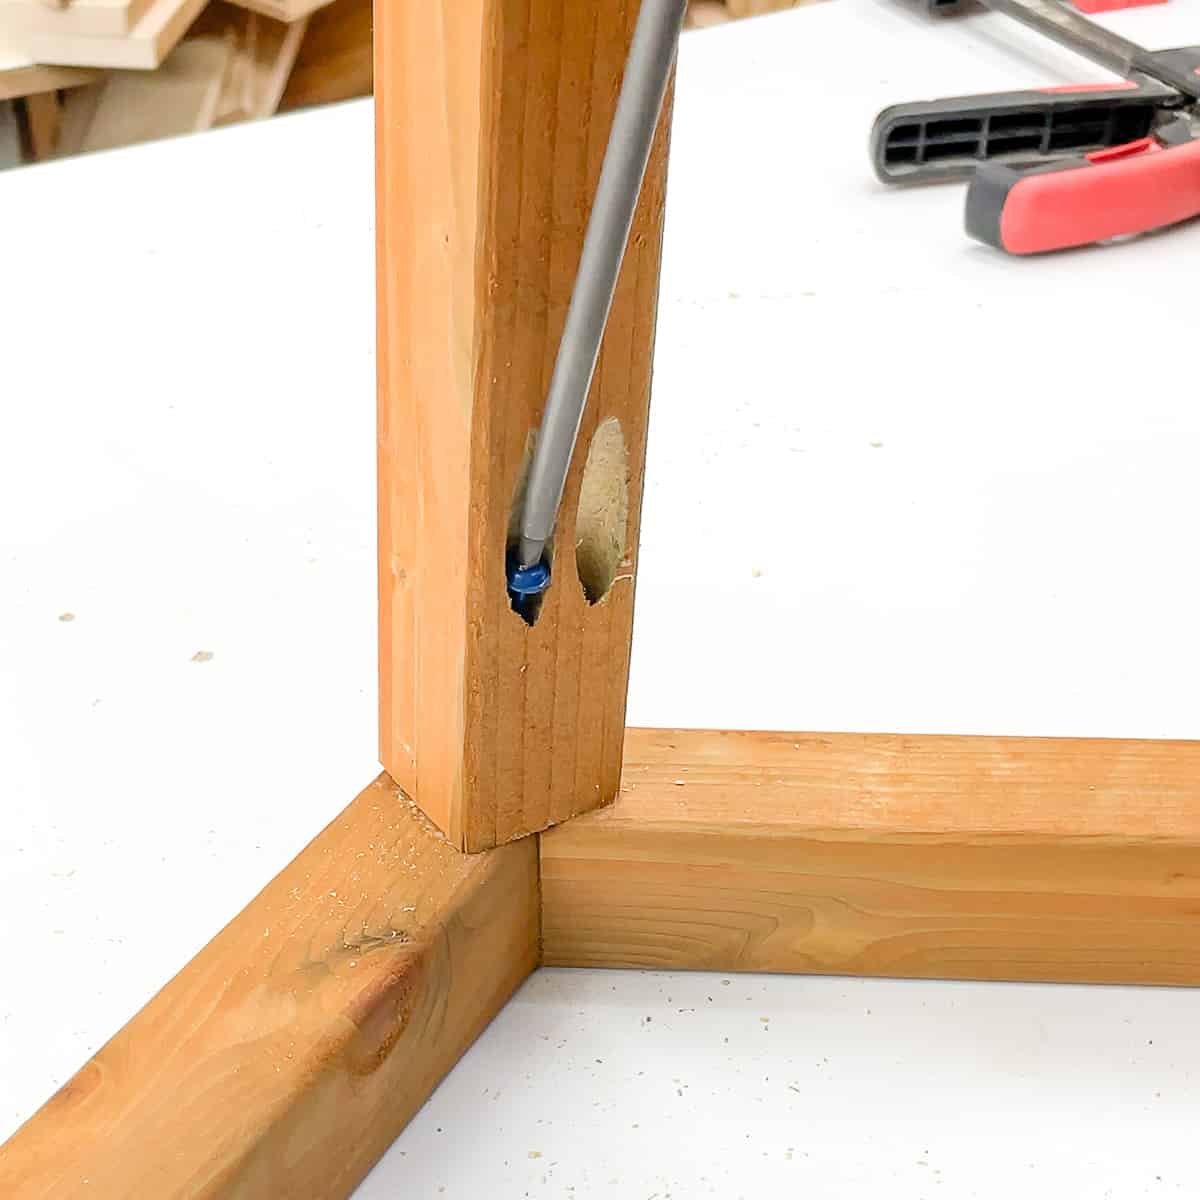
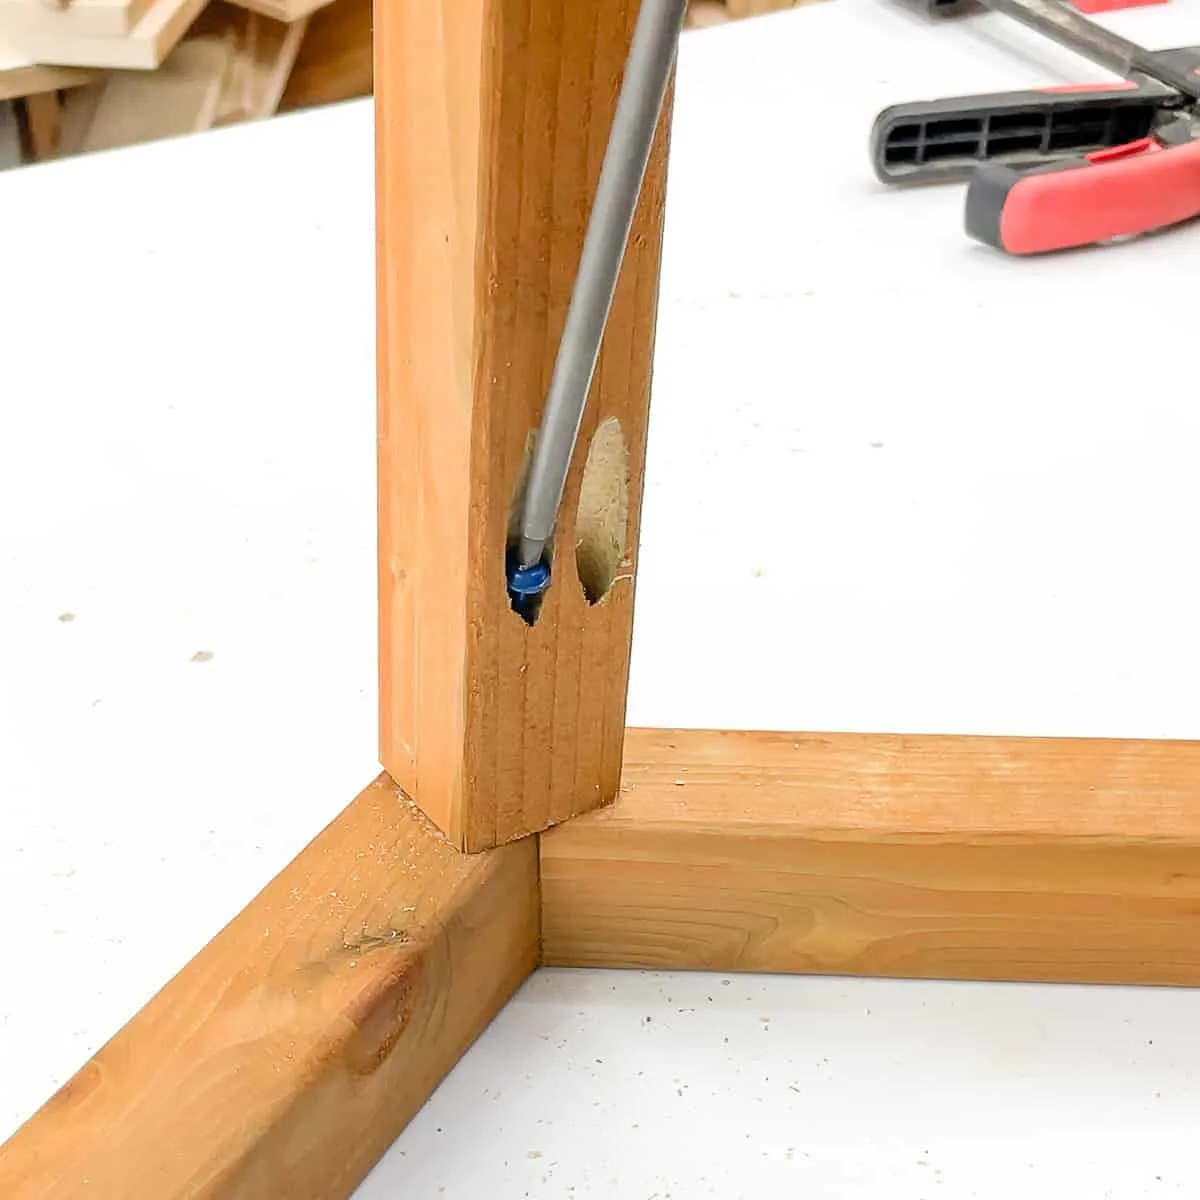
Assemble the frame
The basic structure of this greenhouse is put together like a ladder. Use exterior wood glue and 2 ½" exterior pocket hole screws to secure the cleat pieces to the uprights.
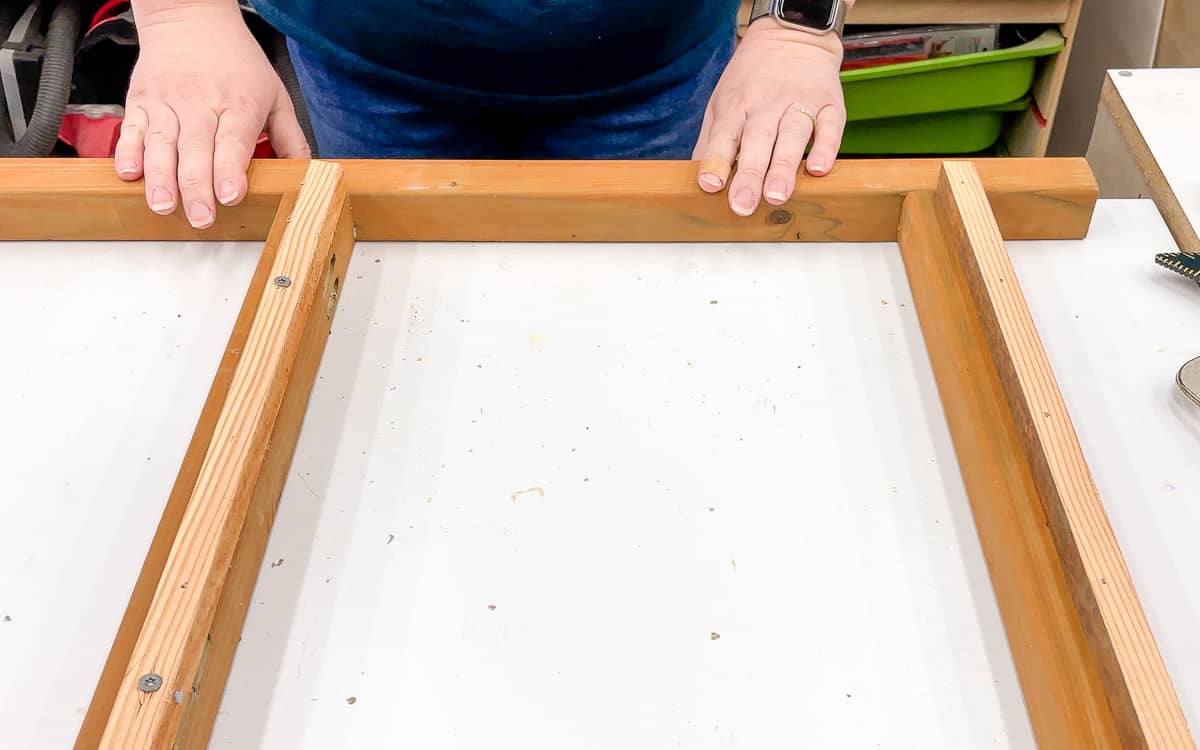
On the opposite side, use long clamps to hold everything in place and check for square before attaching it to the vertical piece.

Assemble both the front and the back of the greenhouse this way. Then attach the cross supports at all the junctions.
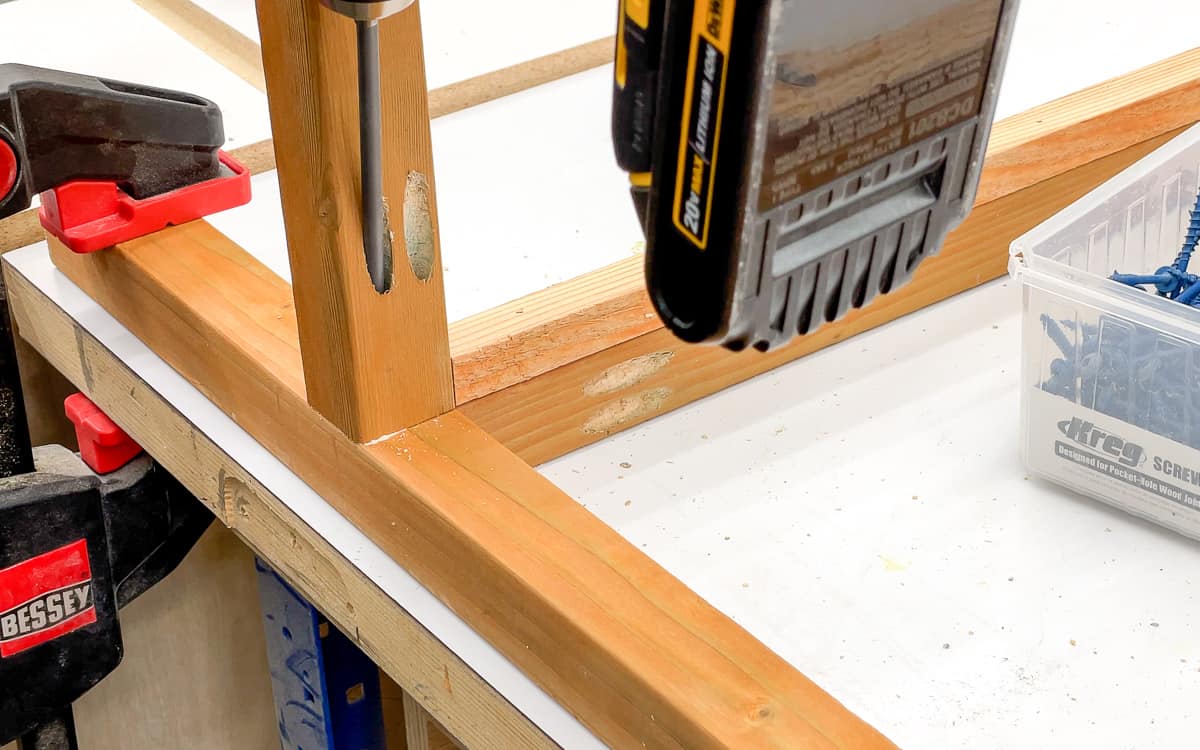

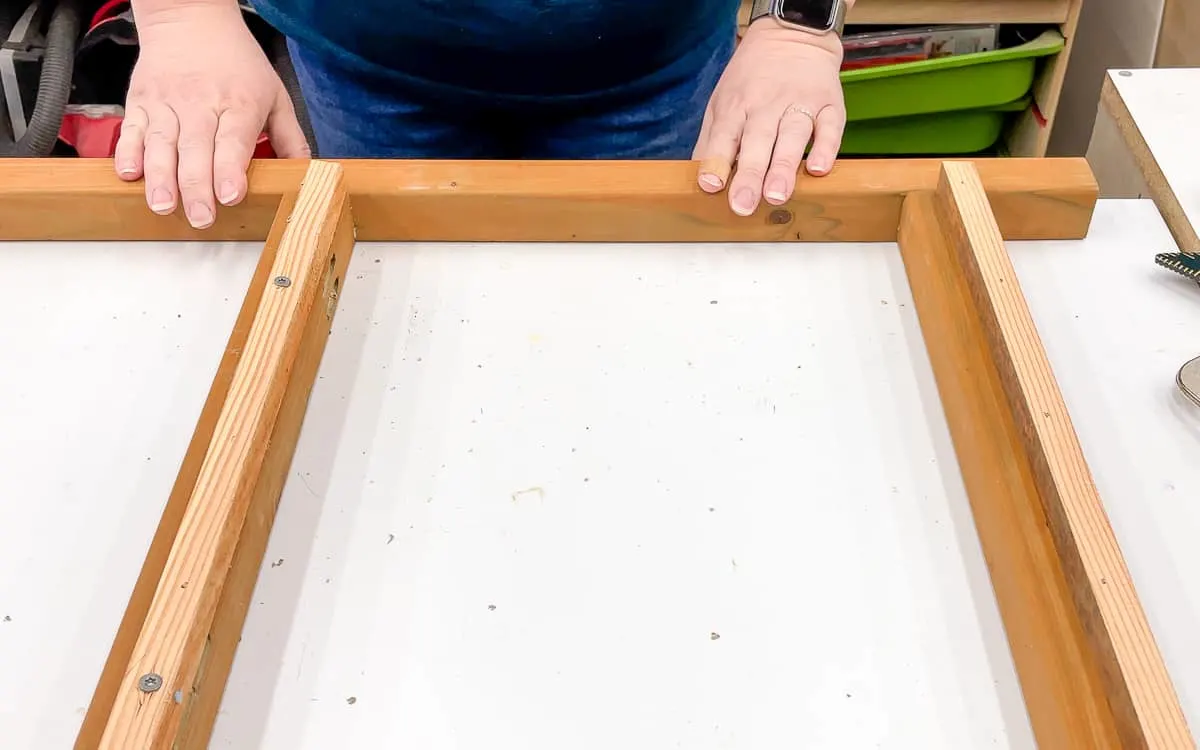
I always have a problem with pocket hole screws in 2x2 boards, because the ends can intersect in the center and cause the wood to split. To avoid this, I just used the pocket hole on the outside edge. The cleat prevents this piece from spinning on a single screw.
Once the cross supports are attached to one side, flip it over and place it on top of the other side. Clamp the whole frame together to keep everything aligned while you drive in the last screws.

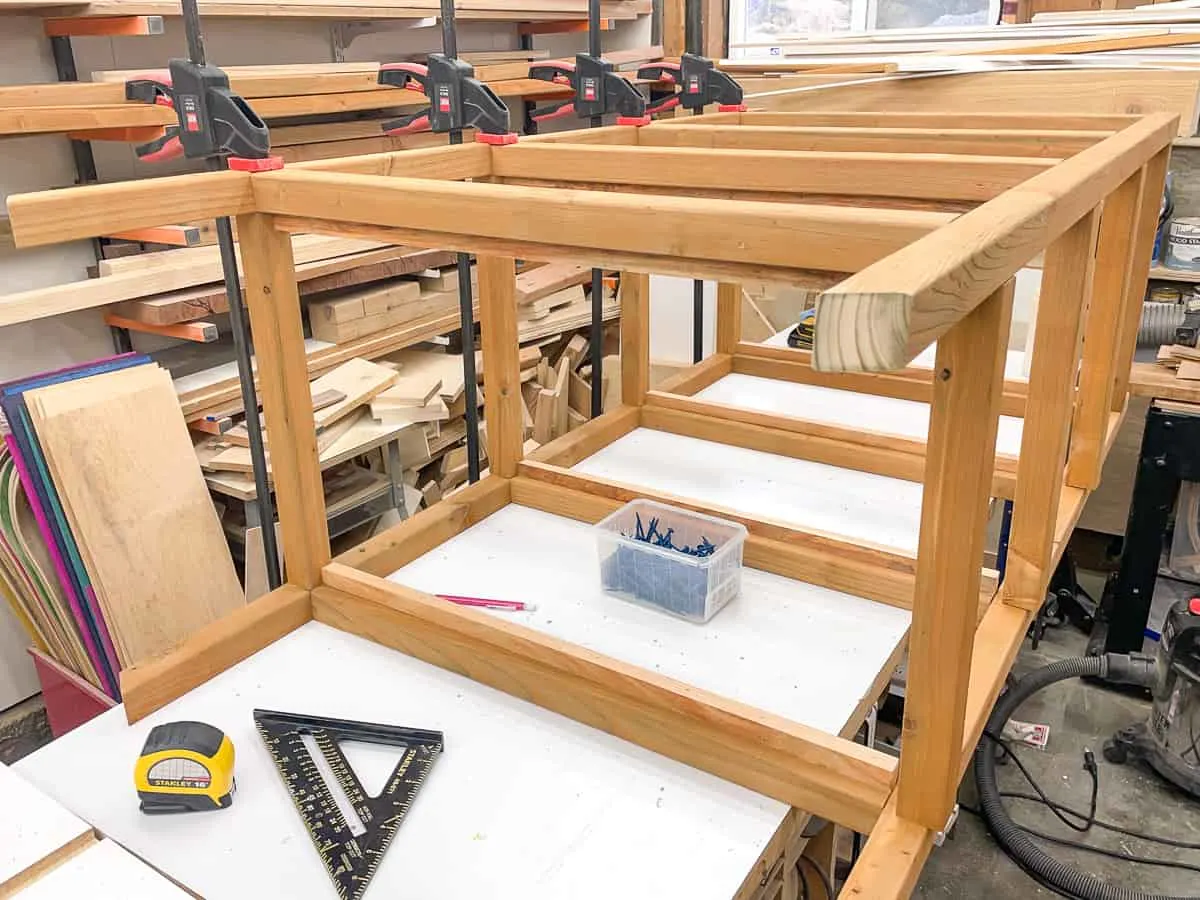
Now you can flip the whole greenhouse upright and work on the top!
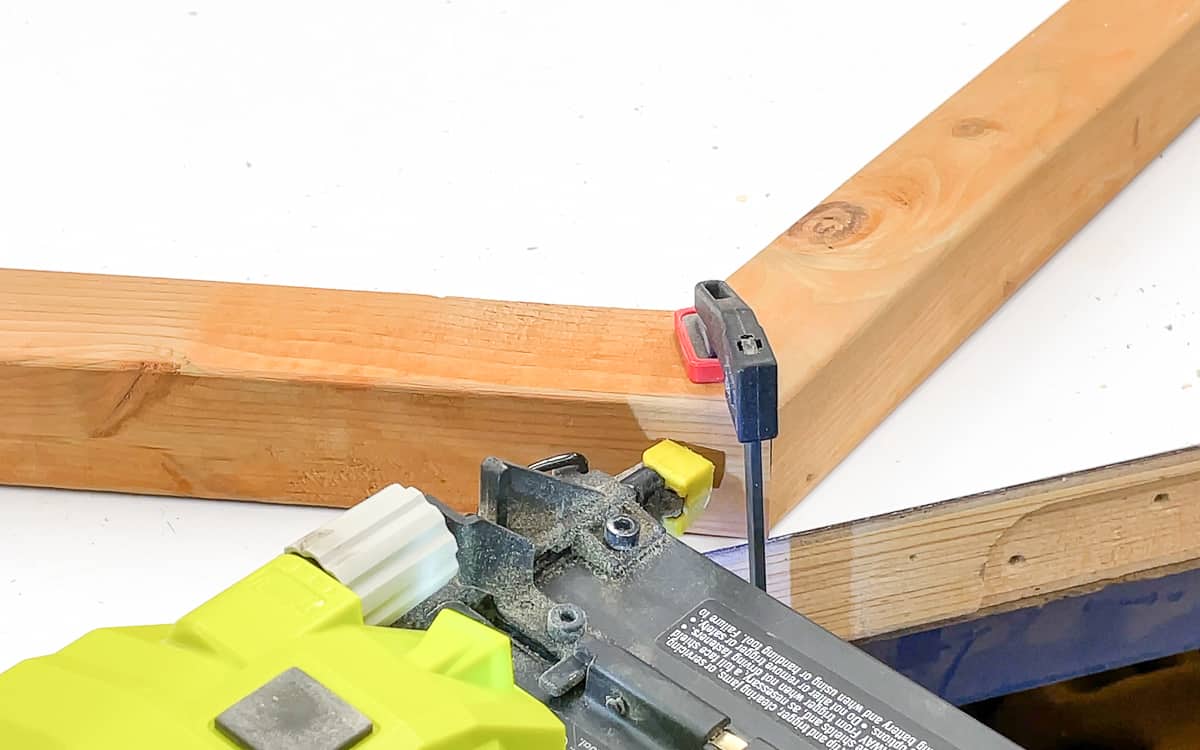
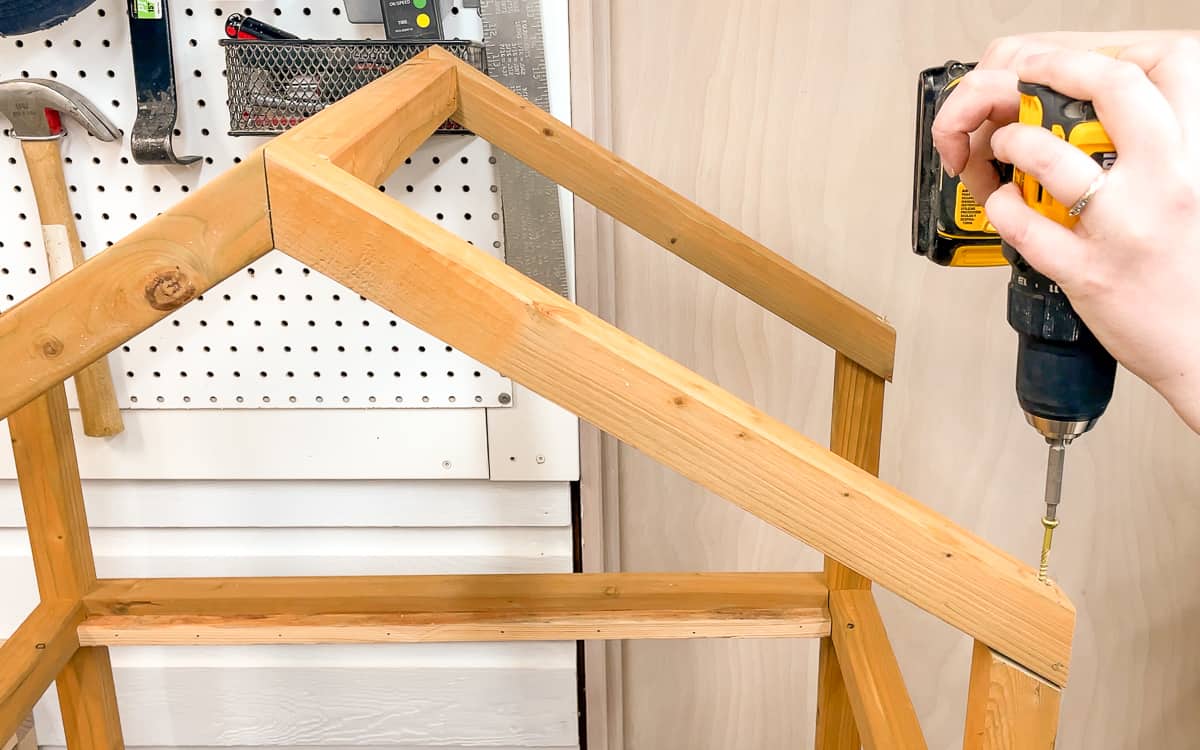
Build and attach the angled top
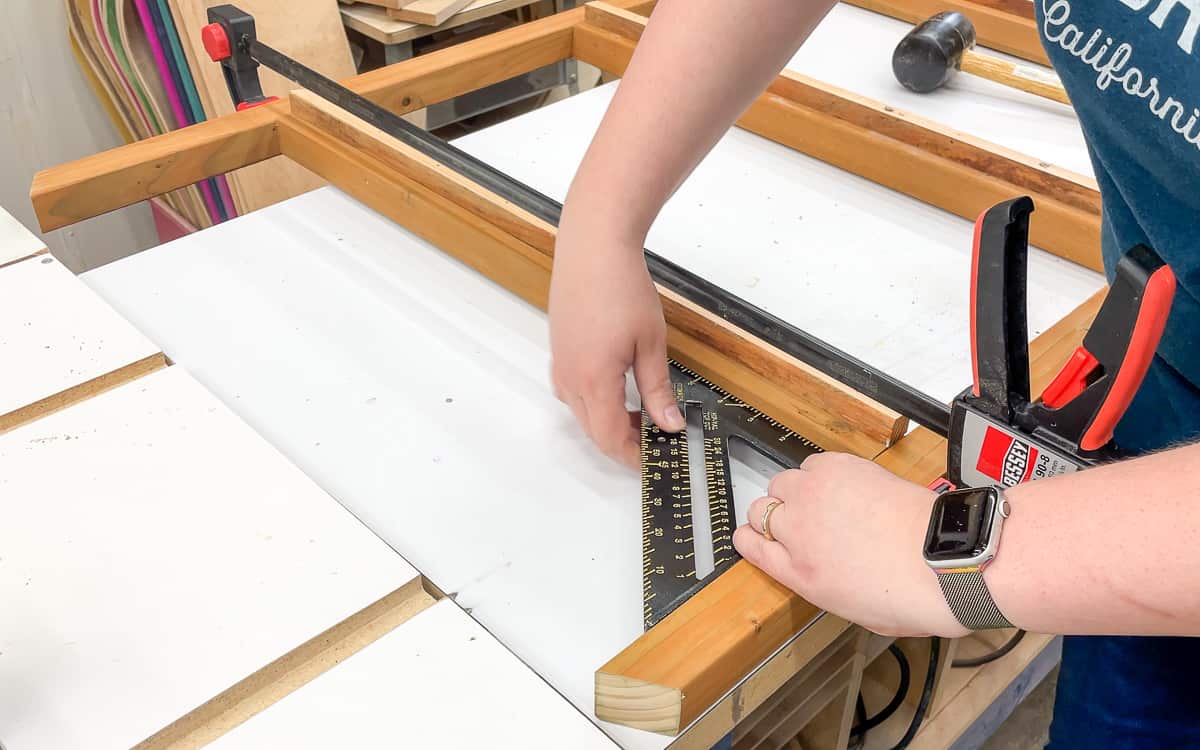
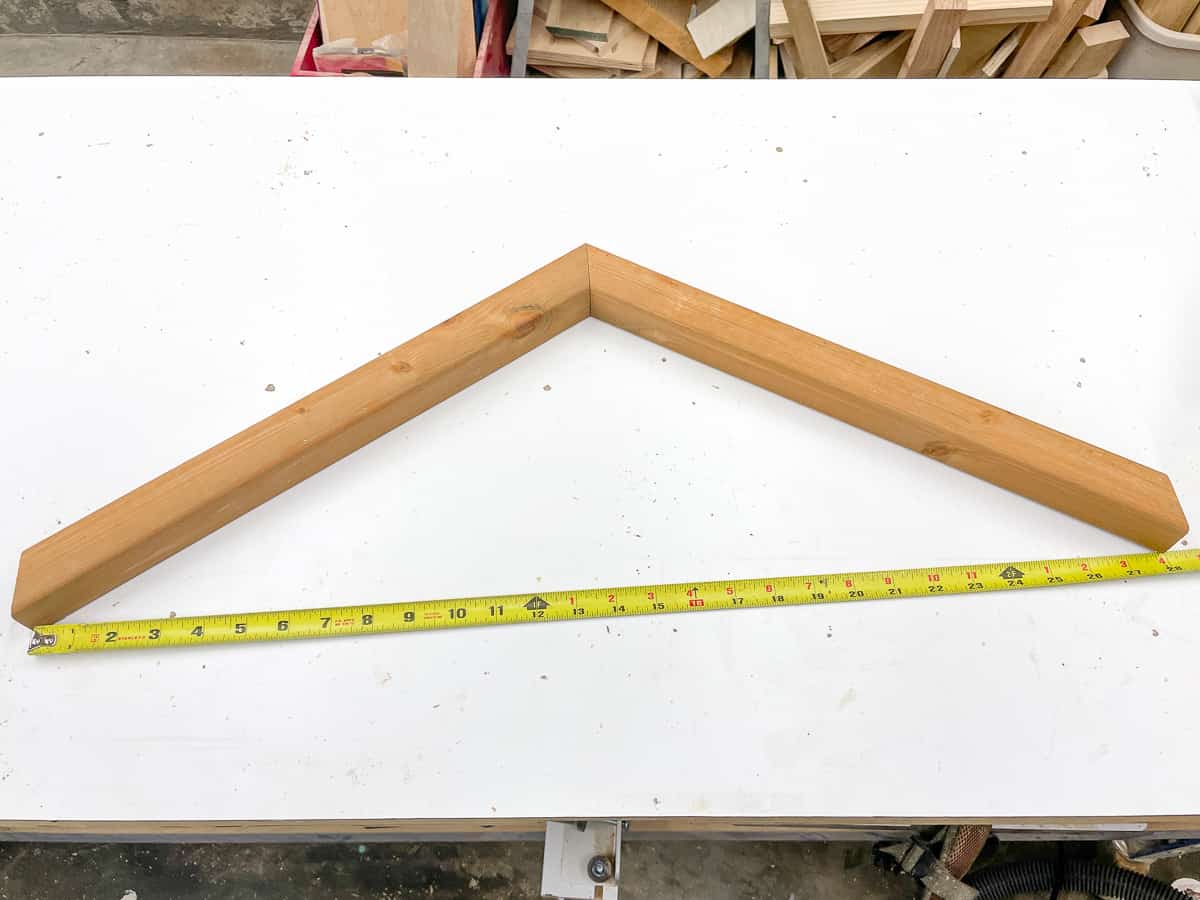
The angled top pieces can vary in length depending on the exact dimensions of your greenhouse, so cut them long and trim them to fit. Cut both ends at a 30 degree angle, align them with the vertical sides, then clamp them together in the middle.
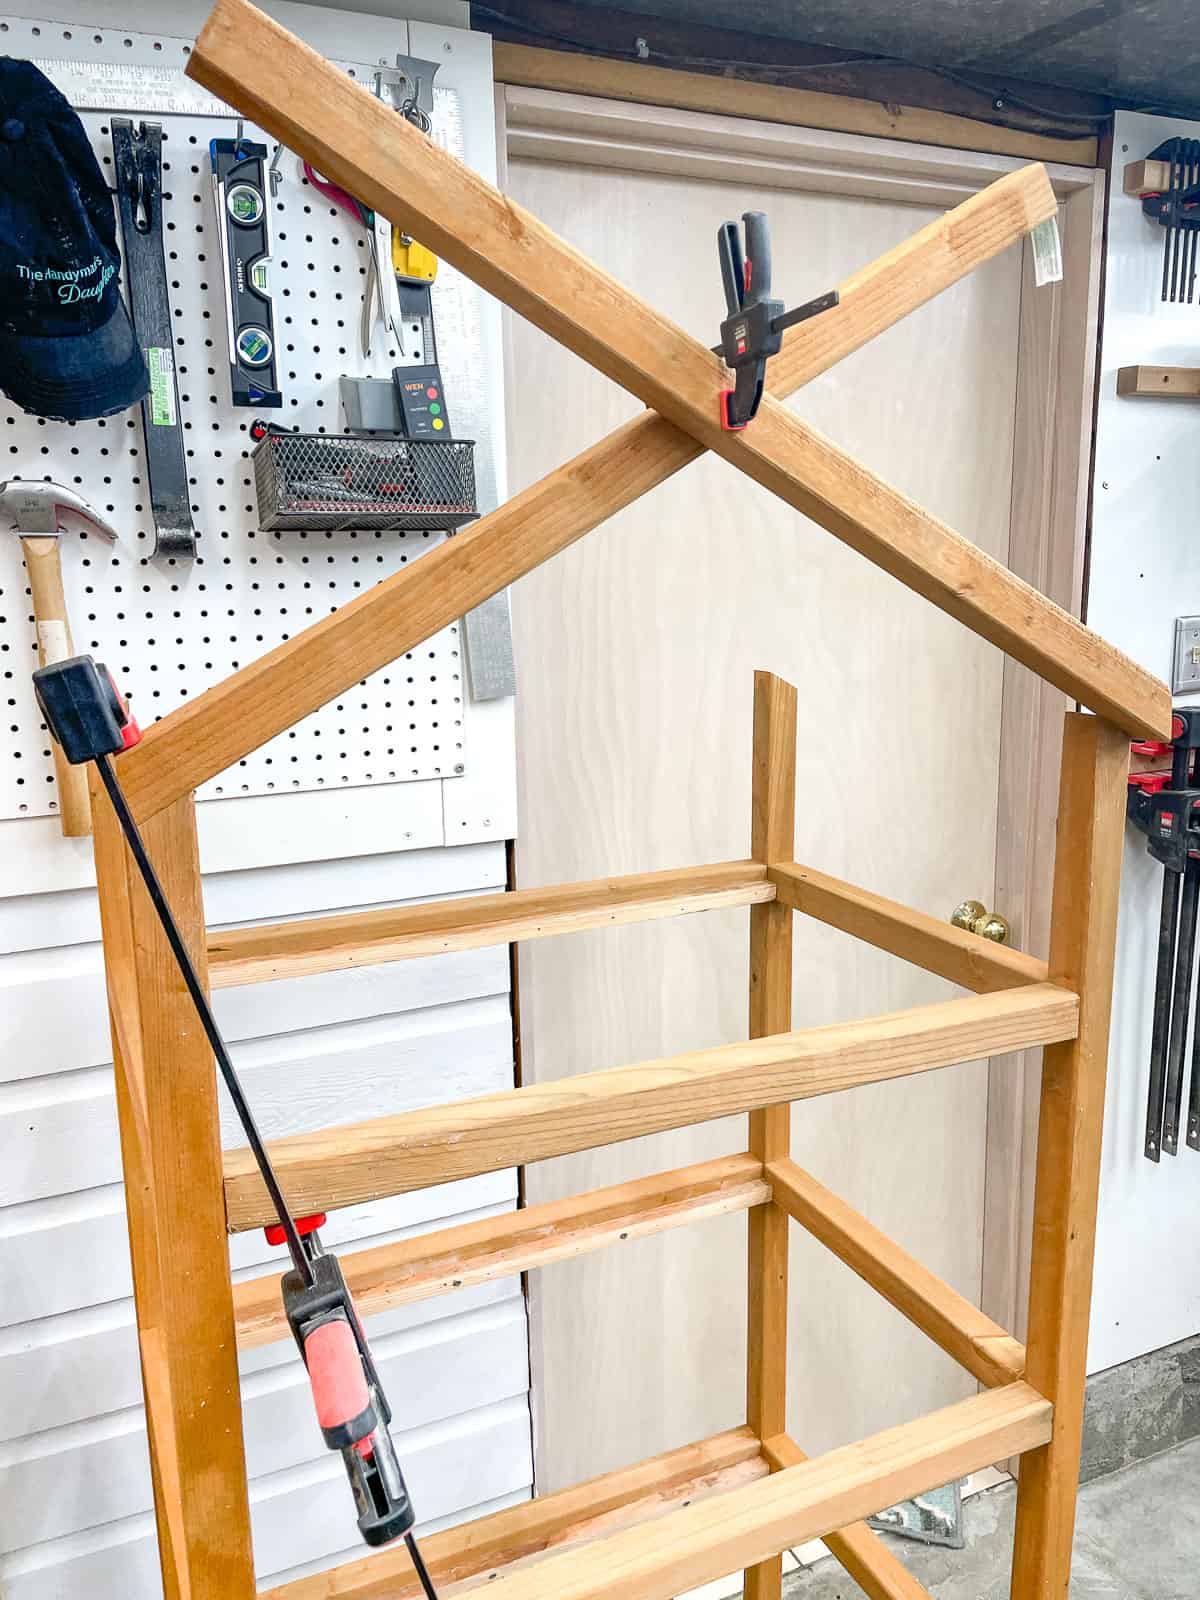

Mark the top where they intersect, and measure to see if they're the same length. Mine were a little off, so I cut both to the larger size at first. Continue slicing off tiny slivers to sneak up on a perfect fit! The span should match the distance between the outside of the vertical pieces.
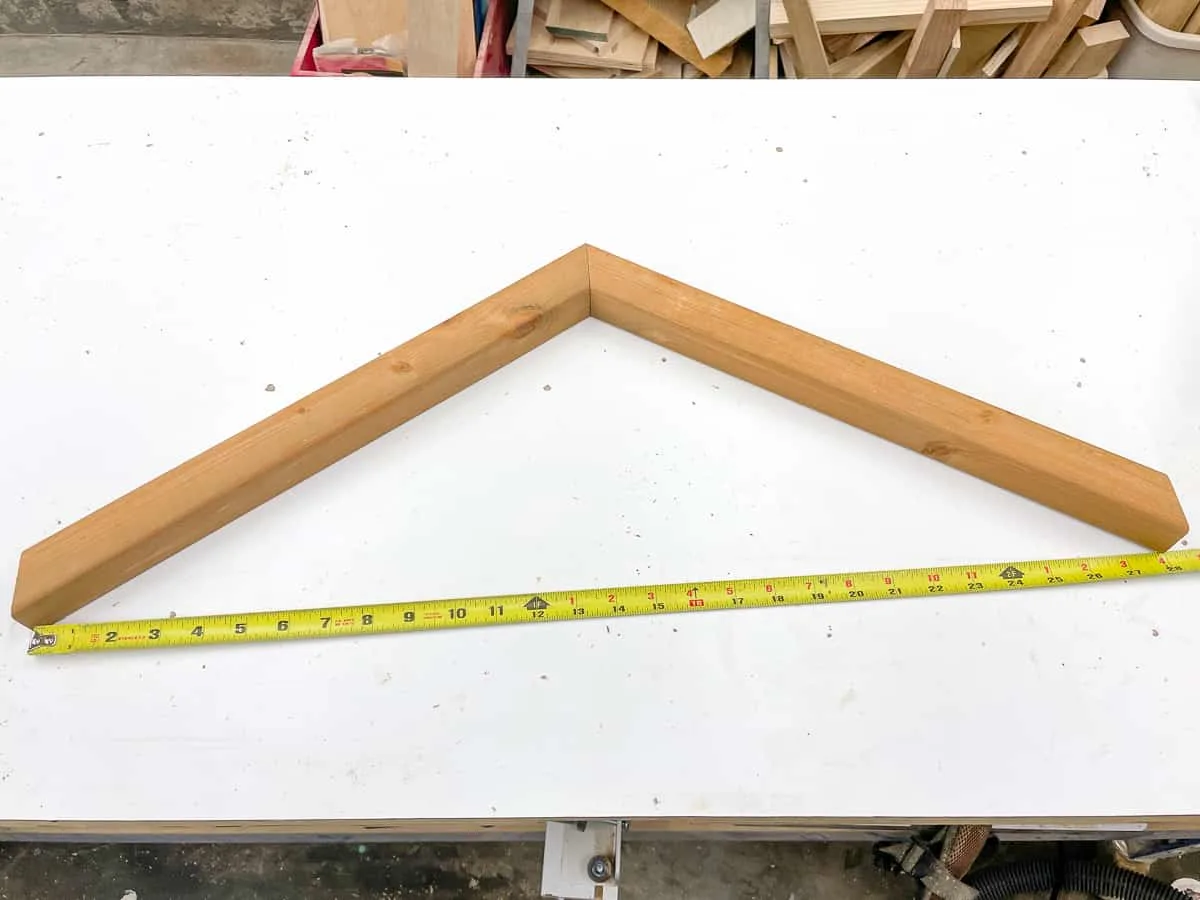
Apply wood glue to both angled cuts, then use a brad nailer to connect them together.

Connect the two angled sides together with a cross support piece. Keep the corners of the cross support below the top edge of the angled pieces so it doesn't rub on the plastic sheeting and create holes over time.
Finally, attach the angled top to the frame with countersink screws.

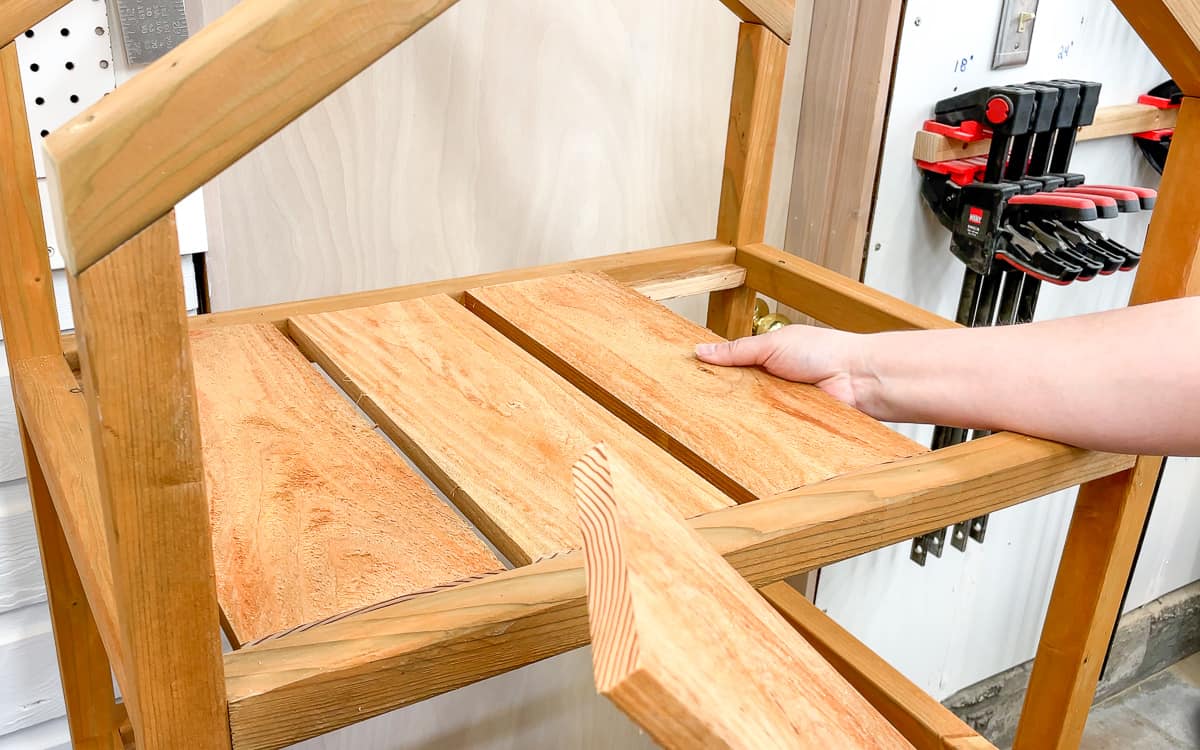
Make the greenhouse shelf slats
These pressure treated fence pickets from AllWeather Wood are perfect for the shelf slats! They're thicker than the fence pickets I've used for other outdoor projects, so they'll be able to hold the weight of lots of plants without bowing in the middle. I cut down a few pickets at the miter saw, then tested the fit.

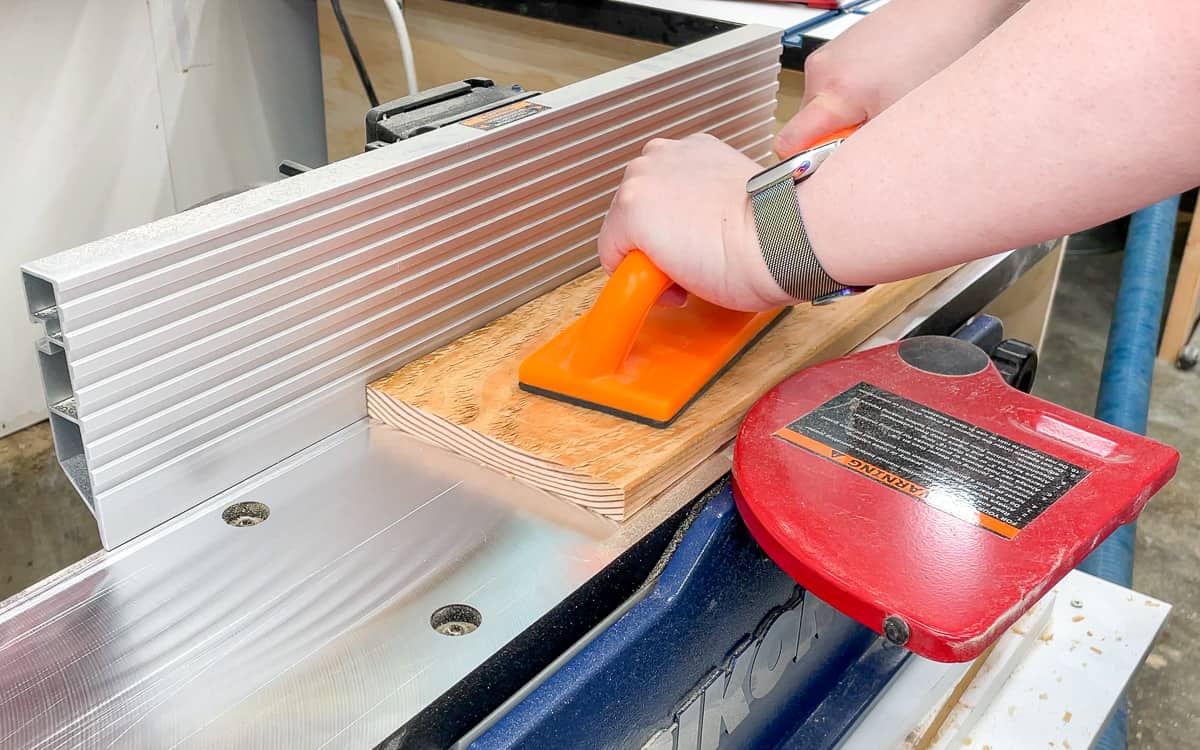
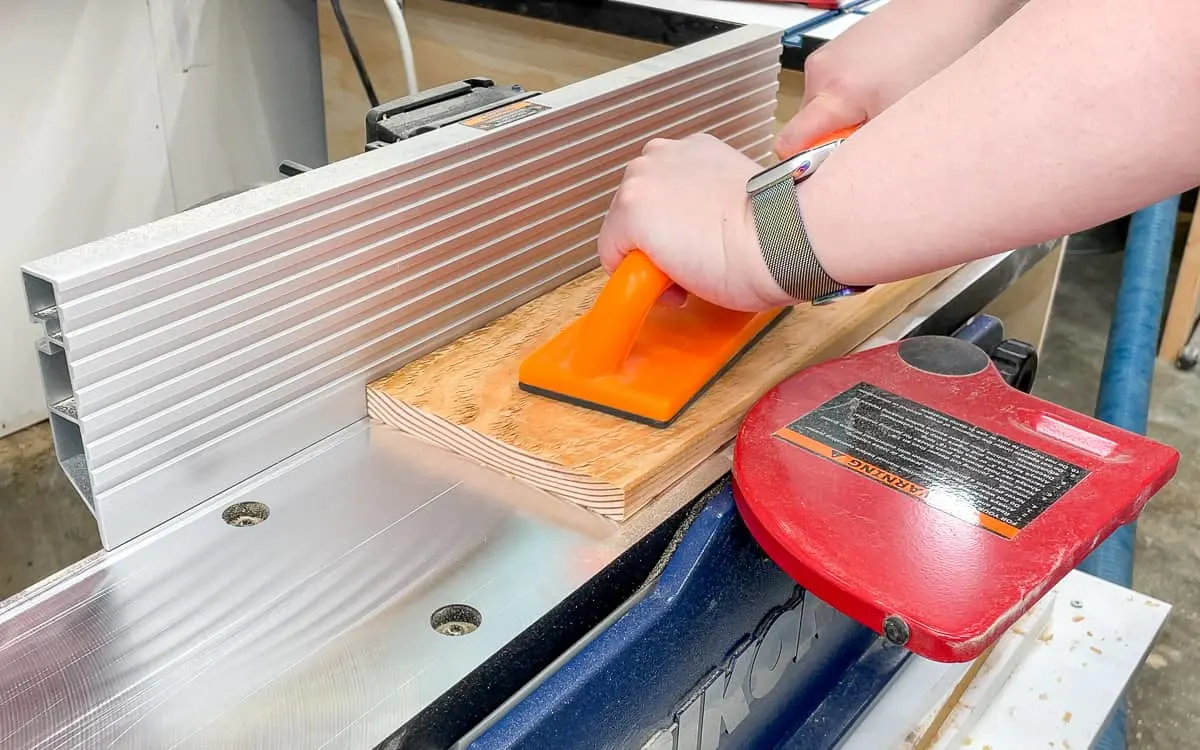
The surface is pretty rough, so I started using 80 grit sandpaper to remove the splinters.
But I got impatient, so I took them over to the jointer and shaved off a tiny bit from the top of each one to clean them up faster. This had the added benefit of flattening any cupping in the boards so pots will sit flat on the surface. Check out this tutorial on how to use a jointer and planer to get perfectly flat boards!
The wood underneath was gorgeous, but it didn't quite match the color of the frame. I applied a few coats of spar urethane to deepen the natural color and protect the surface from potting soil and water.
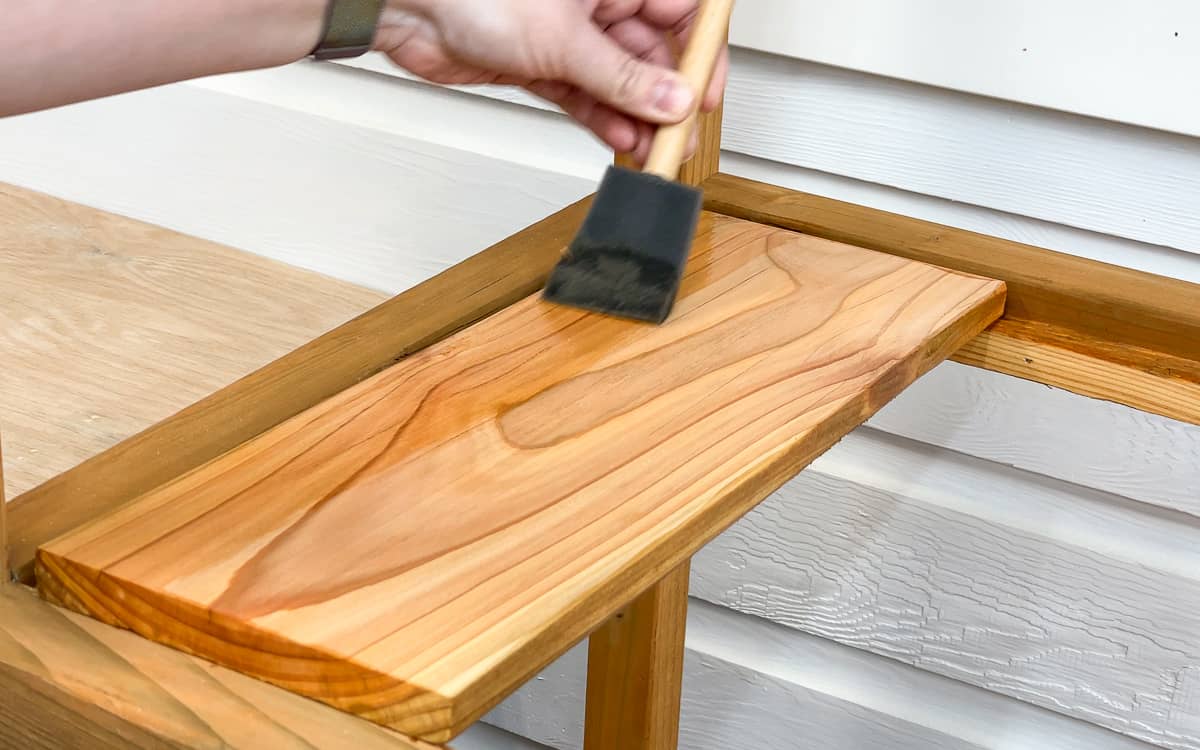
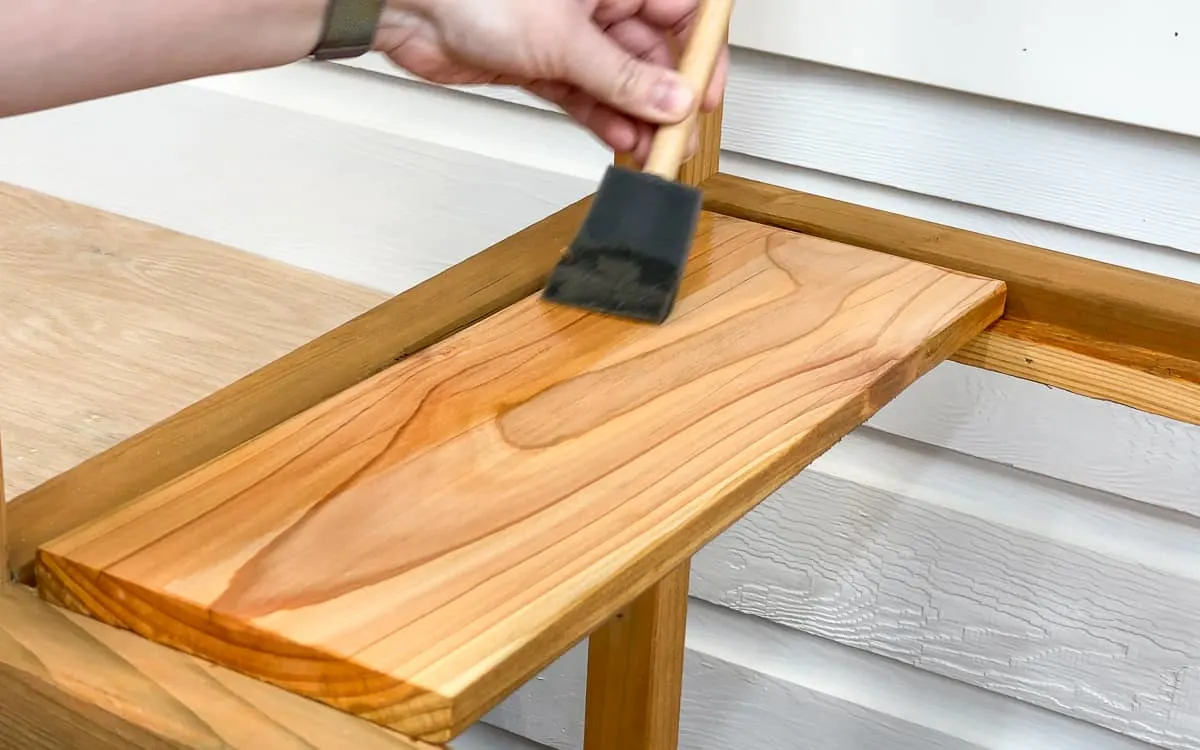
Allow the finish to dry overnight, then your mini greenhouse is ready to go outside!

Add plants and a cover
The greenhouse cover I bought is a perfect fit! The front zips up, and you can secure it with ties at the top for easy access. It also has side vents to help control the temperature and humidity inside.

I'm so excited to get this wooden greenhouse loaded up with plants! I headed over to our local nursery and stocked up on strawberry starts for my DIY strawberry planter, as well as some other landscaping plants that I'll get in the ground as soon as the weather cooperates.
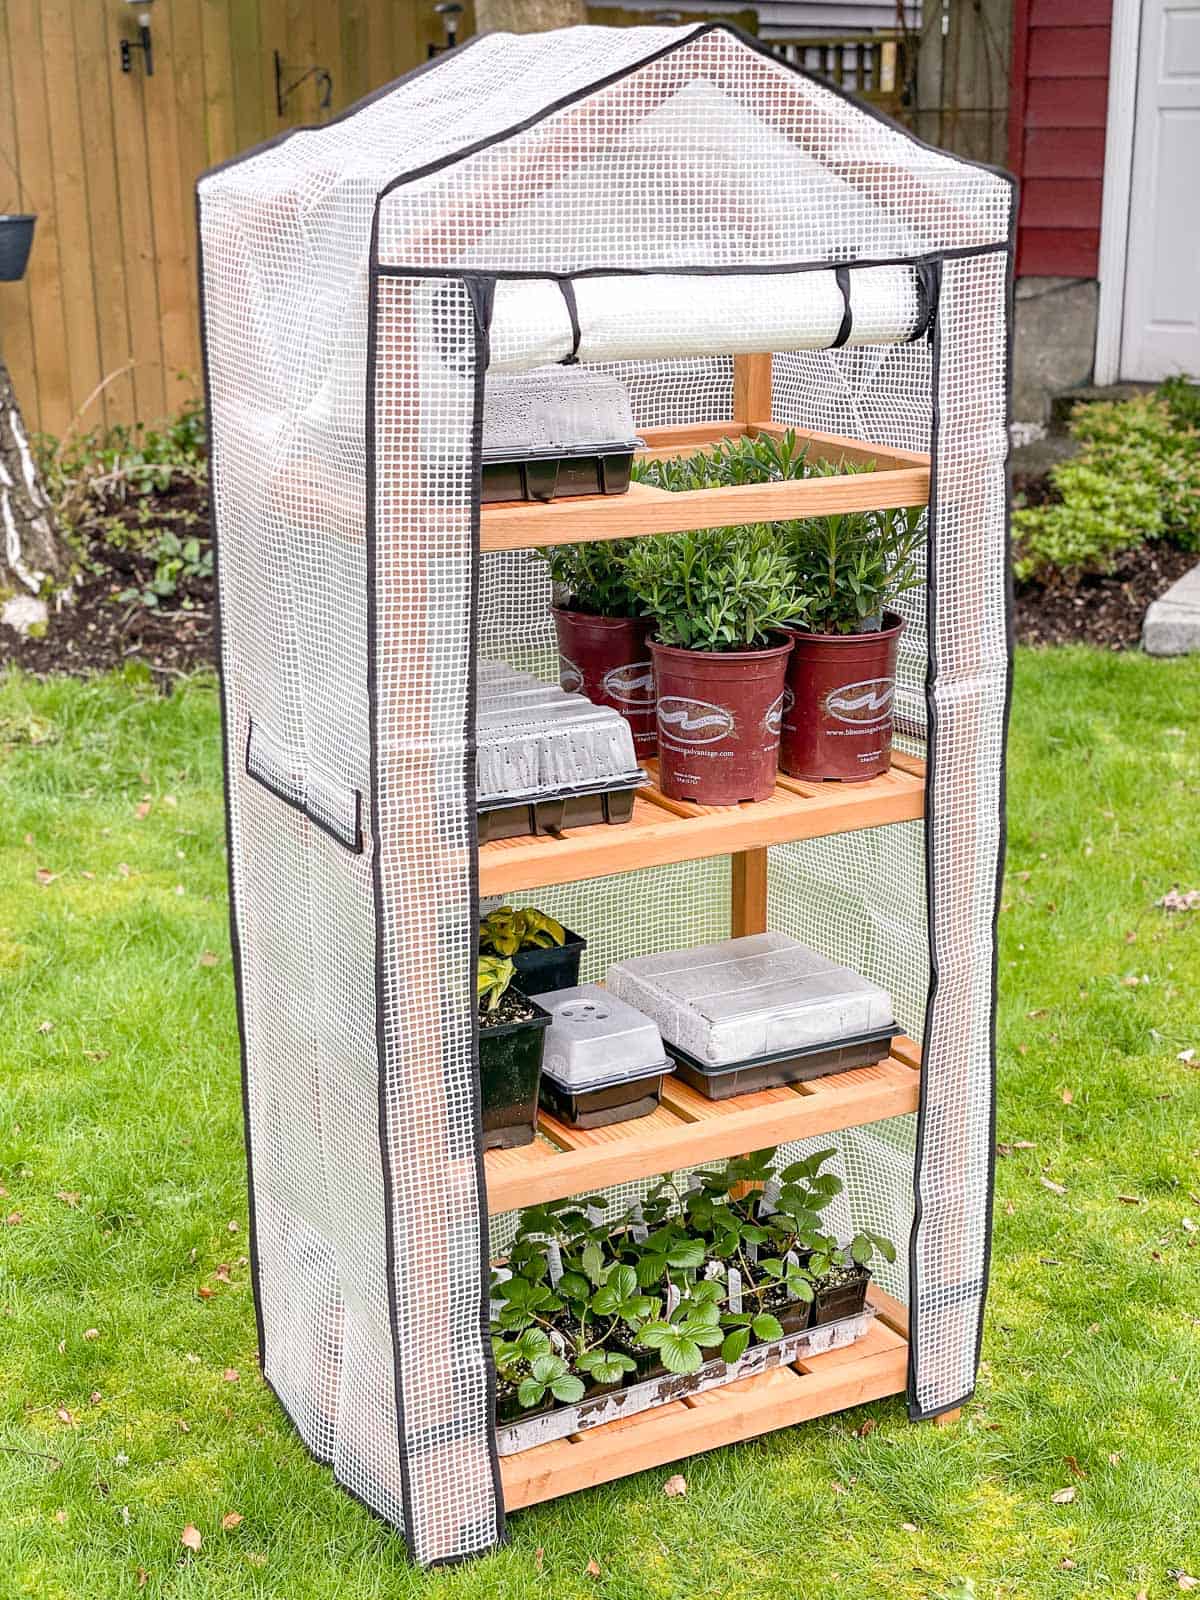

Some of the plants are a bit taller than the shelves, so I just removed the slats above to give them the growing space they need!
I started some seeds in our heated backyard shed a few weeks ago, and some of the seedlings are getting big enough to harden off outside. After they've become acclimated to the cooler temperatures in the sheltered greenhouse, I'll be able to plant them out in the garden!

I'm hoping to extend our growing season even more with cold frame garden beds made from old windows. Stay tuned for that project coming soon!
Ready to build your own greenhouse? Click the box below to get the woodworking plans and get started!


Dee
Saturday 27th of March 2021
It would have been nice to post a link to the greenhouse cover, it's not something you can find easily, especially to fit perfectly like yours. Please provide a link for everything that need to be purchased.
Vineta Jackson
Saturday 27th of March 2021
I included the link in the third paragraph, along with a cheaper alternative. I just added it to the materials list as well so it's easier to find.