Calling all Whovians! Follow these step-by-step instructions for a DIY Tardis door! Ability to travel through space and time not included.

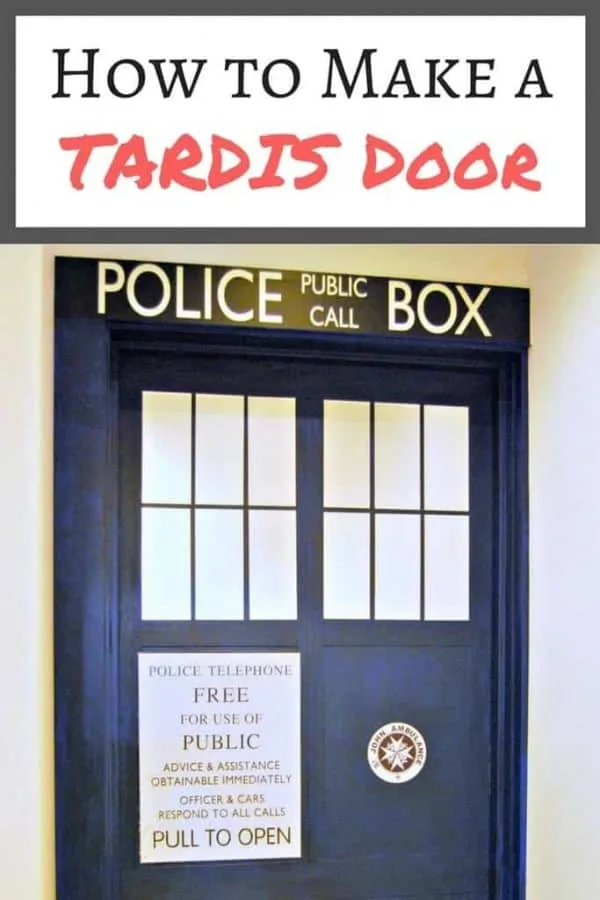
My husband has been a Doctor Who fan for years, and he got me hooked as well. I could think of no other way to enter our basement media room than through a TARDIS door!
Ready to make one of your own? Allons-y!
This post contains affiliate links for your convenience. Purchases made through these links may earn me a small commission at no additional cost to you. Please visit my disclosures page for more information.
Materials Needed for TARDIS Door
- Flat, hollow-core door
- Police Telephone sign
- St. John Ambulance decal
- Police Box decal
- Adhesive silver foil
- 3" wide strips of balsa wood
- Behr paint in Royal Breeze
- Black paint
- Painters tape
Create the TARDIS door panels
I started with the flat front hollow core door that we already had. I removed it from its hinges, took out the doorknob, then lightly sanded it down and wiped off all the dust and grime.
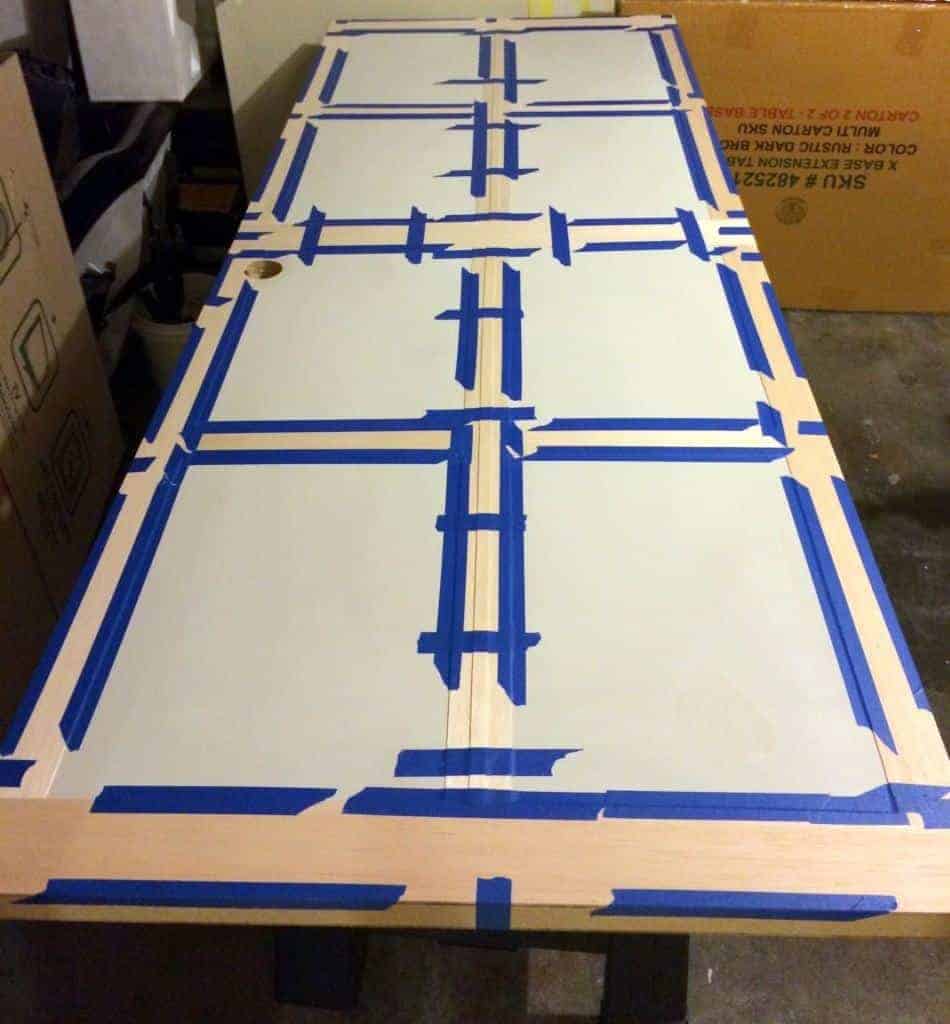
To add dimension to the door and make it look like it has eight raised panels, I used these balsa wood strips. They're the perfect width and length, thin enough to not interfere with the door closing, and easy to cut to size with a box cutter.
I used the full 3" width for the top, middle and lower horizontal lines and cut 1" off the width everywhere else so I would have enough room for Police Telephone sign in one panel. Your measurements will vary depending on the size of your door.
I applied wood glue to each piece and held them in place with painters tape, then left it to dry overnight.
Once the pieces were securely attached to the door, I removed the tape and started preparing for painting.
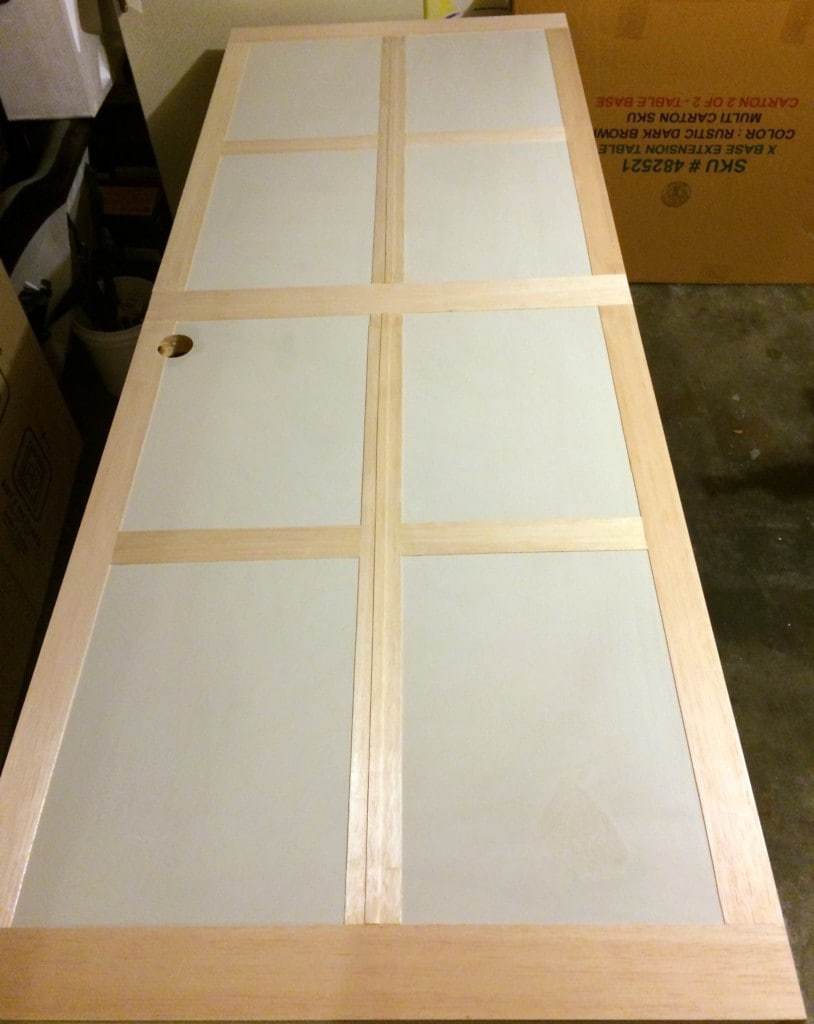
I also removed the section of balsa wood that was covering the doorknob hole by scoring the wood from the opposite side and carefully cutting around the hole.
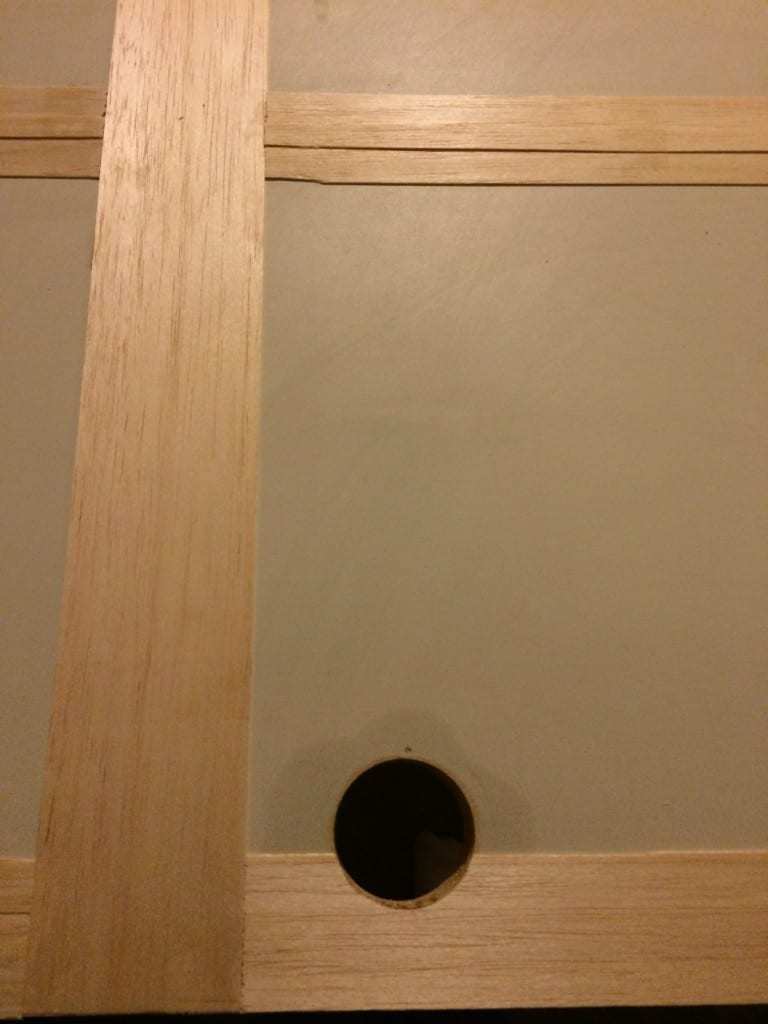
In this picture you can also see the additional 1" wide strip of balsa wood I glued to the center vertical line, since the actual TARDIS door frame is raised in the center, like this.


Oh, David Tennant, how I miss you!
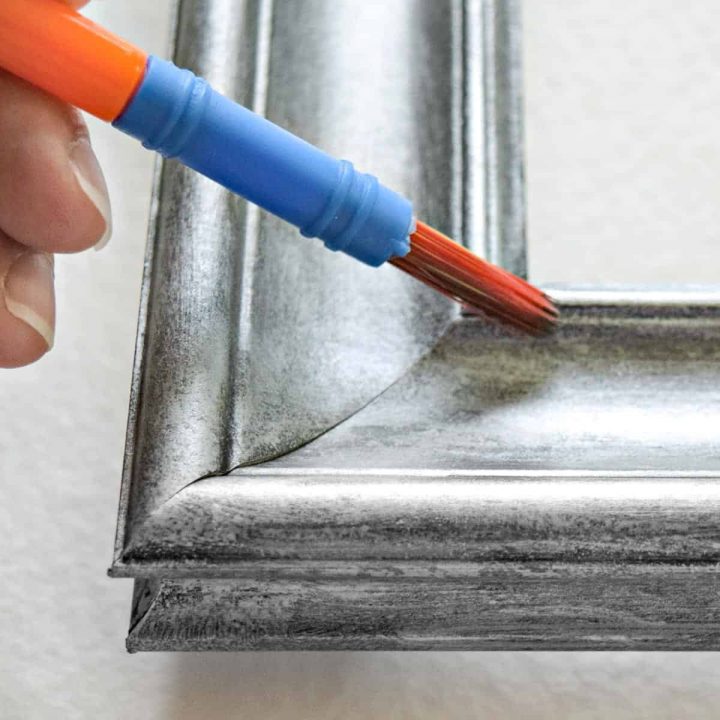
Paint the TARDIS Door
After much research and debate, we settled on Behr's Royal Breeze as the base color for the TARDIS door.

I applied two coats, which ended up looking like this. Not quite right yet...
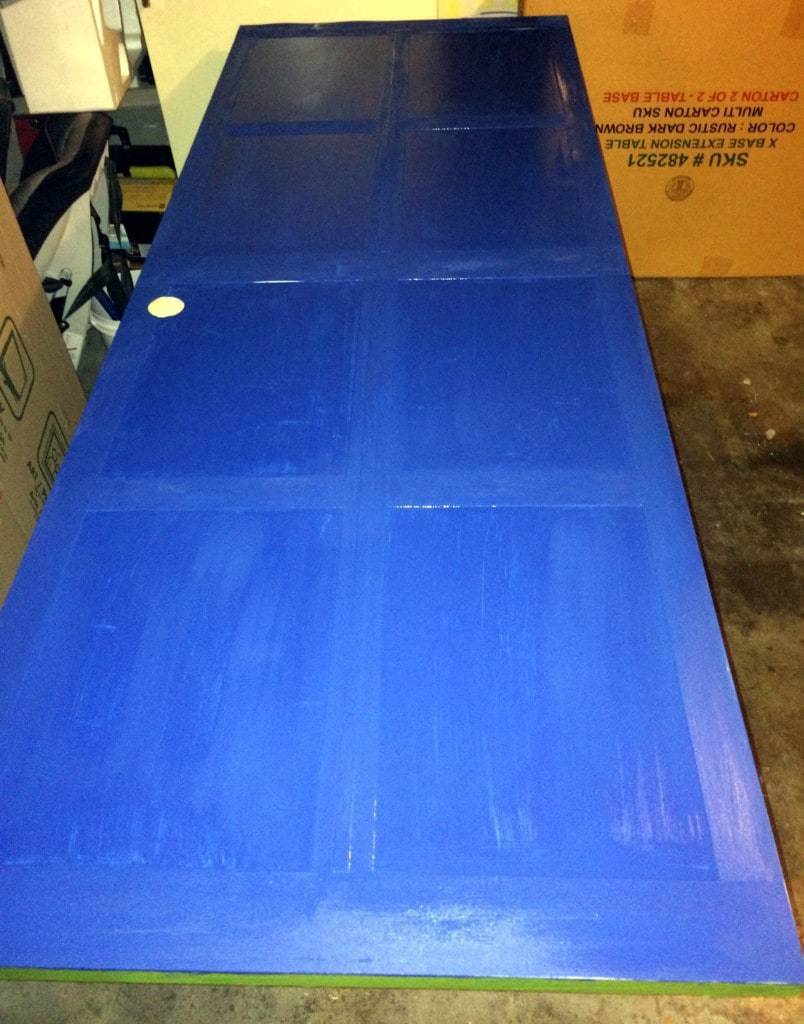
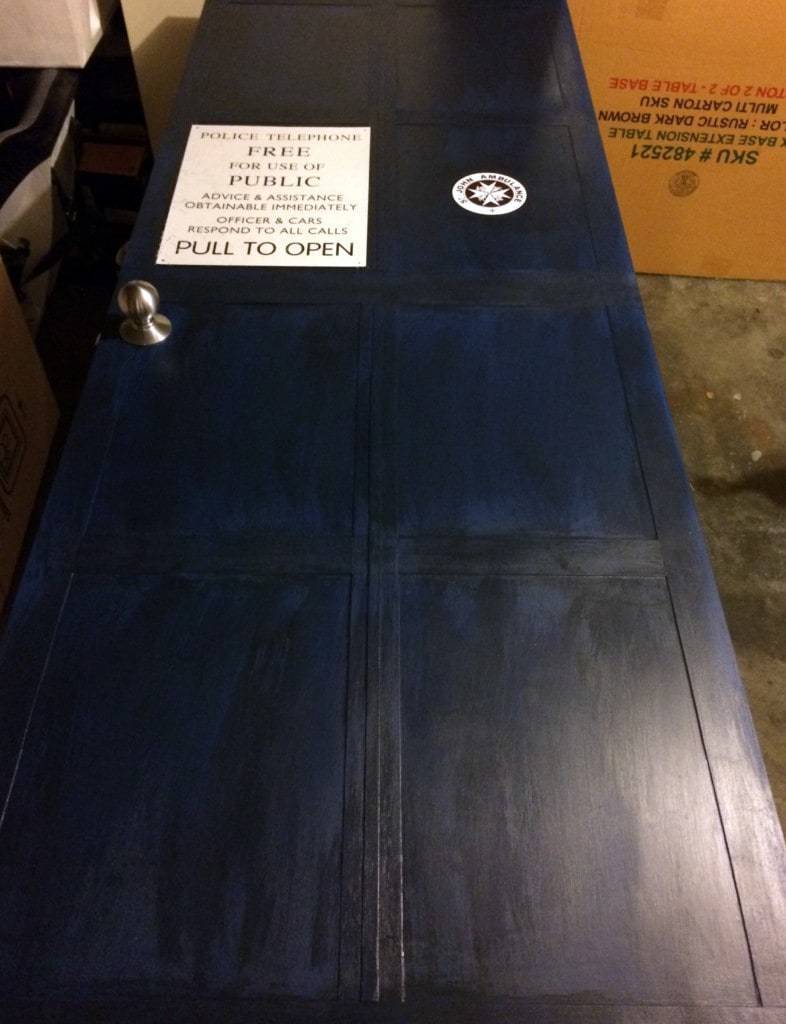
The color was way too bright, and I wanted the TARDIS door to look aged and beat up. I added some black paint to a cup of the Royal Breeze color, and kept mixing in more until I got the color I wanted.
Then, I used a dry brush to brush the new color on very lightly, allowing the brighter blue to show through the brush strokes. I forgot to take a photo of the door before the signs went on, but you get the idea here.
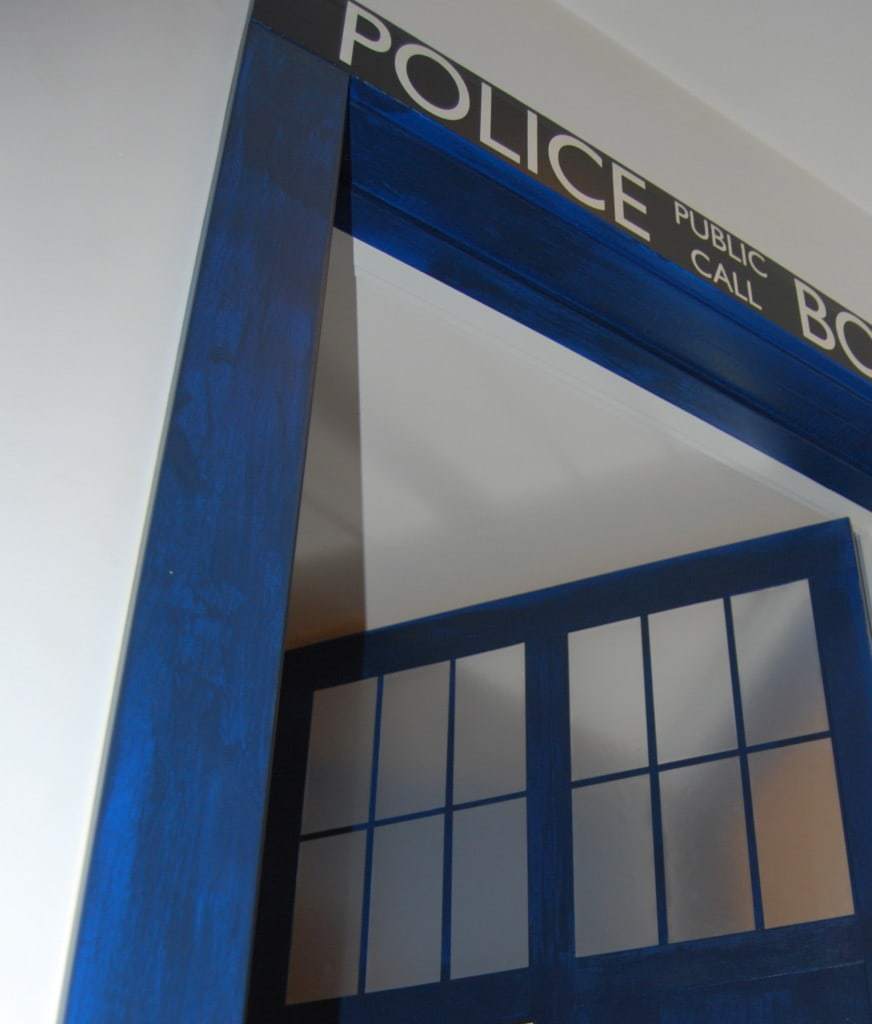
I did the same treatment to the door frame, which was plain old rectangular trim. This photo is lightened up so you could get a better look at the brush strokes.
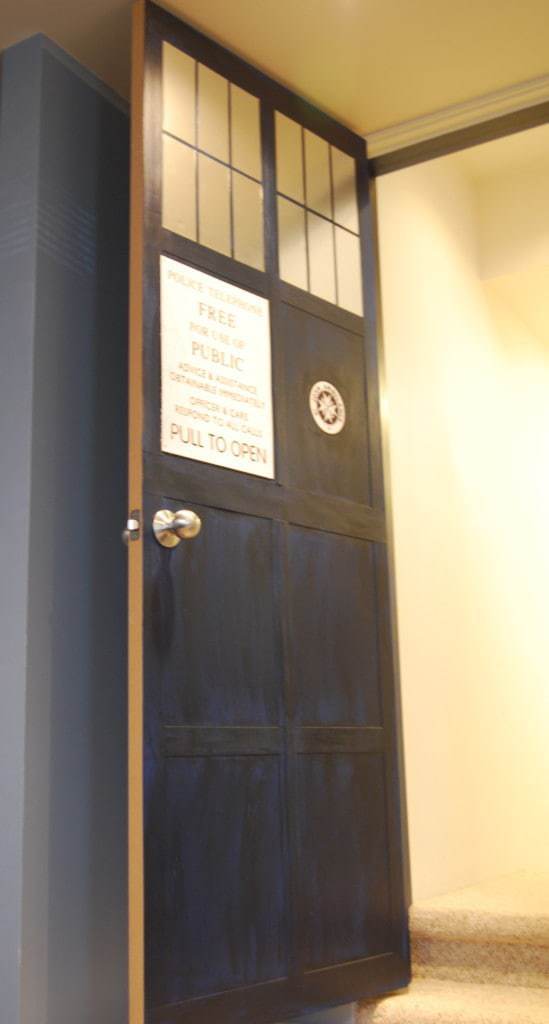
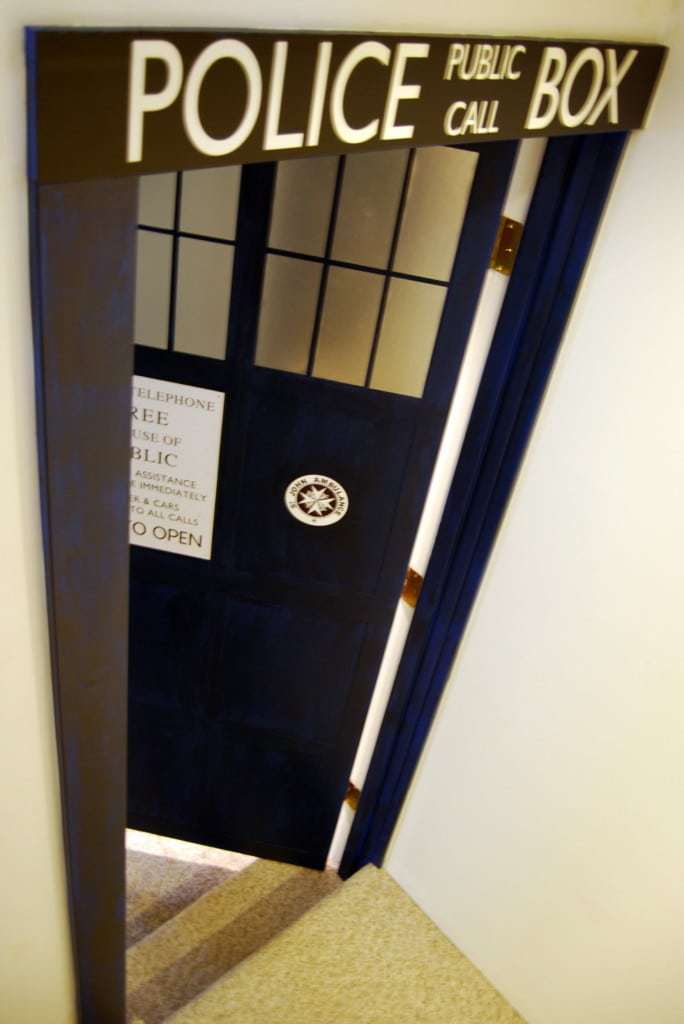
Add TARDIS door signs and windows
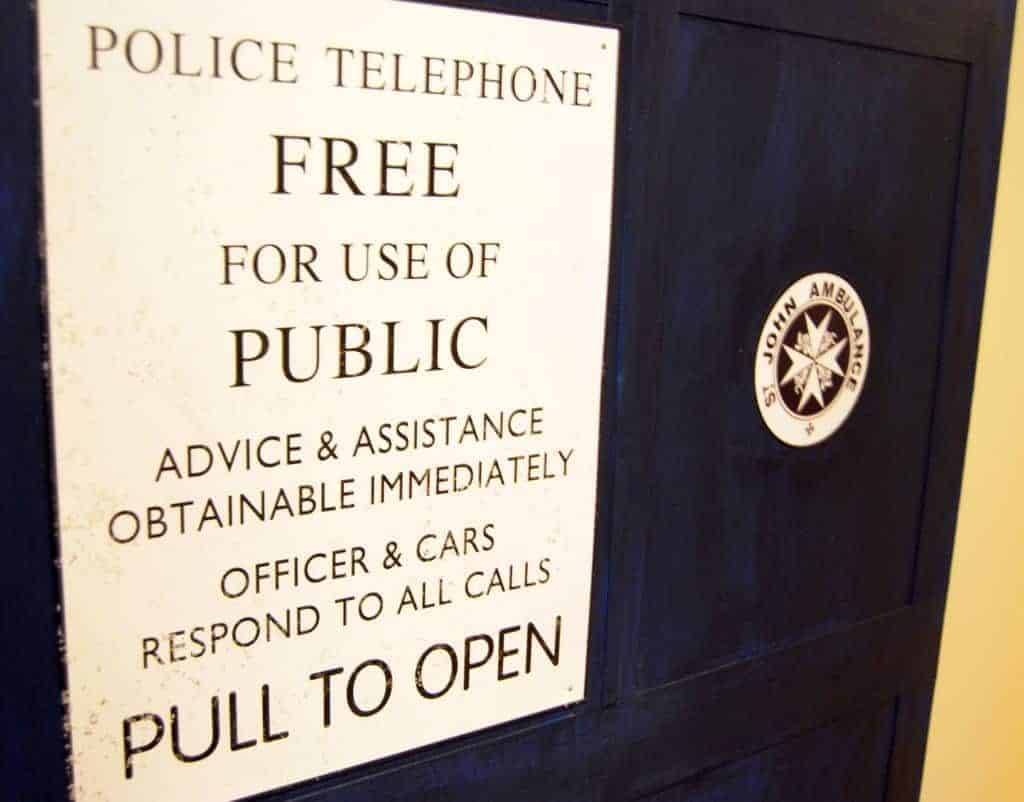
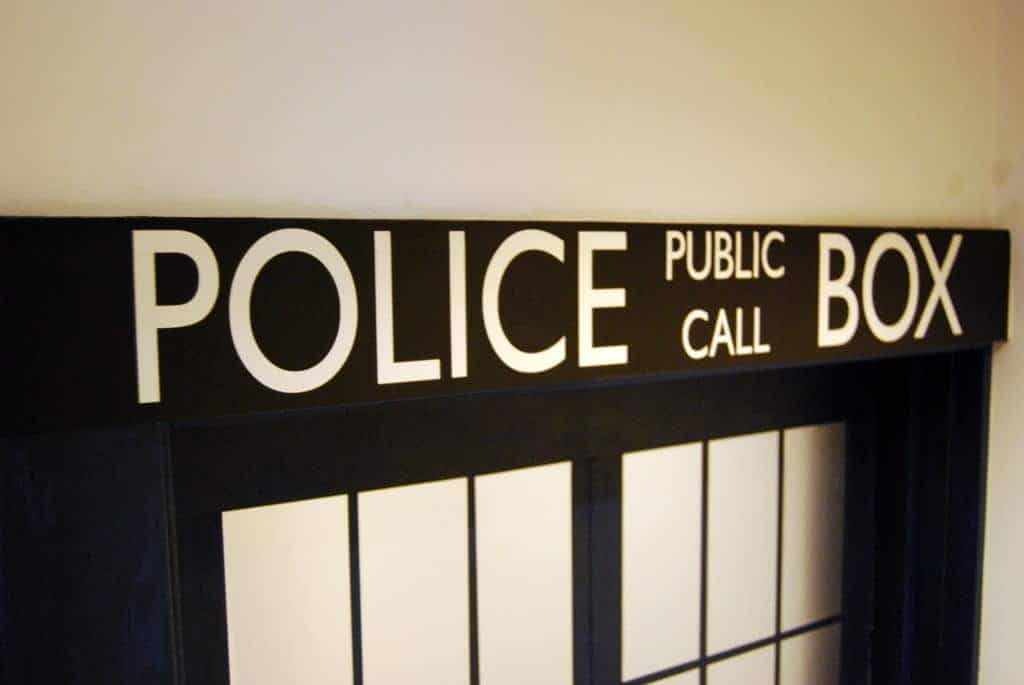
A TARDIS door isn't complete without the signage! I had given my husband this sign for his birthday, and the St. John Ambulance and Police Box signs are stickers I found on Amazon.
The lettering on the Police Box sticker was cut out rather than printed on, so I left the top of the door trim white so it would show through the holes.
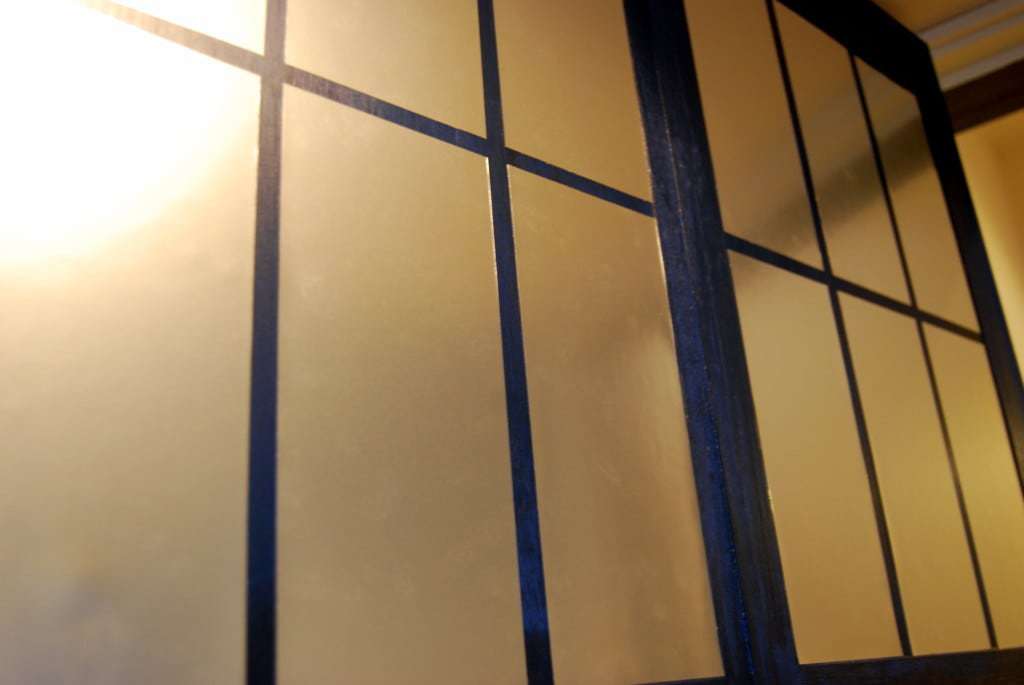
Finally, I attached the "windows" using this silver foil sticky paper. Divide each top section into 6 equal parts, leaving ⅜" of space between each "window pane."
And there you have it! The door stays open most of the time, and I like how we can admire the TARDIS door when we're hanging out on the couch (watching Doctor Who, of course!)
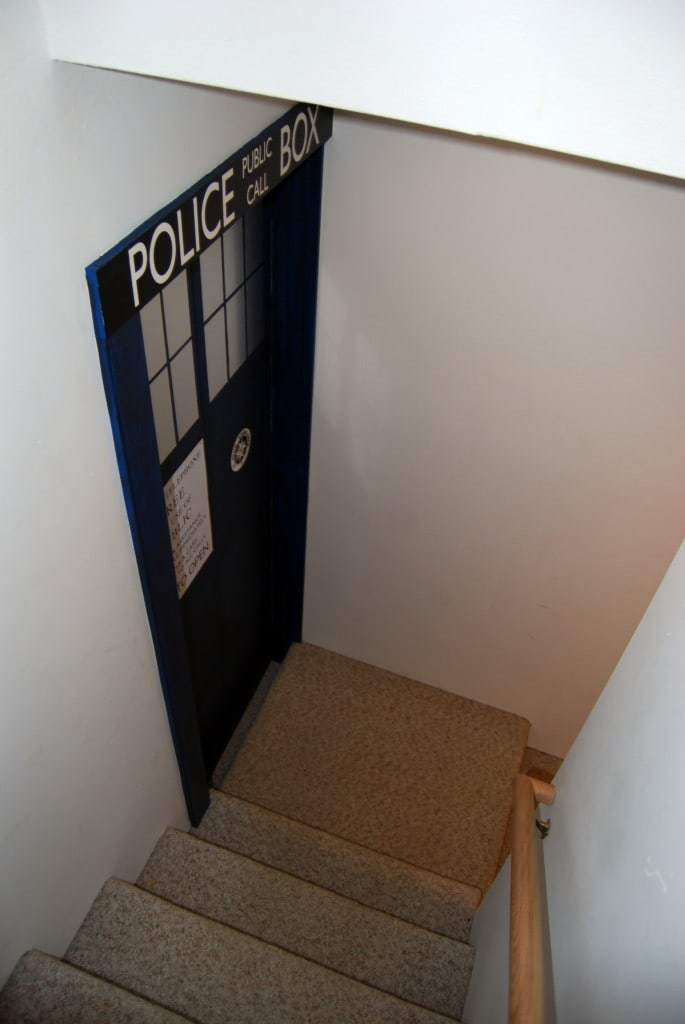
And here's the view of it coming down the stairs. Never fails to put a smile on my face!

I hope this tutorial will help fellow Whovians create their own timey-wimey TARDIS door!
Check out these other easy DIY project ideas!


Lucrecia Stankey
Sunday 6th of March 2016
What a great article! It's clear that you are passionate about this subject, which is a refreshing change from most authors. I see a lot of authors just putting up quick junk, which is unfortunate. I hope you know that people actually appreciate quality writing like this!
sue c
Thursday 19th of November 2015
That is an inspired entry, and very contagious. My small sewing room is screaming for identity...beyond cluttered-too-many-projects-here. The door is the start.
Nettie
Thursday 29th of October 2015
This is so darned cool! David is my favorite Doctor and I miss him dreadfully! I just now need to talk hubby into letting me copy this for myself....
The Handyman's Daughter
Thursday 29th of October 2015
You should go for it! The door makes me smile every time I see it.
Mary-In the boondocks
Monday 21st of September 2015
I'll take it but I want Matty instead of David! Gr eat job, now I'm going to share it w ithmy son and see if we can get a project going.
tgordy71rose
Wednesday 5th of August 2015
How did u do the faux windows?
the.handymans.daughter@gmail.com
Wednesday 5th of August 2015
I used silver foil sticky paper. You can find it on Amazon. http://www.amazon.com/gp/product/B008RX1AYW/ref=as_li_tl?ie=UTF8&camp=1789&creative=390957&creativeASIN=B008RX1AYW&linkCode=as2&tag=thehandymansd-20&linkId=UWXKWIQ2IJQZ5NWY